Nanoleaf Matter Essentials LED Bulb review

A photo of the Nanoleaf Matter Essentials B22 LED Bulb in a light fitting

I’ve bought myself a Nanoleaf Matter/Thread Essentials LED bulb (sponsored link) to use with another PIR motion sensor (see my review of that from a couple of weeks ago). Unlike last time, this is a Matter over Thread bulb, rather than a Zigbee bulb.

Whilst many of the smart home products I have bought recently have been Zigbee devices, I’m reasonably convinced that Matter and Thread are the future of home automation. To date, I’ve only picked up Matter smart plugs – some Meross Wi-Fi plugs and some Onvis Thread plugs – so this is the first Matter bulb that I’ve bought.

Connecting over Matter

This Nanoleaf Essentials bulb connects over Thread, rather than Wi-Fi. This is probably why there is a ‘Frequently returned item’ warning on the Amazon listing, as it won’t work well without a Thread Border Router. Thankfully, I have three – two Google Wi-Fi devices, and my Home Assistant instance with a USB dongle. Like Zigbee, Thread is a mesh network, and so these three border routers, and my two Onvis plugs have formed a relatively good Thread mesh. That’s good, because this bulb is in a room on its own some distance from any of the border routers, but it’s able to join the mesh with the Onvis plugs.

As it’s a Matter device, I was able to add it to Home Assistant, Google Home and Apple Home with no issues. Nanoleaf include the necessary QR code on the instruction manual as well as the bulb itself, which is helpful. The bulb also supports Bluetooth, partly for commissioning onto the Thread network, but it can also be controlled by Bluetooth using the Nanoleaf app if you don’t have a Thread Border Router. However, due to Bluetooth’s short range, I doubt this will be much use to many people.

Appearance and usage

The design of the bulb is a little odd. Unlike most LED bulbs, it’s not a smooth spherical surface, but a series of blocky geometric shapes. I’d prefer a smooth look, personally.

The bulb was quite responsive when using it with Google Home. It’s a colour changing and dimming model, and when it turns on and off, it fades up or down, which is a nice touch. I found controlling it with Home Assistant a little more hit and miss – sometimes, turning it on took a few seconds, but other times it was instant. I’ll need to look into why that is.

Cost

The thing that mainly drew me to this bulb is its price – literally just five of your Great British Pounds. That’s not quite as cheap as the £4.33 Zigbee bulb that I previously bought from AliExpress, but as it’s from Amazon, I didn’t have to wait a week for shipping. And as it’s a Matter bulb, it’s better supported by Google and Apple. I just wish it was a little less ugly, but at £5, you can’t really argue.

Tasmota firmware upgrade failing due to lack of storage space

A screenshot of the Tasmota firmware upgrade screen on the web interface

Once you’ve switched your ESP devices from the stock proprietary firmware to Tasmota, the good news is that future firmware upgrades to newer Tasmota versions should be straightforward. You just need to open your device’s web interface, and do an over-the-air (OTA) upgrade, or use something like TasmoAdmin to bulk-upgrade multiple devices. At least, that’s how it works in theory.

What you may find is that the update fails, due to a lack of storage space. So today, I’m going to outline four possible workarounds that you could try if your Tasmota firmware upgrades fail.

Why is there a lack of storage space?

Firstly, a bit about why this happens. You’re most likely to encounter this error with devices that use the ESP8266 chip. Some of these chips come with as little as one single megabyte of flash memory storage, and the standard build of Tasmota is 656 kilobytes (as of version 15.0.1 which is the latest at the time of writing). There simply isn’t enough space for both the current firmware and the new firmware to sit side-by-side ahead of the update process.

Now that we understand why the problem occurs, we can try some solutions.

Solution 1: gzipped binaries

As long as you’re upgrading from a version newer than Tasmota 8.2 (which came out over five years ago now), you can use the smaller gzipped binaries. This reduces the standard Tasmota 15.0.1 release binary down to 469 kilobytes.

However, on some of my devices, that was still too big – 656 plus 469 is more than 1024 kilobytes and exceeds the capacity of the 1 MB flash storage.

Solution 2: install tasmota-minimal first

There are a couple of slimmed down versions of Tasmota:

  • tasmota-lite – a cut-down version of Tasmota without many of the sensors or drivers included
  • tasmota-minimal – the bare-minimum of Tasmota which can’t do anything apart from be upgraded to the full firmware

What you can do is install the latest version of tasmota-minimal first, and then the latest standard version of Tasmota. tasmota-minimal is only 265 kilobytes, and so it’s small enough to fit alongside the standard firmware. Once installed, there’s then space for the full version to be installed.

When you do an OTA upgrade, this is the process that should happen – tasmota-minimal gets installed first, and then the full version. But if it doesn’t, you can do this manually yourself. Your device settings, such as the GPIO mappings and MQTT settings, will be retained during the process.

Solution 3: tethered firmware update

A tethered update is where you use another device, such as a PC, to update the firmware. This means physically connecting the device to the PC. It gets around the storage limitation as the firmware doesn’t need to be downloaded to the device running Tasmota first.

How easy this will be will depend on the device, and where it is. If you’re running Tasmota on a development board, such as a Wemos D1 or m5stack Atom, then you can plug in into your PC with a standard USB cable (as long as it’s a data and power cable). However, if your device is buried away somewhere inaccessible, or is a consumer device that requires disassembly and a USB to UART converter, then you may not want to do this every time a new version is released.

Solution 4: Compile Tasmota yourself

The standard builds of Tasmota cover most common use cases. However, as Tasmota is open source, you can compile it yourself. That way, you can create a smaller, customised build for your device that doesn’t include any extra functions that aren’t needed. There are tools available to do this, but this is really only for advanced users – especially as you’ll need to recompile the binaries for each release.

Solution 5: Switch to a different firmware

As I mentioned last month, Tasmota is not the only game in town. If you also use Home Assistant, then consider replacing Tasmota with ESPHome.

ESPHome has a higher learning curve, due to its use of YAML configuration files. But, once this is set up, it’s easier to compile new binaries each time a new version of ESPHome is released. And, if you’re lucky, you’ll be able to download a pre-built YAML file from the ESPHome Device Repository. Just be aware that it’s not as extensive as the Tasmota Supported Devices Repository – the ESPHome repository has details of around 600 devices compared to almost 3000 for Tasmota. I wasn’t able to find an exact match for ESPHome for my smart plugs, for example.

ESPHome has some other advantages. For example, you can edit the YAML configuration to tell Home Assistant what type of device is plugged in, say a light. That means it’ll appear in Home Assistant as a light, rather than a switch, without needing to use the Change device type of a switch helper.

As with solution four, having a smaller firmware binary will make future OTA updates easier, and these updates can be managed through Home Assistant.

TasmoAdmin: manage multiple Tasmota devices

A screenshot of the TasmoAdmin interface

Now that I have multiple Tasmota devices, I went to look for a tool to manage them collectively, and found TasmoAdmin. It’s a web-based app that can monitor the status of your Tasmota devices.

The easiest way to install it is with Docker, and it’s also available as a Home Assistant addon. You can also install it manually on an existing local web server with PHP available. Once installed, you’ll need to create a user account, and then you can start adding your devices by IP address.

Once all your devices are in there, you’ll get a nice list, with their IP address and their current version of the Tasmota firmware. You can then jump quickly into the standard Tasmota configuration for your device, but you can also configure many settings from within the TasmoAdmin interface. This includes things like the MQTT and Wi-Fi settings.

You can also use TasmoAdmin to perform bulk actions on multiple devices at once. For example, you can trigger backups or firmware updates in bulk. The ‘Start’ page in TasmoAdmin also lets you, for example, turn all of your switches on or off at once.

It’s a handy tool. Bear in mind that if you run TasmoAdmin as a Home Assistant addon, it doesn’t currently support ‘ingress’ and so you can’t open it within the Home Assistant interface. This also means that you might not be able to access the dashboard remotely. TasmoAdmin may also work with OpenBeken devices, but I haven’t tried this myself.

Our 2018 summer holiday in the Loire

A small train plodding around the Parc Floral de la Source

Last summer, I blogged about previous un-blogged holidays in 2019, 2021, 2022 and 2023. As I’m away on this year’s holiday at present, I’m going to write about our 2018 holiday. Although our holiday fell before my blogging hiatus, it only got a brief mention at the time.

This particular holiday was our nine-year-old’s first trip outside England, although as it was seven years ago they were two at the time, as that’s how maths works. Nominally, our holiday was in the Loire valley in France – yes, the same place as 2023 – but we fitted some other places in too.

A photo of the outside of the Cadbury's Factory in Bourneville, West Midlands

Cadbury World

I suppose our holiday ‘started’ in the West Midlands, at Cadbury World. This was one of several places that we called at on our journey down. I’d been before with Hari – her family is from Worcestershire – but this was the first time we’d been as a family.

Cadbury World is adjacent to the Cadbury’s factory in Bourneville, a model village built by Cadbury’s for its workers that now forms a suburb of Birmingham. It tells the story about Cadbury’s – the history of the company and how chocolate is made. So whilst it’s a museum, it’s also very much a tourist attraction, with indoor rides and a chance to watch professionals make chocolate. During my earlier visit in the 2000s, you were able to see some of the actual Cadbury production lines in the factory, but I don’t remember seeing them on this visit.

It’s not quite a full day out, which suited us as we’d arrived there having set off from home – it was over two hours’ drive, and we had further to go afterwards. The attraction is run by Merlin (the Alton Towers and Sealife Centre people) so whilst it can be quite pricey, there are various discounts available if you can book in advance.

We stayed overnight near Oxford, where we met up with my parents and had a meal for Father’s Day.

A photo of a tall sailing ship called HMS Warrior at Portsmouth Historic Dockyard

Portsmouth Historic Dockyard

As per usual, we entered France by ferry from Portsmouth. Having driven down from Oxford in plenty of time, we spent the afternoon visit the Portsmouth Historic Dockyard, home to a museum and various boats such as HMS Warrior (pictured) and HMS Victory. The museum is huge, and is actually split across three sites with a shuttle boat between them. We were only there for the afternoon, and so we only saw about half of the museum. It’s also home to the wreck of the Mary Rose – again, we didn’t have time to see it.

We did, however, have a late evening stroll around Gunwharf Quays in Portsmouth.

Our ferry was the overnight Portsmouth to Ouistreham (for Caen) service. In subsequent years, we’ve taken the longer Portsmouth to St Malo service, which leaves earlier and arrives later, giving you a better night’s sleep. The Caen ferry leaves Portsmouth at 11pm UK time, and arrives at 7:30am French time (6:30am UK time). I wouldn’t recommend it, especially if you then have to drive once you’ve arrived.

Photo of the Chateau de Blois

Blois

We called briefly in Blois on the way to our campsite to have some lunch. It’s a city with a large, well-preserved château in the centre – bits of the château date as early as the 13th Century, but it was substantially complete by the 17th Century. We had a quick look around, but didn’t go in.

A photo of Chateau de Chambord, a massive French castle.

Château de Chambord

One thing the Loire is not short of is châteaux, and Chambord is the chonkiest. It’s an absolute unit.

It was built in the 16th Century as a hunting lodge, and so as you would expect, the surrounding parkland is huge. Following the French Revolution in the 18th Century, it was abandoned with its furnishings removed. During the Second World War, it was used to store works of art normally displayed in the Louvre in Paris, and later on the 20th Century it was restored and opened to the public.

Inside, many of the rooms remain unfurnished. Most notable is a double spiral staircase.

Zoo Parc de Beauval

As mentioned, we stayed in the same area in 2023 and made a return visit to this zoo, so I won’t go into much detail here. It’s a fantastic zoo and arguably one of the best in the world.

A photo of Château de Chenonceau which spans the River Cher in France

Château de Chenonceau

Chenonceau is the château that is also a bridge, spanning the River Cher (which then flows into the Loire further downstream). You can indeed hire a rowing boat to go under the château, should you wish – we didn’t. And whilst it spans both sides of the river, you can’t exit on the other side.

Most of the château dates from the 16th Century. In the 20th Century, the château had roles in both World Wars – in the first, it was used a hospital, and for a time during the second, it was a way to smuggle people out of occupied France. It was then occupied by the Nazis, leading to the Allies bombing it in 1944. Thankfully, it was restored in the 1950s and remains one of the most popular Loire châteaux for visitors.

A photo of the Parc Floral de la Source near Orleans

Parc Floral de la Source

This was somewhere that we hadn’t originally planned to visit ahead of time, but decided to visit on a whim. And it was lovely.

It’s a huge garden, with several different themed areas. Indeed, it’s big enough for there to be a little train that runs around the park – we saw it running (and it’s the header image of this post) but it was only open to a pre-booked school group. As well as a wide variety of plants and trees, there are animals too – some birds, a butterfly house, and some farm animals. I think we spent most of the day here, before we hit Auchan in nearby Orleans – Christine’s first time in giant a French hypermarket.

A photo of Le Mont-Saint-Michel, an island accessed by a causeway

Le Mont-Saint-Michel

On the way back now, and we called off at Le Mont-Saint-Michel. It’s a small island, accessed via a causeway from the mainland, and it’s very photogenic. I’ve been before, and on a previous visit you could park your car on the causeway and then walk up. Nowadays, you park on the mainland, and a double-ended shuttle bus takes you across the causeway.

As well as the abbey at the top, there are lots of little windy streets selling everything a tourist could want. Indeed, it’s a UNESCO World Heritage Site, and the most-visited bit of France outside of Paris.

The bandstand at Matlock

Matlock

Back across the channel now, and we called in at Matlock in Derbyshire for a couple of hours on the way home. It’s a picturesque inland spa town on the edge of the Peak District, and we had a wander around the town and the park. Nearby is the Heights of Abraham – we didn’t go, but it’s on my long list of places to visit in future.

Heading off on holiday to North Wales

A photo of the village of Portmeiron in North Wales

Later today, we’re off on our annual summer holiday. This year, it’s a week in North Wales, where we’ll be staying in a rented holiday cottage.

As usual, we’re going with my parents, who have kindly paid for the accommodation for all five of us. It also gives our nine-year-old chance to spend time with their paternal grandparents – as my parents live in York, they’re just a little too far to see on a regular basis.

Like last year’s holiday to Northumberland, this holiday is a domestic holiday; although Wales is a separate country from England, it’s not a separate nation state and so we don’t need to worry about having different currency, passports, plug adaptors and the like. And there’s no biosecurity restrictions, so we can bring and take back as much cheese as we’d like.

We are driving there, and it’ll be in our new electric car. Naturally, I’ve spent some time before we leave scoping out where we can charge the car whilst we’re there, but it’ll be its first distance test. A full charge should be enough to get us all the way there.

We’ve already started a list of where we’d like to go. This may well include Portmeiron, as pictured in the header image. That photo was taken the last time we were in North Wales, back in 2018. What we actually end up doing will, of course, depend on the weather.

I’ve written more than a week’s worth of blog posts in advance, so there’ll be no gap in blogging whilst I’m away.

Robin Ince and Pierre Novellie at BradfordLitFest

Pierre Novellie (left) and Robin Ince (right) taking part in a discussion about Thinking Differently and Laughing Loudly at Bradford Literature Festival

A couple of Sundays before, we went to see Robin Ince and Pierre Novellie at the final day of the Bradford Literature Festival. They’re both stand-up comedians, who, as adults, have received ADHD (Ince) and Autism (Novellie) diagnoses, and written books about them. The event, entitled Thinking Differently and Laughing Loudly, had Ince and Novellie talk about their experiences both pre- and post-diagnosis, and their books.

The Bradford Literature Festival has been going for a few years now, and – full disclosure – my employer, the University of Bradford, has been one its major funders from day one. Indeed, this event took place in the university’s Great Hall, which, combined with an Open Day the day before, meant I spent quite a bit of my weekend at work in some capacity. Ashamedly, this was the first event I had attended, although I put this mainly down to issues arranging childcare in previous years. This event was in the late afternoon, and so we dragged our nine-year-old along along with their iPad and headphones.

The following paragraphs include sponsored links to Amazon for the books mentioned.

A photo of two books, 'Normally Weird and Weirdly Normal' by Robin Ince and 'Why Can't I Just Enjoy Things'

Robin Ince – Normally Weird and Weirdly Normal

I’ve seen Robin Ince a few times before. These include a couple of ‘Uncaged Monkeys’ events in 2011, which was sort-of a live show for nerds as a spin-off of the Infinite Monkey Cage show that he co-hosts with Professor Brian Cox on BBC Radio 4. We also saw his ‘Bad Book Club’ show in Hebden Bridge, again in 2011, and we’ve seen him at a couple of shows in Leeds and in Huddersfield. Finding out that Ince has ADHD was not much of a surprise – his comedy sets would often go off and tangents and he would frequently go over time.

Robin Ince has written quite a few books now, and I’ve read Bad Book Club (related to the aforementioned show), I’m A Comedian And So Are You (one of my books of the year for 2019) and The Importance of Being Interested. His latest is Normally Weird and Weirdly Normal, published in May, and this was the book he was here to promote. I haven’t read it yet, but we picked up a signed copy and I also have the audiobook to accompany us on our upcoming holiday. We also had a couple of Robin’s other books signed, including Bibilomaniac, which I haven’t yet read.

Pierre Novellie – Why Can’t I Just Enjoy Things

I haven’t seen Pierre Novellie before, but I follow him on social media as he’s popped up on a few podcasts that I listen to. Pierre was born in South Africa, moved to the Isle of Man in childhood and then went to Cambridge for university. He was diagnosed as being autistic in his thirties, and in the discussions on stage, he said he’d realised that autistic observations made up much of his comedy even before he was aware.

His book is called Why Can’t I Just Enjoy Things? and, if I remember correctly, Novellie self-published it before it was picked up by a publisher and released in paperback in May. I picked up the Kindle edition when it was on offer, and had started reading it on the plane on the way back from Greece. It’s very good; it’s funny, but it also makes you think. I’ve not finished it yet – probably a combination of being busy and my undiagnosed ADHD – but we picked up the paperback to have that signed as well. I mean, I could have asked Novellie to sign the iPad that I’m reading it on, but I’m looking at replacing it later this year.

As for the Bradford Literature Festival, it’ll be back next year. It’s a really good festival, with a huge range of activities and a real commitment to diversity.

The Potato Book and The Snack Hacker

A photo of two hardback books. The one on the left is The Potato Book by Poppy Cooks, which is pink and features a photo of the author, a young blonde-haired woman, eating a chip, and The Snack Hacker by George Egg, which looks like a partially-opened sardine tin containing various snacks.

We’ve picked up a couple of new cookbooks recently: The Potato Book by Poppy Cooks (sponsored link) and The Snack Hacker by George Egg (sponsored link). And I’ll be honest: the main reason I’m writing about these new books is to break up what had been planned to be a full week’s worth of blog posts about smart home tech and firmware. As it was, we ended up buying a new car sooner than planned, and so some of those posts have been pushed back now. Anyway, on with the books.

The Potato Book

This isn’t the first time I’ve mentioned a book by Poppy O’Toole, better known as Poppy Cooks, as we also have her slow cooker book and use it regularly. Poppy is known as ‘the potato queen of Tiktok’, and so I guess it was only a matter of time before she published a book of potato recipes. Indeed, the cover of The Potato Book has a quote from Nigella Lawson describing her as ‘the high priestess of the potato’.

The Potato Book is split into eight themed chapters – mashed, roast, chips/wedges/hash browns, 15-hour potatoes, world classics, baked, potato salads, bakes and extra crispies. Usually the first recipe in each chapter sets out the basics, so the very first recipe in the book is how to make a classic mashed potato with salt, butter and double cream. The rest of the chapter is then variations on the basic recipe, such as hot honey and bacon mash.

Crucially, each recipe tells you what variety of potato to use for the best results. For example, the mashed potato recipes call for Maris Piper potatoes, but others use red-skinned or baby potato varieties.

We’ve only had the book a couple of weeks, and so far, we’ve just cooked her Swiss Rösti recipe. It wasn’t bad, but didn’t end up as crispy as we’d hoped.

I’m not going to spoil the final recipe in the book, but it’s worth marvelling at it.

The Snack Hacker

The second book was The Snack Hacker by George Egg. We’ve seen George’s Anarchist Cook show before (almost ten years ago, blimey) and this is in a similar vein – unconventional ways of preparing food.

Whilst some of the recipes are akin to traditional cookbooks, where you start with a set of raw ingredients, many take an existing snack food item and ‘hack’ it into something better. For example:

  • a Gregg’s Steak Bake, with some mustard, soured cream and spices to make a Stroganoff Steak Bake
  • a Breakfast McMuffin enhanced with mackerel fillets, curry sauce and mayonnaise to make a McKedgeree Muffin

It’s not just a book of recipes though. It’s also a memoir, covering George Egg’s career and childhood memories – especially the ones that are food-related. The illustrations and design are excellent – all done by Egg’s son, Jem Ward, with whom he pitched the idea for the book.

As yet I’ve not cooked any of the recipes, but I enjoyed reading it and will be trying a couple.

Hello to our new electric car

A photo of a red Nissan Leaf

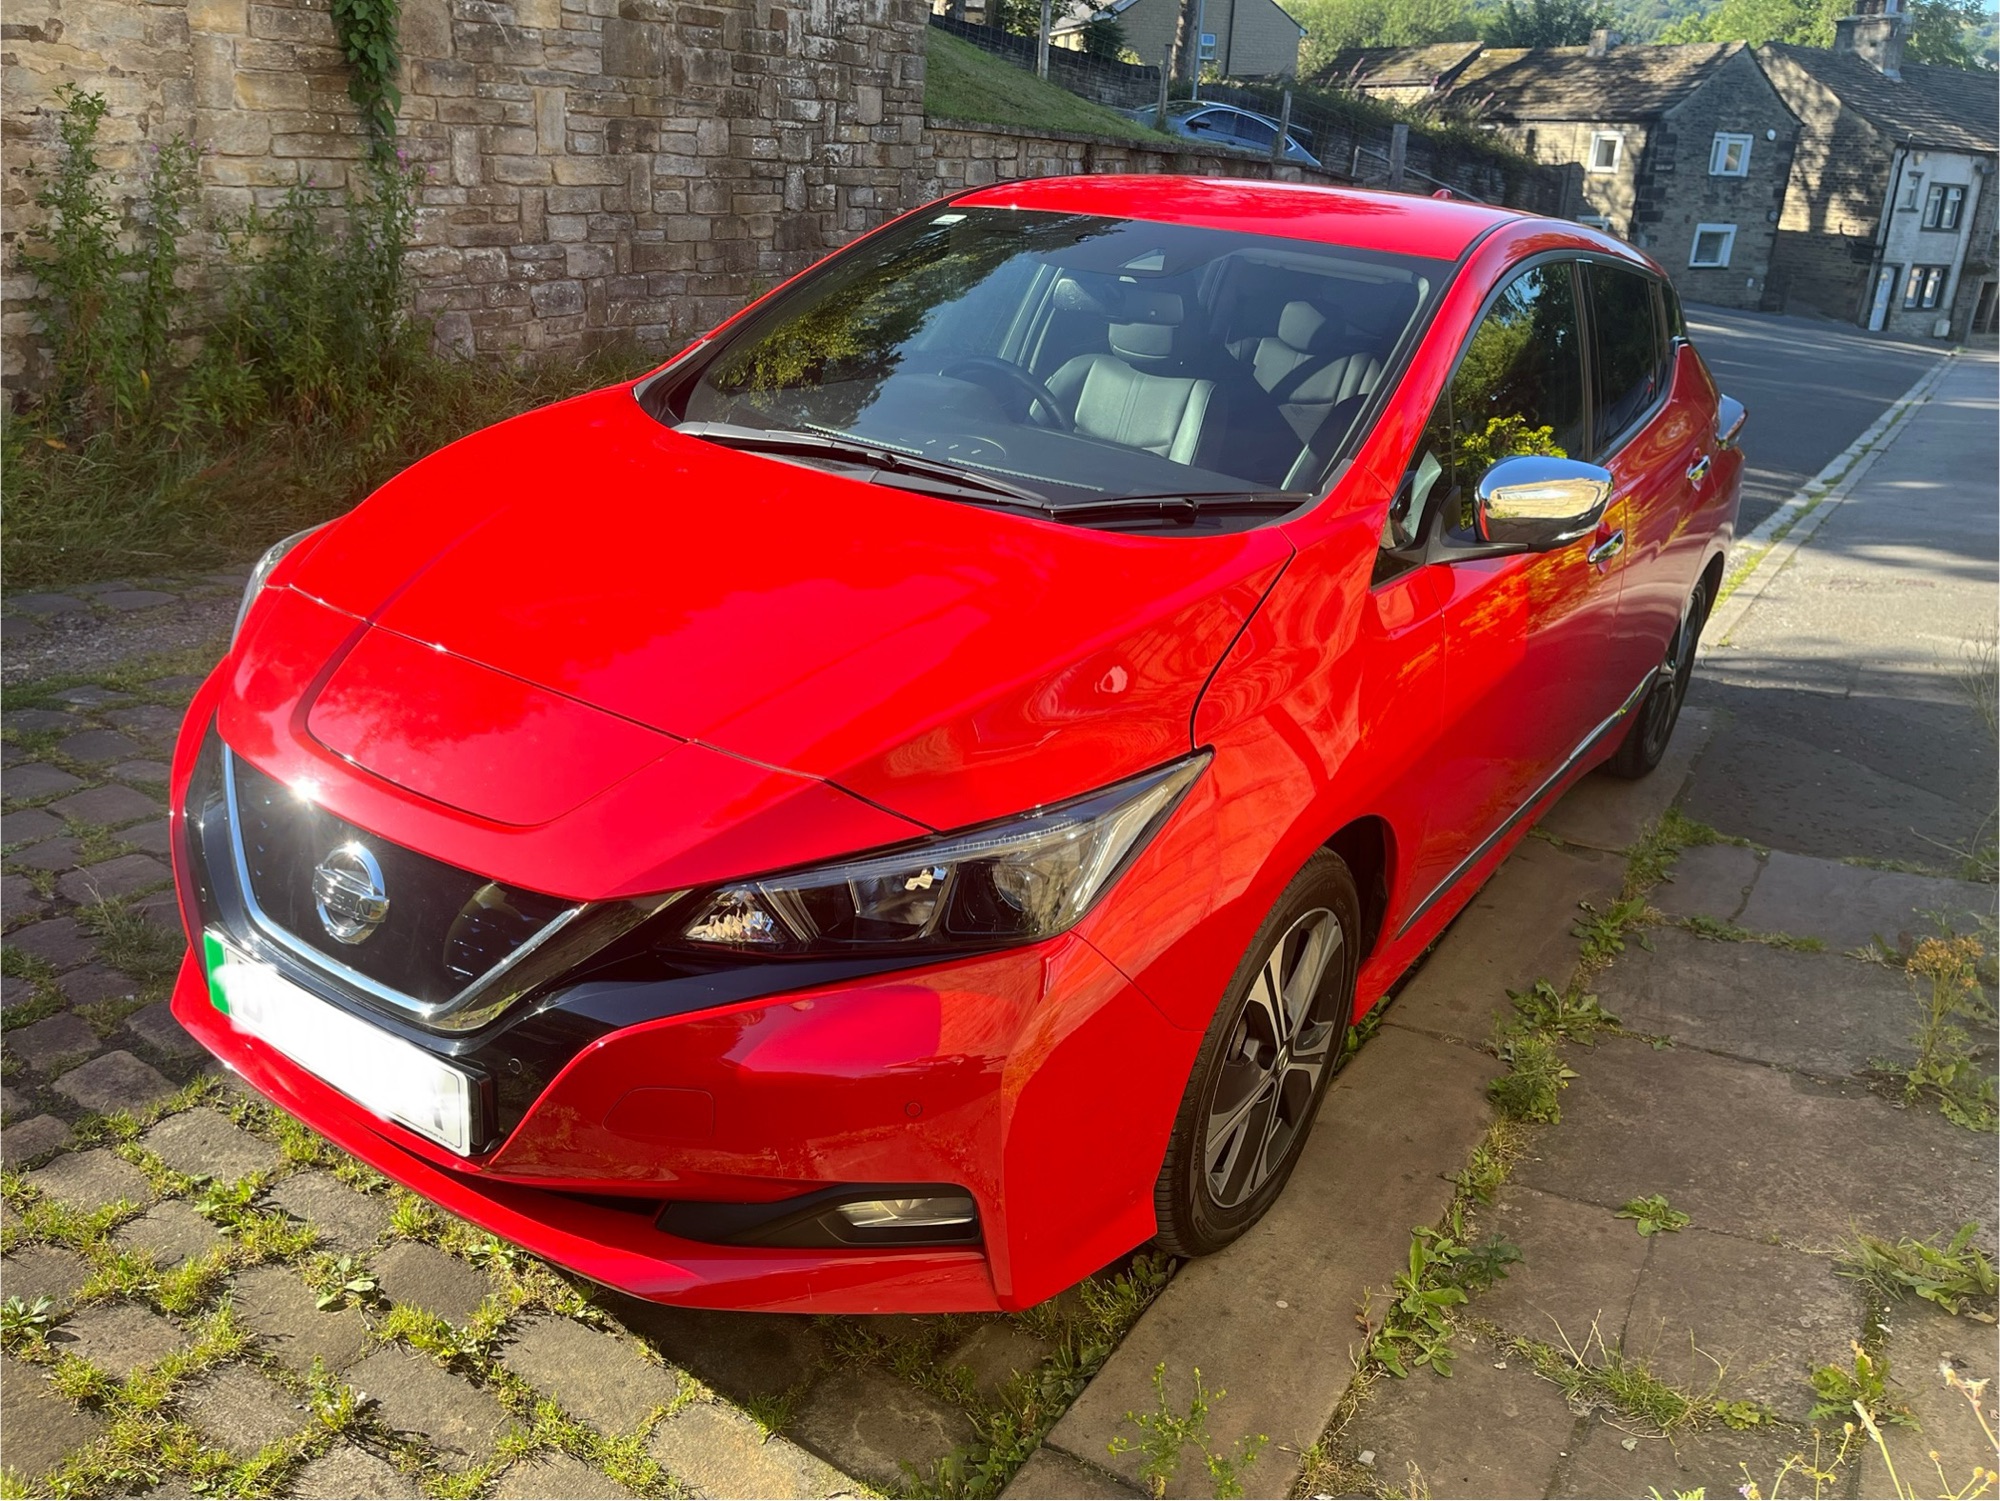
Well, our journey towards an electric car is complete, as on Friday, we bought a new (to us) Nissan Leaf. It’s a second generation model, built in 2021, and replaces our diesel Peugeot 3008. It’s also our second Nissan, having previously owned a Nissan Note from 2015 to 2019.

Both of our previous cars have been around 6 years old when we’ve bought them, whereas this Nissan Leaf is less than four years old. It’s the ‘n-Connecta’ trim, so a mid-range model with a similar level of features to our Peugeot. Our local dealership also had a cheaper model with the ‘Accenta’ trim level, but we decided to pay more for the additional features that we were used to with the Peugeot.

Driving the Nissan Leaf

Like almost all electric cars, the Nissan Leaf just has one gear, so it drives like an automatic. I’ve only ever driven cars with a manual transmission before, and so this took a little getting used to. In particular, one quirk of the Nissan Leaf is the parking brake (i.e. handbrake) is foot operated, roughly where the clutch would be on a manual car.

The car has three driving modes: standard, eco, and e-pedal. Standard is best for motorway driving, giving you better acceleration at the cost of higher power usage. Eco is fine for day-to-day driving, but turning on e-pedal enables single pedal driving. That means that you press the accelerator pedal to go, and take your foot completely off the pedal to slow to a stop. As it the car brakes, the energy generated is then recovered to the battery – known as regenerative braking. As well as meaning you only need to keep your foot on one pedal most of the time, it’s also the most energy efficient way of driving.

Compared to the Peugeot, the steering is much lighter, and even in Eco mode, it’s got good acceleration. But most electric cars will accelerate faster than an equivalent car with an internal combustion engine.

In common with the Nissan Note, the legroom isn’t great when driving, but Christine finds it more comfortable to drive than the Peugeot.

Energy use

We’ve only had the car a couple of days, and have used around 40% of its charge across around two and a half hours of driving. This equates to about 40 miles. The Lithium-Ion batteries in most electric cars are less efficient in really hot weather, like what we’re currently experiencing in the UK as I write this. Therefore, you should keep your EV below 80% charged in hot weather (if you can). Indeed, when I picked the car up on Friday, the dealership had charged it to this level.

The maximum stated range of the Nissan Leaf is around 150 miles. That’s quite a bit less than our Peugeot, which could do around 400 miles on a full tank. And, of course, a key disadvantage of electric cars is that even a quick charge takes longer than fuelling a car with petrol or diesel. We’ll have to plan our longer journeys with recharge stops, although most motorway service stations include several quick charge points now. That being said, a quick charge should mostly recharge our Nissan Leaf’s battery in about 40 minutes.

Size

We deliberately decided to buy a smaller car than our previous Peugeot 3008. There are a couple of occasions each year, when the Peugeot’s extra capacity would be helpful, like holidays. But for 95% of the time, we were driving around a car that was bigger than we needed it to be. That’s a waste of fuel, and also makes it more difficult to park in narrow space.

Compared to the Peugeot 2008, the Nissan Leaf is around 5 cm (two inches) narrower, so parking should be a little easier. It’s also shorter in height, by around 10 cm (four inches). However, weirdly, it is actually longer – by around 30 cm (6 inches). It doesn’t look like it should be longer, but it is.

As such, the actual amount of space inside the Nissan Leaf is only slightly less than in the Peugeot. And on the few occasions that we may need extra space, we’ll considering hiring a roof box, which will also be easier to reach with the lower roof.

Charging

So far, I’ve only charged the car at home, using our dedicated Rolec EVO car charger. The previous owner of our car had set it to charge on an overnight schedule, so by default, it won’t start charging as soon as it’s plugged in. However, there is a dashboard button to over-ride this to start an immediate charge. Three lights appear on the dashboard, visible from outside the car, to show how charged the battery is.

On a ‘slow’ 7 KW home charger, expect a full charge to take around 6 hours. At present, I’ve knocked the current down to 16 Amps, so a full charge would probably take closer to 14 hours at this rate. This is where the equation to calculate power, voltage and current that you learned for GCSE Science comes in.

The Nissan Leaf supports two charging sockets. There’s a standard ‘Type 2’ socket, which only supports ‘slow’ chargers up to 7 KW, like our Rolex EVO. Then there’s a second ‘CHAdeMO’ socket, for use with supported fast chargers. Type 2 is essentially the European standard, and some public charge points only offer type 2 sockets, even for fast charging. Therefore, if we need to use a fast charger, we’ll need to find one that offers a CHAdeMO socket. Many do, but not all.

All the extra fancy gubbins

Being nine years newer than our previous car, our Nissan Leaf has lots of additional features:

  • Adaptive cruise control. I used cruise control extensively on the Peugeot and so pleased to have it on here. Combined with no need for gear changes, I can drive for longer without using any of the pedals with this on. ‘Adaptive’ means that it will slow down to match the speed of the car in front if needed, which I didn’t have before.
  • Built-in Apple CarPlay and Android Auto. Our Peugeot had the most basic entertainment system without a colour screen, so it’s nice to have these built-in. However, it only supports these over USB – if you want to use either CarPlay or Android Auto wirelessly, you need to buy a separate USB adaptor (sponsored link).
  • Heated seats and steering wheel. I suppose these will be useful in winter. Our nine-year-old seemed very keen on the idea of heated seats, until we pointed out that they still need to use a car seat until they’ve grown a bit more.
  • Remote start air conditioning and heating. Whilst the car is plugged in, you can use the Nissan app to remotely start the air conditioning or heating systems, so that your car is the right temperature before you set off. This also reduces the load on the battery.
  • Forward, rear and around view cameras. Our Nissan Note had no parking sensors whatsoever, whilst our Peugeot 3008 had standard rear parking sensors. The Nissan Leaf, meanwhile, offers a reversing camera, a forward camera, and ‘around view’ cameras. The around view gives you a top-down, ‘bird’s eye’ view of your car whilst reversing. This makes it much easier to park straight, especially if there are no white lines marking out the space. There’s also moving object detection.
  • Blind spot alerts. A small red light flashes on your wing mirror, along with an audible warning, if there’s something in your blind spot.

There’s a higher level of trim called ‘Tekna’ which adds a self-parking feature. That would have been lovely to have, but as we were buying used, we were limited to what was available at the dealership.

Compared to the Peugeot, the only things that I’m missing so far are:

  • The large storage box between the front seats (the Nissan Leaf has a smaller one)
  • The head up display, which showed the current speed and whether cruise control or the speed limiter was enabled.

The Nissan Connect app

The Nissan Connect mobile app allows you to control aspects of your car remotely, like checking its charge status or starting the heating or air conditioning. Alas, although I’ve downloaded the app, I can’t use it yet. The previous owner of my Nissan Leaf didn’t unlink the car from their account, and so I’m waiting for someone at Nissan to un-link it. Thankfully, the dealership gave me a copy of the DVLA ownership change confirmation and so hopefully that’ll be enough evidence.

Overall, we’re really happy with the Nissan Leaf. It’s easier to drive, easier to park, and should be much cheaper to run. I suppose it’s major test will be when we need to drive longer distances – like when we go on holiday next week.

Farewell to our old car

A photo of a black Peugeot 3008.

By the time you read this, we’ll have got ridden of our previous car, a black Peugeot 3008, after six years. We’ll have picked up our new electric car and I’ll write about that in future blog posts.

The Peugeot 3008 was our second car, and we bought it in 2019. It was not a planned purchase, but was necessitated by our previous car being written off in France. That car was a Nissan Note, bought in 2015 shortly after I passed my driving test. We were therefore limited by what we could get locally, and at short notice.

Trim and spec

As it was, the Peugeot 3008 has served us well. When we bought it, it was six years old and had clocked up around 80,000 miles in that time, which probably meant that it was cheaper than it would’ve been with a lower mileage. We didn’t expect to be able to buy such a large car within our price range.

In terms of trim, it was an ‘Allure’ model, which meant that it had some additional features. These included a transparent head up display showing your current speed, cruise control with distance alerts and dual zone climate control. However, it also had the most basic stereo system, with just a CD player, 3.5mm auxiliary port, FM radio and a single USB port which could be used as an iPod Dock Connector. It didn’t support Bluetooth at all. A couple of years ago, we added a free-standing CarPlay and Android Auto screen which helped, but also meant having various wires trailing across the interior.

Dirty diesel

The other big disadvantage of the Peugeot 3008 was that it was a diesel. At the time we bought the car, dieselgate was thought to just apply to Volkswagen vehicles, but it may well be that our car was affected. We’ll see what happens when the case against Peugeot finally makes it to court.

Its emissions mean that we would have to pay to access certain clean air zones, such as London’s ULEZ and the clean air zone in Birmingham. As it is, we’ve not needed to enter those zones whilst we have the car, but will be taking our new electric car into Birmingham’s clean air zone next month. Ironically, our previous Nissan Note would’ve been fine in the ULEZ with its petrol engine, despite being an older car.

That being said, it did have a six speed (manual) gearbox, and that sixth gear was great for motorway driving.

Getting expensive

I wrote last year about how keeping our car roadworthy was getting expensive. It had been in the garage for repairs four times in as many months, and would be back in again within a month.

What proved to be the turning point was finding a patch of rust on one of the doors. Getting this fixed would have cost a lot of money, and with the car’s mileage continuing to increase, we decided it would be beyond economic repair. There’s also a laundry list of other issues:

  • The tyre pressure monitor on one of the wheels has never worked in the six years we’ve owned it, and so the car beeps loudly at you after around 10 minutes of driving to tell you this.
  • Various squeaks and knocking noises, suggesting bits of the car are working loose.
  • The air conditioning hasn’t really worked in well over a year, despite being recharged.
  • It seems to burn out headlight bulbs quicker than it should do.
  • It’s always leaked very small amounts of oil, but it’s never been clear where it’s leaking from.

I spent about an hour yesterday getting our personal effects out of the car, which included £3.04 in change that had ended up in various nooks and crannies.

Trading it in

We are doing a part-exchange, so the value of the old Peugeot 3008 will be used as a discount on the new car. However, with our car now having almost 130,000 miles on the clock, it’s worth less than £1000. Indeed, the part exchange quote we got was about 10% what we spent on it six years ago.

It’s probable that the car will be sold at auction. After which, who knows. I wouldn’t be surprised if it’s stripped for useful parts and scrapped. It would be a shame, as it’s been a good car for us. It got us through the pandemic, and we’ve taken it on three holidays, including two in France. But unless someone is able to repair it cheaply, I doubt it’s worth much to anyone.

Incidentally, our old Nissan Note is still on the road, as far as we can tell. After we left it behind in France, the insurance company arranged for it to be collected and sold it to a car breakers. However, it looks like they fixed it up and got it back on the road, and it passed an MOT as recently as this May. I can only assume the breakage firm had enough spare parts to patch it up and sell it on.

Tuya-Cloudcutter

A Tuya IR and RF bridge that has been flashed with new firmware using tuya-cloudconverter

Last year, I wrote about a tool called ‘tuya-convert’ which exploits a vulnerability in ESP-based Tuya devices to install custom firmware such as Tasmota. But not all Tuya devices use ESP chips, and that’s where tuya-cloudcutter comes in.

I have one such device, an ‘S11’ RF and IR bridge (pictured above) that I picked up cheaply from AliExpress last year. Instead of one of Espressif’s ESP chips, it comes with a Beken BK7231N chip. Having disassembled its case, I also didn’t find any obvious pins for the UART bus. So I was relieved to come across tuya-cloudcutter, as it doesn’t require any soldering or disassembly. tuya-cloudcutter should work with any devices that use the BK7231T and BK7231N chips.

Like tuya-convert, tuya-cloudcutter exploits a vulnerability. This was responsibly disclosed to Tuya (the bug bounty was donated to charity), and newer devices are shipped without this vulnerability. However, there’s no firmware update for my S11 device to fix the issue, which is perhaps poor from a security perspective but suits my needs right now.

Running tuya-cloudcutter on a Raspberry Pi

You’ll need to run tuya-cloudcutter on a Linux device, and a Raspberry Pi is perfect for this. Indeed, there’s a detailed tutorial to follow. You’ll need Python, Docker, Git and NetworkManager installed and enabled, and there are a couple of configuration files to edit before you start. Everything is done using a command prompt, so you could do it over SSH using a Windows machine with Putty if you wanted to.

A note: I first tried this on my nine-year-old’s Raspberry Pi 400, and it didn’t work, whereas it did on my Raspberry Pi 4. I believe it was an issue with the specific Wi-Fi adaptor in the Raspberry Pi 400.

You may find that it’s easier to have the device already set up in the Tuya or Smart Life app, as you’ll be able to find the existing firmware version. You’ll need this when running the tuya-cloudcutter tool.

Detaching and flashing

tuya-cloudcutter offers two modes:

  1. Detach – this leaves the Tuya firmware intact on the device, but detaches it from the Tuya cloud. You can then use the LocalTuya or TuyaLocal custom Home Assistant integrations from HACS to control your device, but the official Tuya and Smart Life apps won’t work anymore.
  2. Flash – this also flashes new firmware onto the device.

In terms of firmware choices, by default you get:

  • OpenBeken – a Tasmota-like firmware where you can configure the device
  • ESPHome Kickstart – a minimal version of ESPHome, which can be updated later.

You can also add your own firmware, although be careful as you may brick your device if the firmware isn’t configured correctly.

If you choose to flash new firmware, then when the tool has run correctly, you’ll see a new Wi-Fi network appear for you to connect to. The Hotspot login page should open automatically, but if not, go to http://192.168.4.1/ to proceed. You can then configure the firmware to connect to your Wi-Fi network.

Switching firmware later

For my device, I tried OpenBeken first, but found that it wasn’t able to use the RF capabilities of the device. Instead, I built an ESPHome configuration, using the tuya_rf custom component, and flashed that, using OpenBeken’s OTA firmware updater. Because once you’ve used tuya-cloudcutter to install new firmware on a device, you don’t need to use it again – you can switch from OpenBeken to ESPHome and vice versa quite easily.

Also, if you read yesterday’s post about the Sonoff RF Bridge, no, this RF bridge didn’t work with my doorbell either.