Earlier this month, our ten-year-old reached an important milestone: they became tall enough not to need a car seat.
As I write this in March 2026, children need to use a car seat until they’re 135cm (4 feet and 5 inches) tall, or until they turn 12, whichever happens soonest. Obviously our ten-year-old isn’t twelve yet, so this means they’ve reached 135cm tall. They therefore no longer need to be strapped into a child car seat, and can sit in the front of the car for the first time.
Three different car seats
Since they were born at the end of 2015, we’ve had three different car seats. The first was a baby carrier type, which clipped into a base fitted to the car using Isofix. All three of our cars have had Isofix anchors built-in. We could also clip the car seat onto a pram frame, so transferring a sleeping baby from the car to a pram was possible without waking them up.
The second came when they were around 18 months old. This was a forward facing car seat that rotated, so we could easily get them in and out. Like the baby carrier, this came with a harness rather than using the seatbelt, but it remained in the car rather than being removable.
By the time they’d reached the age of four, it was time for another, larger car seat. This one was a more, front-facing seat that didn’t rotate, and didn’t include a harness. Instead, we strapped our ten-year-old in with a standard seatbelt that went across the car seat. Back when I was that age, I had a simple booster seat which had no back, but those aren’t sold any more. Instead, this one had a back and extra head protection against side impacts.
Now, there’s no need for any additional protection at all. Which is handy as it meant one less thing to pack whilst we were in London and our ten-year-old was with my parents. They can also take advantage of the heated seats in our Nissan Leaf.
What to do with old car seats
When it comes to what to do with old car seats, the advice is mainly to take them to your local authority recycling centre. You shouldn’t buy or receive a child car seat that’s second hand, unless you absolutely trust the person selling it to you about its age and condition. If it was in a car that has been in an accident, then there’s a risk that the car seat may have been damaged, and so it may not offer as much protection in another accident. It’s a shame, because car seats are expensive, and they’re not the easiest things to recycle either.
That being said, you can buy all-through car seats(sponsored link) that should serve most children from birth to age 12 (or 135cm). Had these been available back in 2015, we would have saved quite a bit of money, although I wonder how adaptable they are for older kids.
I’ve only recently come across Matterbridge, which allows you to add a wide range of smart home devices as if they supported the Matter smart home standard, even if they don’t. Once installed, it runs as a server that acts as a bridge between whatever devices you have, and your choice of smart home ecosystem using Matter.
Whilst I have a handful of Matter devices – some Wi-Fi and Thread smart plugs, and a smart light bulb, many of my devices don’t support Matter. They’re either older Wi-Fi devices, or use Zigbee. To make those devices available to Google Home, I’m currently using Home Assistant and Homeway, but Matterbridge offers an alternative.
If the Matterbridge interface looks familiar, it’s because it’s derived from Homebridge. Whilst Homebridge is designed just to work with Apple Home, Matterbridge will work with Google, Alexa, Samsung Smartthings and Apple Home, amongst others.
Installing Matterbridge
I’m using Matterbridge alongside Home Assistant, and so I’ve installed it as a Home Assistant App (formerly known as an add-on). If you run Home Assistant Container, then you can also install Matterbridge as a Docker image, or you can install it using Node Package Manager (NPM).
It’ll take some time to install and run the first time, but once done, you’ll be able to open the interface inside Home Assistant and will get a screen similar to that in the screenshot. However, it won’t do very much until you install some plugins
Install the Home Assistant plugin
If you want Matterbridge to see the devices added to Home Assistant, then you’ll need to install the Home Assistant plugin. This is true even if you install Matterbridge as a Home Assistant app.
Most of the default settings should be fine, but you’ll need to provide a ‘long lived access token’ for your Home Assistant user account. In Home Assistant, click your user profile at the bottom of the left hand menu, select the ‘Security’ tab, scroll to the bottom, and click ‘Create token’. Give it a name, like ‘Matterbridge’, and then copy the token text and paste it into the Home Assistant Matterbridge plugin settings. Then, restart Matterbridge using the restart button at the top right of the Matterbridge interface. You don’t need to restart the whole app for this.
Once Matterbridge has restarted, it’ll bring all of your Home Assistant devices in. On the right hand side, next to each device, is a tickbox, so you can untick them to hide those devices that you don’t available via Matter. If you have lots of devices, but only want to share a few, then the plugin settings includes a ‘Whitelist’ feature that may be quicker than unticking hundreds of devices.
One other thing I had to do for some devices was hide some entities. Otherwise, the device showed up as two (or more) separate devices in Google Home; Apple Home was a little better and grouped these per device. Again, this is done in the Home Assistant plugin settings.
Optionally install the Zigbee2MQTT plugin
Another of Matterbridge’s plugins supports Zigbee2MQTT. This is the app that I use to add my Zigbee devices to Home Assistant, however, Matterbridge can connect to it directly using MQTT. There’s a couple of good reasons to do this:
It means Home Assistant isn’t an additional intermediary. Say I want to use Google to turn on a Zigbee light: this request would go from Google, to Matterbridge, to Home Assistant, to Mosquitto (my MQTT broker), to Zigbee2MQTT and finally to the device. By connecting directly, you skip that third step.
The Zigbee2MQTT plugin is more mature, and pulls in data such as how the device is powered.
Pair Matterbridge to your other ecosystems
Once you have your devices set up, it’s time to scan that big QR code on Matterbridge’s home screen, using the smart home app of your choice. How this will work will depend on the app:
In Google Home, it’ll add all the devices in an ‘In Your Home’ section at the bottom, for you to then allocate to rooms
In Apple Home, you’ll be asked to configure each device in turn, including setting a custom name allocating them to rooms.
After this initial setup, any new devices added to Matterbridge will automatically appear in the other apps.
Advantages over other options
Using Matterbridge as a way of bridging your Home Assistant devices to other smart home ecosystems has a number of advantages. Previously, I was using Homeway, but by using Matterbridge:
It’s free – I don’t need to pay a third party for this.
It retains local control, so if I decided that I didn’t want Homeway any more, my devices would still work.
Once configured, devices work in both Google Home and Apple Home – you don’t need to configure them separately.
Whilst Homeway used to be really reliable, in recent weeks it has randomly disconnected from Google Home without warning. So far, I’ve been using Matterbridge for about a month, and have not had any significant issues with it.
To this end, I’ve disabled Home Assistant’s built-in HomeKit integration, and I’m just using Matterbridge now. So far, so good, although I don’t tend to use Apple Home very much.
In terms of disadvantages:
Not all types of device are supported. Some may appear as switches rather than their actual device type, such as a washing machine or dishwasher.
It will only work with Amazon Alexa if you have an Echo device with Alexa on it. Although I have the Alexa app on my phone, and use it on Fitbit Versa, Alexa requires a physical Echo device to manage Matter devices. It won’t use another vendor’s Matter server. However, Homeway’s Alexa support seems more stable than its Google Assistant support, so this doesn’t really affect me.
Other plugins
There are a number of other plugins available for Matterbridge. These include plugins for Shelly and Somfy devices, that allow Matterbridge to connect to these directly. In time, more of Homebridge’s plugins could be ported to Matterbridge, which would enable devices from the likes of Tuya/Smart Life or Philips Hue. But, for now, you can use these devices via the Home Assistant plugin.
So, in the start of the month round-up, I mentioned that Sci-Fi Weekender had been cancelled with only a few weeks notice. This meant that we had three nights of childcare arranged, with no plans. So, as this post goes live, Christine and I will be on our way down to London.
It’ll be my first trip to London in two years, although Christine has been more recently for some conferences related to her work. Normally we go once a year, so a two year gap is unusual for me. We’re travelling down by train, as per usual; I drove to London and back once, and vowed never to do so again.
It’s also the first time since 2021 that we’ve had a child-free weekend in London. We, of course, love our ten-year-old to bits, and there’s no shortage of things to do in London as a family. But when it’s just two of us, we can just be a little more agile and spontaneous, and can be a bit more daring when it comes to food. Plus, some of the places we’re planning to visit are things that our ten-year-old would either dislike or find boring. Instead, they’re staying with my cousins, and then with my parents in York.
That being said, as I write this, we haven’t firmly decided what we plan to visit. So far, we’ve got the train and the hotel booked, and may go and see a West End show one night. The trips to London we’ve enjoyed the most have had a mixture of planned and spontaneous activities, so we deliberately don’t plan the trip too much before we arrive.
I’ve got a few pre-written blog posts to go live over the next few days, and then I’ll write about where we went. See you soon.
Until now, plug-in solar panels haven’t been legal in the UK. If you wanted solar panels, you either had to have them professionally installed, or only use them with a battery that you kept separate from the energy grid. We had solar panels professionally installed on our roof in 2023. Meanwhile, a former colleague of mine had a series of fold-out portable solar panels that she uses with a portable battery for use in her campervan.
The UK is catching up with our European neighbours in this regard. In Germany, over half a million households already have these systems, which are known as Balkonkraftwerk and can be picked up for around £500. These plug-in solar panels can simply clip over your balcony railings. Seeing as the German supermarkets Aldi and Lidl are now widespread in the UK, I wouldn’t be surprised if these plug-in solar kits will start appearing in their middle aisles soon.
Because they don’t require a professional installation, they’re much more suited to people who rent their homes, and people who live in flats without access to a roof.
Why hasn’t plug-in solar been legal before?
So why is the UK only now catching up with Germany? Here’s an explanation from Terence Eden, who I credit with first making me aware of this:
The electricity grid needs to be capable of handling both import and export from households, and in the past it wasn’t very good at this. Nowadays, it mostly is, and so a big increase in people exporting excess electricity from their homes shouldn’t cause too many problems. Which is a relief, considering how many houses already have solar panels – it’s rare to see a housing estate with at least a couple of houses with solar panels on their roofs already.
It’s worth noting that you’ll be paid significantly less per kWh for exporting electricity; as it stands, Octopus pay 12p per kWh, versus typically 24p kWh for import. It was 15p per kWh until earlier this year. Most other suppliers pay even less, so if you’re not already with Octopus, maybe consider switching. Here’s my referral link – you’ll get £50 off your next bill once your first direct debit payment has been taken, and so will I.
In any case, if you’re considering a plug in solar kit, maybe also consider buying a battery that you can charge whilst it’s sunny. Anker’s SOLIX range is popular, and here’s a 2 kWh model that costs £999(sponsored link). That way, you can use the excess electricity yourself.
This will help the UK reduce its fossil fuels reliance
As energy secretary Ed Milliband says in the announcement linked above:
Global events demonstrate there’s not a moment to waste in our drive for clean power because there can be no energy security while we are so dependent on fossil fuels.
Oil and gas prices have shot up in recent weeks, thanks to the latest war in the Middle East. Allowing more households to start using solar power will reduce our reliance on burning gas to generate electricity, as well as being better for the environment and air quality. We spent a five figure sum getting our solar panels installed three years ago; now, many households will be able to get a small system for just a few hundred pounds. And I think that’s great news.
I’ve moved my Bluesky account to Eurosky. If you follow me on Bluesky, then you probably won’t have noticed any difference, as everything will have migrated over.
Eurosky is a PDS (Personal Data Server) for the Atmosphere, which is the system of interoperable social media services that Bluesky uses. As the name suggests, it’s based in Europe, and so my personal data is stored somewhere with more closely aligned privacy laws to the UK.
Signing up for Eurosky
Eurosky opened for registrations last month, and is now home to a few thousand users. You can create a fresh account there, or you can migrate an existing account from Bluesky (or indeed any other app in the Atmosphere). I did the latter, and used their EU-HAUL tool to migrate my account. It took around 20 minutes in total. I previously tried the PDS MOOver tool, but this failed for some reason.
Once the migration was complete, I just needed to log out of my deactivated Bluesky account, and then log in using my Eurosky account. You can still use the official Bluesky app and web interface, so there’s no change to the user experience.
I use my domain as my username, and so my username remains the same after the migration. If you don’t have your own domain, then your username will change from [something].bsky.social to [something].eurosky.social.
Alternative PDSs
There are a few other PDSs coming online now. Blacksky is aimed at black people and is based in the US. Cory Doctorow is using one where he is the only user (he previously resisted joining Bluesky until now). In time, I imagine Atmosphere PDSs will become a bit like Mastodon instances, where there will be lots of small servers that people can run themselves, as well as the core Bluesky instance. Indeed, the Atmosphere is essentially analogous to the Fediverse, and the underlying AT Protocol works in a similar way to ActivityPub. A WordPress plugin called Wireservice is in development.
This is all very geeky stuff and I’m sure most Bluesky users will stay put on the Bluesky PDS. But I feel more comfortable using a service like Eurosky which is in a more closely aligned jurisdiction to me.
A couple of weeks ago, we went back to the Science & Industry Museum in Manchester, to see the newly re-opened Power Hall, and their latest exhibition, Horrible Science: Cosmic Chaos. I’ve written about their previous exhibitions here and here.
The Power Hall
The Power Hall has been closed for six of years for a refurbishment. This has included replacing the roof, and installing a more efficient heating system. Indeed, the new heating system is now an exhibit in itself – it’s based around water-source heat pumps which pump water from an aquifer 90 metres below the museum. The heating system also incorporates a recovery system for the steam generated by the various machines on display in the Power Hall. Overall, the new system should be cheaper to run and better for the environment, and explaining how it works is just what the museum should be doing. It’s quite the comparison to see this fancy new system alongside machinery that’s over a hundred years old.
Speaking of the other machines, these are not all on at the same time, but there is a schedule for when they are powered up. These include a talk by one of the museum’s explainer staff, about where the machine came from and what it was used for. We got to see the Buxton diesel generator in action, which used to work in mine research site in Buxton at a time when the site wasn’t connected to the Nation Grid.
As well as static machines, the Power Hall is also home to some locomotives. There’s an enormous steam locomotive with two tenders, that was built in Manchester almost 100 years ago but worked in South Africa. A smaller locomotive, which was built for the Isle of Man, has been sectioned so that you can see inside it. There’s also Ariadne, a Class 77 electric locomotive that was built for services on the now-closed Woodhead Line between Sheffield and Manchester, and was later exported to the Netherlands. The Woodhead Line used a 1500 KV DC electrification system which isn’t used elsewhere in the UK (apart from on the Tyne & Wear Metro) but is common in the Netherlands.
The refurbishment of the Power Hall is good, and it’s nice to see some of the old exhibits again. It’s also nice for the museum to have more than one building open again; hopefully the rest of the site will be ready by 2030 for the 200th anniversary of the Manchester Liverpool Road station.
Entry to the Power Hall is free.
Horrible Science: Cosmic Chaos
The BBC is following up its hit Horrible Histories series with Horrible Science, and this exhibition is themed around its central character, Dr Big Brain. At the start of the exhibition is a short video where you are recruited as one of his henchpeople, and you are tasked with helping him conquer the solar system. On the way, you get to see what passes for a toilet on a Soyuz-Mir spacecraft, how astronauts live in space, and what each planet in our solar system is like. There’s a good balance of objects from the museum’s collection, with videos and interactive activities for kids.
The exhibition is primarily aimed at 8-14 year olds, as you would expect for a CBBC TV series, but I learned a few things whilst there. As with other special exhibitions, you need to pay extra for entry. Advance booking is recommended for busier times, like school holidays, but when we went on a Sunday it wasn’t too busy.
Accessibility
I’m going to skip over the accessibility section for this one as it’s basically the same as last time we visited.
I’ve bought myself a new Bluetooth label printer – it’s this Etikez PM260 Label Printer(sponsored link).
But wait, you may think, don’t you already own a Bluetooth label printer? Yes, I do, and I reviewed that one a couple of years ago. And, despite buying this new one, I still use the previous one more frequently! I’ll get onto why in a bit, but first let’s outline the ways in which this Etikez PM260 model is better:
It supports larger labels. It comes with 30x40cm labels, but can support 50x80cm portrait labels.
As well as connecting to mobile devices via Bluetooth, it can also plug into Windows PCs and Macs via a USB-C cable.
You can do mail merges from Excel spreadsheets.
There’s a wider variety of label designs, including clipart.
It’s mainly the first three reasons why I bought the Etikez PM260. I wanted to be able to print labels easily via a mail merge, so that I would be more likely to actually send Christmas cards this year. And yes, I’m aware that posting about Christmas cards in March is a weird flex, but I’ve already had a chance to use it for something else. Namely, our ten-year-old’s birthday party invitations. I drew up a list of names in an Excel spreadsheet, and then we designed the invitations in Word, and used Word’s mail merge feature to print the invitations. Then, we used the Labelnize app on Windows to design the labels, and imported the names for the labels from the same spreadsheet. As well as installing the Labelnize app, there are printer drivers to install.
It worked reasonably well, although for some reason the printer only printed on every other label. In other words, after printing 10 labels, we ended up with 9 blank ones interspersed. I was able to re-stick the labels onto the backing roll to use again, and I hope this was a one-off, otherwise a roll of labels will last half as long. The labels print quickly, as it uses thermal printing rather than ink or laser toner.
What’s less good about it
For day-to-day use, we still use the Phomemo D30 printer. It’s more basic and can only print text and emojis, albeit in a variety of fonts. But it’s much quicker to use. By contrast, the Labelnize app for the Etikez PM260 is much more powerful, but you have to choose a design for each label, or design your own. It’s therefore not as quick to use as the Print Master app for the Phomemo printer.
The Phomemo printer is also quite a bit cheaper – currently it’s £16, as opposed to £27 for the Etikez PM260 – and it’s smaller. Both have a built-in battery, although the Phomemo printer should have slightly longer battery life.
If you don’t own a label printer at all, then the Etikez PM260 definitely offers more features, and overall gets my recommendation. But both printers have their place, and we use them both regularly.
Hopefully, this means I’ll have less of an excuse not to send Christmas cards this year!
Yesterday, we trooped off as a family to watch the latest Disney Pixar film, Hoppers. This is Pixar’s 30th feature film, and the 19th one I’ve seen. Generally, we look forward to Pixar films, and this one didn’t disappoint.
I’ll be honest: when I first saw the poster, I thought it was a film adaption of the French series Grizzy & the Lemmings. It’s not – for a start, the protagonist is a beaver, not a lemming.
Plot
The story focusses on a rebellious girl named Mabel, who wants to protect a picturesque glade in her home town of Beavertown. The town, led by Mayor Jerry Generazzo (voiced by Jon Hamm) has cleared the glade of animals, ahead of the construction of a new motorway. Mabel discovers that one of her university lecturers, Dr Sam Fairfax, has developed technology that allows people to ‘hop’ inside realistic animatronic animals. So, she steals an animatronic beaver in the hope that she can re-establish a beaver colony in the glade and stop the road. Along the way, she meets the King of the Mammals, the council of other animals, and sets herself up for a showdown with the mayor.
Besides Jon Hamm, Meryl Streep also has a cameo role, as do Alan Carr and Amanda Holden in the UK release.
My review of Hoppers
So, what did I think of Hoppers? Pretty good on the whole. I mean, it’s a Pixar film, and Pixar films are rarely bad. There’s a good mix of humour and sad bits, and the story isn’t wholly predictable. It’s not the emotional roller-coaster that a film like The Wild Robot was, but it’s fun. It’s certainly a good family film, and there’s a revelation at the end that made me laugh out loud (no spoilers). The three of us all enjoyed it.
We saw at The Light cinema in Bradford (my second favourite cinema chain), and with it having only opened fully in the UK on Friday, it was relatively busy. Thankfully, the days where Pixar films came out in the UK months after the US are gone.
Somewhere that we go to regularly, but I have hitherto not blogged about, is Heaton Park in Manchester. It’s the largest public park in the north west of England, and, being in the north-east corner of Manchester, it’s only about half an hour’s drive from us.
To give you some idea of how big Heaton Park is, it effectively spans junctions 17, 18 and 19 of the M60 motorway. Indeed, depending on which of its multiple car parks you use, you may end up leaving the M60 at either junction 17 or 19. Its large size means that there are plenty of things to see and do inside the park.
History of Heaton Park
Heaton Park is the parklands surrounding Heaton Hall, which was built in the late 18th Century and remains to this day. Whilst originally in private hands, the park and hall transferred into public ownership in 1902, and has been open to the public ever since. The hall is Grade I listed, and is occasionally open to the public. Here’s a video of the inside.
The parklands were laid out with a lake and pleasure grounds whilst still in private ownership, and these remain today. There are a number of other listed structures and monuments across the park, including the colonnade from the original Manchester Town Hall which was re-assembled in the park when the current City Hall in Manchester city centre was built.
Playgrounds
There are two large playgrounds for kids at Heaton Park. One is by the hall, towards the northern end of the park, and has a space theme. The second is down by the lake, with a woodland theme. Both are far better than the average playground that you get in a typical municipal public park, both in terms of size, range of play equipment and that there’s a consistent theme. We mostly visit the park on weekends and they’re both always busy.
Heaton Park is also home to Zip World Manchester, a Go Ape style treetop adventure park. Whilst entry to the other playgrounds is free, this is a chargeable attraction. We’ve not done it yet.
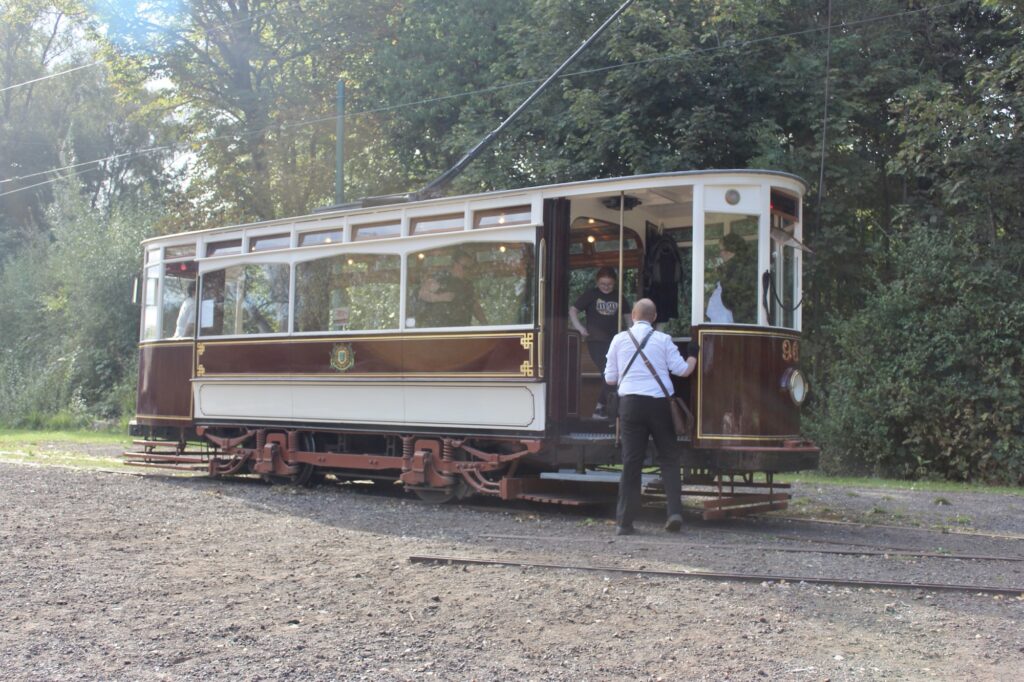
Trams
As well as having a dedicated stop on Manchester’s Metrolink tram network, there are heritage trams that run on a short tramway within the park itself. This tramway is Britain’s only dedicated heritage tramway that still runs on original tram track, as it uses a short spur built by the original Manchester Corporation Tramways that runs into the park. It’s been extended a couple of times, most recently in 2011, and now runs from the edge of the park to the boating lake, over a distance of about half a mile. There are two depots, at each end, and one of these includes a small tramway museum inside the original waiting shelter.
Tram services usually run at weekends in the summer. The heritage trams all come from the north of England – some from Manchester but others from Blackpool.
Heaton Park Animal Centre
Behind the hall’s old stables block, which is now a café and toilets, is the Heaton Park Animal Centre. This would have been the farm for the hall in its heyday, and nowadays a range of animals live there. They’re mostly farm animals – chickens, sheep, pigs and donkeys – but there are some alpacas and a tortoise there too. Like the rest of the park, entry is free although its opening hours are limited to 10-4. Whilst not as impressive as places like Cannon Hall Farm, it’s nice to pop in and see the animals.
Boating lake
There’s a large lake towards the southern tip of Heaton Park, where you can hire a boat for 25 minutes at a time. There’s a choice of boats – some are electrically powered, but you can opt for a swan-shaped pedalo or a traditional rowing boat. Prices range from around £15-30 and ideally you should book ahead.
In the summer, Heaton Park becomes an outdoor events venue – Oasis had their homecoming gig there last year.
Overall, Heaton Park offers enough for a full, varied day out – especially in summer. And, unless you need to pay for parking, the majority of what it offers is free. This is really important, in an age where lots of family activities cost increasing amounts of money. Whilst we often visit properties operated by the National Trust and are happy to pay for our annual membership, it’s really important that everyone has access to safe leisure activities and green space.
Accessibility
If you struggle with stairs, then you should still be able to get around most of the park as there are few steps. However, it is on a hillside, and some slopes may present a challenge for some powered wheelchairs. Disabled toilets are available, and there is a Changing Places toilet at the pavilion by the lake.
There are five car parks spread around the edge of the park. The largest of these is the Lake Car Park, with 263 spaces and a much larger overflow. We tend to use the Hall Car Park, which is closer to the hall, stables and animal centre and offers 252 spaces. All car parks have disabled spaces. Parking is pay and display, or using the PayByPhone app, and typically costs up to £4 to park all day.
The Golf Car Park, which is on the eastern tip of the park, is the only one with electric car charging facilities. It offers two 7 KW AC chargers on the Be.EV network; payment appears to be by app (including Zapmap and Electroverse) or RFID card. I haven’t used this one myself – as mentioned, it’s about a half hour drive for us. If you need a rapid charger, then there are several available around the perimeter of the park, including a 150 kW charger with five bays just off Junction 17 of the M60.
As mentioned, Heaton Park is served by Manchester Metrolink, with regular services on the Bury line. The tram stop is on the western edge of the park, across a road. Trams actually pass underneath the southern tip of the park in a tunnel.
We’re now six months into our electric car adventure. We do the vast majority of our charging at home – indeed, between September and December, we didn’t need to use a public charger once. But when we do need to use one, there can be multiple ways to pay. This blog post compares the three main ways: phone apps, RFID cards, and card payments.
Phone apps
Years ago, someone I knew had bought the then-new mark one Nissan Leaf. We’re probably talking ten years ago here, so back then public charging infrastructure was a long way behind what it is now. On the whole, he was really happy with his electric car, but he said his biggest gripe was the need to have a range of different apps to use with public chargers. I suppose it’s the same problem with parking apps.
Whilst many public chargers, especially the rapid ones, will accept other forms of payment, for some, using an app is the only option. On my phone, I have seven apps for paying for charging, although some are apps like Zapmap and Octopus Electroverse (which I compared here) which are primarily designed to help you find charging points. It just so happens that they also allow you to pay for your charging at many of them too. Indeed, I could probably yeet some of the brand-specific apps from my phone, as Zapmap and Electroverse support them directly.
That being said, some charging networks like Gridserve say that you will always get their best charging rate with their app, so it may be cheaper than other payment methods. Others, like Instavolt, offer sign-up incentives for using their app. For example, if you sign up with my referral code, dUmpH (charming), we’ll both get a £5 free credit the first time you charge 10 kWh using the app.
There are chargers I have encountered which would only work with an app. A good example is when we went to Portmeirion, where the chargers only worked with the Monta app. I now use Monta with my home charger thankfully so this app gets to stay. But having to download an app, which can be around a hundred megabytes, on a weak mobile data connection when you’re stood in the rain somewhere, isn’t a great experience.
A key advantage of using apps over the other methods is that you can usually track the progress of your charge on your phone – especially at rapid chargers. This is handy if you’re using the time your card needs to charge for other things, like having lunch at a motorway service station. Some even use the Live Tiles feature of iOS to show the status on your phone’s lock screen.
RFID cards
Another option is to use a Radio-frequency identification card, or RFID card. This is a credit-card sized card that you can order from a variety of providers. When you get to a charger, you can usually just tap the card on the chargepoint, and it’ll bill your chosen provider for your charge.
These are accepted by just about all rapid chargers, but also some slower ones. I recently used a charger on the Blink network, which accepted payment either by RFID card or app, but not by card payment.
Zapmap, Electroverse and some others will offer to send you an RFID card by post – and in the case of Electroverse, you won’t need to pay for it. You should only need one RFID card too; I’ve yet to find any chargers that would accept an RFID card from one company but not another. When I use my Electroverse card, I can also track my charge in the Electroverse app.
Overall, I find that RFID cards are more convenient than using apps, but I have found some chargers to be fussy about them. As in, they work fine when you use a payment card, but not with an RFID card.
Payment cards
Every rapid charger that I have encountered will also happily take a credit or debit card as payment. This works in a similar way to self-service pumps at petrol stations – your card is pre-authorised with a certain amount before you start, and then the actual amount is billed at the end.
Some slower AC chargers also now take payment cards, which is handy. Almost everyone has some form of payment card on them, or a phone that can make payments, and so it’s the most convenient option for most people. No apps to download or a special RFID card to send off for – you just pay for charging in the same way that you would pay for fuel.
As for the downsides? Generally you can’t track your charge on your phone, in the way you can with the apps. Some chargers may also charge a higher unit rate for using payment cards, rather than their own app. And some chargers only take contactless cards; whilst I doubt that’s an issue for many, you may need to use Apple Pay or Google Pay if you need to charge up beyond your contactless limit, or if you have made too many previous contactless payments in succession.
So what do I use?
Obviously there are some chargers where you don’t get a choice of method – they will only accept one payment method and you have to go with that. However, when I do have a choice, I tend to go for an app (if I have it) or my RFID card. I appreciate being able to check in the progress of the charge using my phone, and sometimes using an app is cheaper. I suppose if I was in a rush, then I would probably just use my debit card if that was the option though.