Seeing as it’s UK City of Culture this year, and theatres are places where you can see cultural things, how many theatres are there in Bradford? I think there’s eight, and here’s a list.
By the way, I’m defining Bradford as the area within the A6177 Bradford ring road. That means that I’m not including the theatres and arts centres in Ilkley, Bingley and Keighley that are in the wider City of Bradford district. And I’m defining ‘theatre’ as anywhere with a stage and seating that can be used for performances.
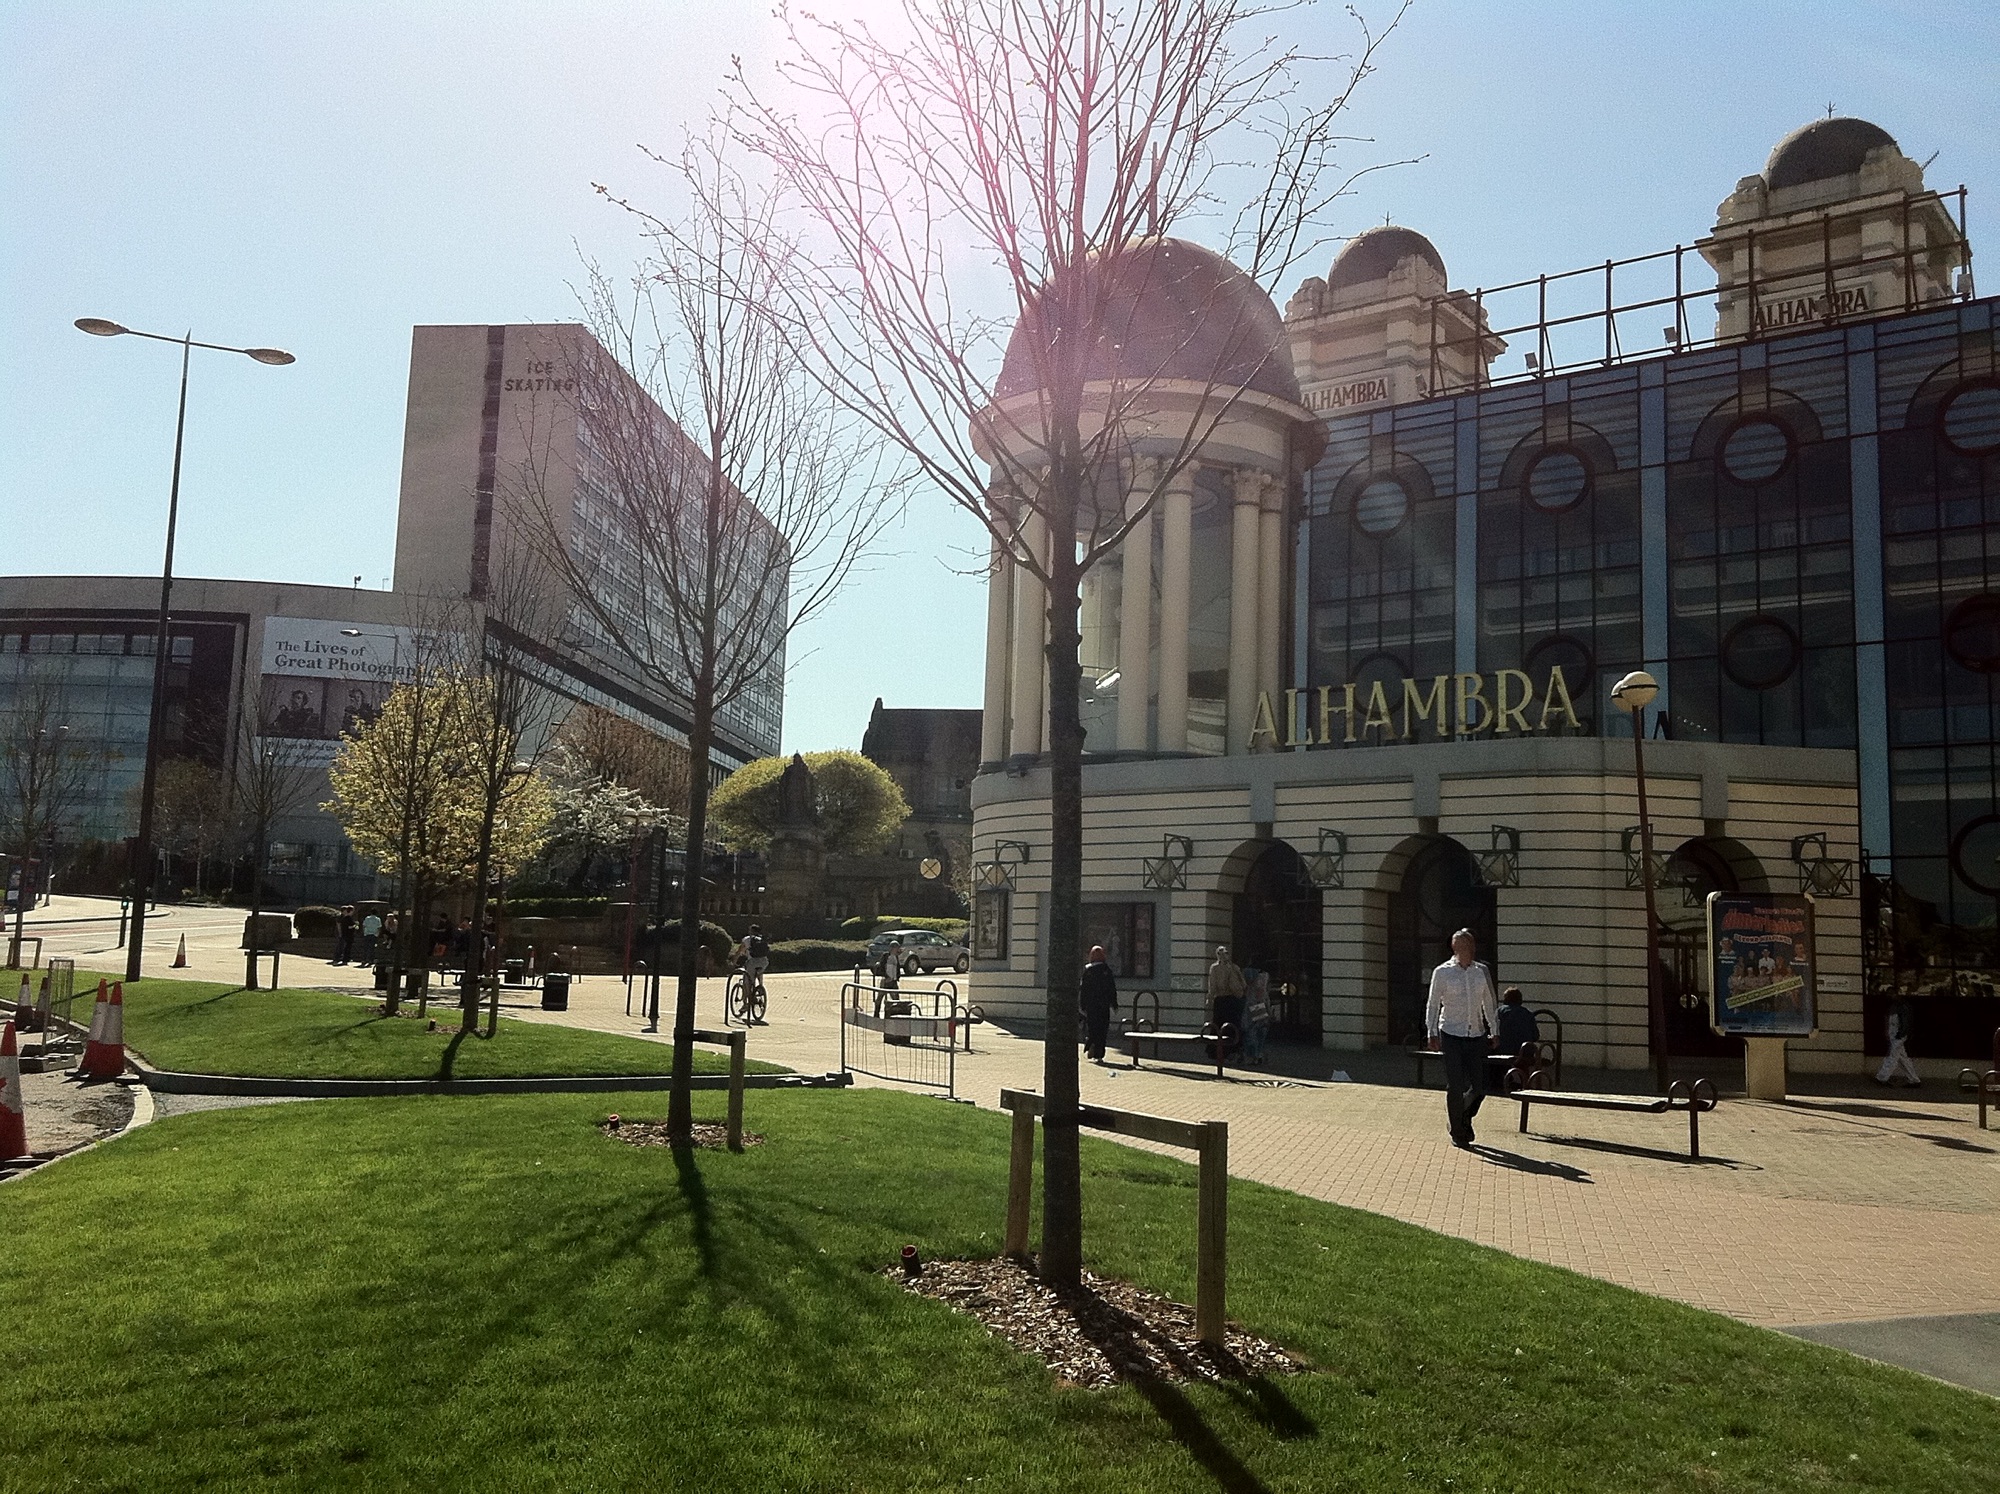
1. The Alhambra Theatre
Probably the best known theatre in Bradford is the Alhambra Theatre in the city centre. Opening shortly before the First World War, and extensively refurbished in 1986, it seats 1456 people and is where most major shows take place. It’s Grade II listed, and next month it’ll be hosting the touring production of Matilda, Tim Michin’s musical adaptation of the Roald Dahl novel. Earlier this month, it hosted the annual CBeebies Pantomime which will be on TV and BBC iPlayer this Christmas.
The last show we saw here was Unfortunate, last year, but we may well go to see Matilda as it’s a favourite in our household. It’s a Grade II listed building.
2. The Studio
Right behind the Alhambra Theatre is The Studio. As the name suggests, it’s a ‘black box’ studio theatre with a movable seating rig. This can seat up to 200, and is used for smaller productions and stand-up comedy. We saw George Egg here 10 years ago, but haven’t been to another show since.
3. Theatre in the Mill
Okay, disclosure alert: The Theatre in the Mill is run by my employer, the University of Bradford. As the name suggests, it’s in part of what was the Phoenix Mill, and now forms one of the university buildings. Like The Studio, it’s a black box studio theatre with movable seating, and seats around 100 people. Its programme of events includes stand-up comedy – both performances and workshops – film screenings and shows. I’ve also been to a number of student shows here over the years, but as Bradford isn’t really a performing arts university, there currently aren’t many of these.
4. Siobhan Ullah Performance Space
Next door to the university is Bradford College, which is home to Bradford Arts School, and in turn, the Siobhan Ullah Performance Space. Although it’s primarily used by the college students, it can also be used for events and seats 125 people. Again, it’s a black box studio theatre. It’s named after a former performing arts student of the college who sadly died of an asthma attack, aged just 18. I haven’t been to this theatre before.

5. Bradford Live
Back down towards the city centre, and next door to the Alhambra is Bradford’s newest and biggest performance venue, Bradford Live. It only opened this summer, and seats over 3000 people. It’s hosted in what was the Victoria Theatre, and later and Odeon Cinema which closed in 2000, and laid empty for almost a quarter of a century. Indeed, it survived a plan to demolish it in the late 2000s, and has now undergone a huge amount of restoration. It’s not currently a listed building.
As the name suggests, Bradford Live is more about live events and will be hosting a number of bands in coming months. Ocean Colour Scene are playing next month, as is CBeebies entertainer Justin Fletcher, and the Kaiser Chiefs are playing their first album in full in the new year. But there are some shows that you would typically expect in a theatre playing there too, such as Bluey’s Big Play, which I’m sure we’d be dragged to if our nine-year-old was a bit younger. We haven’t yet been here.
6. Bradford Arts Centre
Okay, technically the Bradford Arts Centre is even newer than Bradford Live, having opened under its current name as recently as this month. Previously, it was known as Kala Sangam, with a focus on South Asian arts. Its new name reflects its broader remit and engagement across all of Bradford’s populations. It’s located at what used to be Bradford’s crown post office at Forster Square, around the back of the Broadway shopping centre and next to Bradford Cathedral. The building is Grade-II listed.
There are several spaces in the arts centre, including a 200 seater studio theatre. We’ve been once, to see a pantomime that a friend was in about 10 years ago.
7. Bradford Playhouse
A few years ago, I used to volunteer at the Bradford Playhouse, and so it’s come up on here a few times. It was at risk of closure in 2014, but is now flourishing and is now fully accessible, following a successful crowdfunder early this year. The theatre offers two spaces: an art deco main auditorium seating up to 265 people, and a smaller black box studio theatre, seating up to 40 people. It hosts a mixture of professional shows and performances by amateur dramatic societies and dance schools. The building isn’t listed, but it was registered as an Asset of Community Value for five years in 2014.
8. St Georges Hall
Like Bradford Live, St Georges Hall is more of a live events venue than a theatre, with stand-up comedy and live bands. It’s also the oldest on this list, having opened in 1853. At one time, over 3000 seats were squeezed into the space, but nowadays its seating capacity has been reduced to 1335, or 1550 for standing events. It’s Grade II* listed, and was renovated between 2016 and 2019. The last show we went to see was a recording of I’m Sorry I Haven’t A Clue in 2014.
I think that’s quite an impressive list of theatres, actually, considering Bradford’s size.


