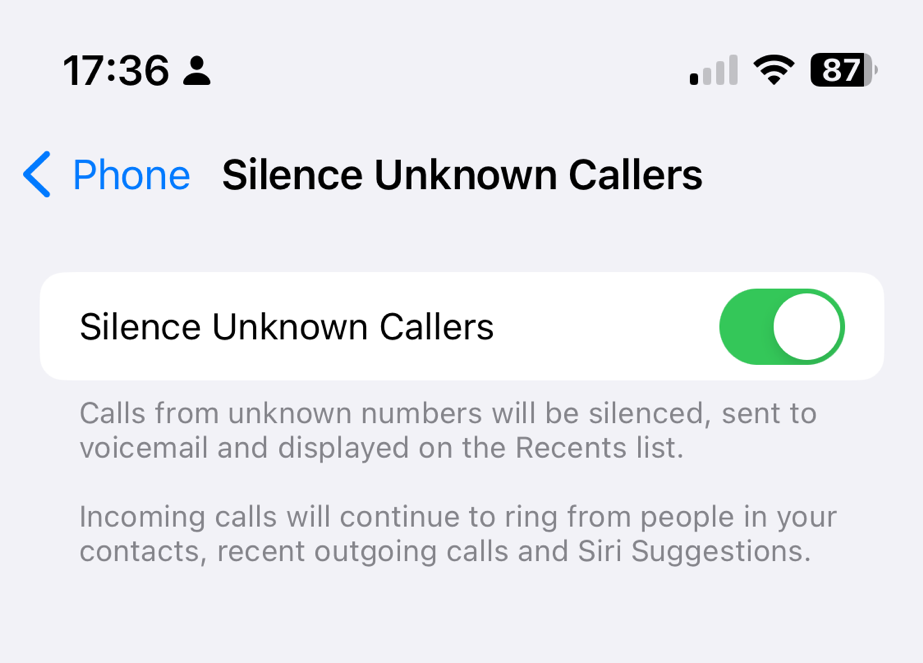
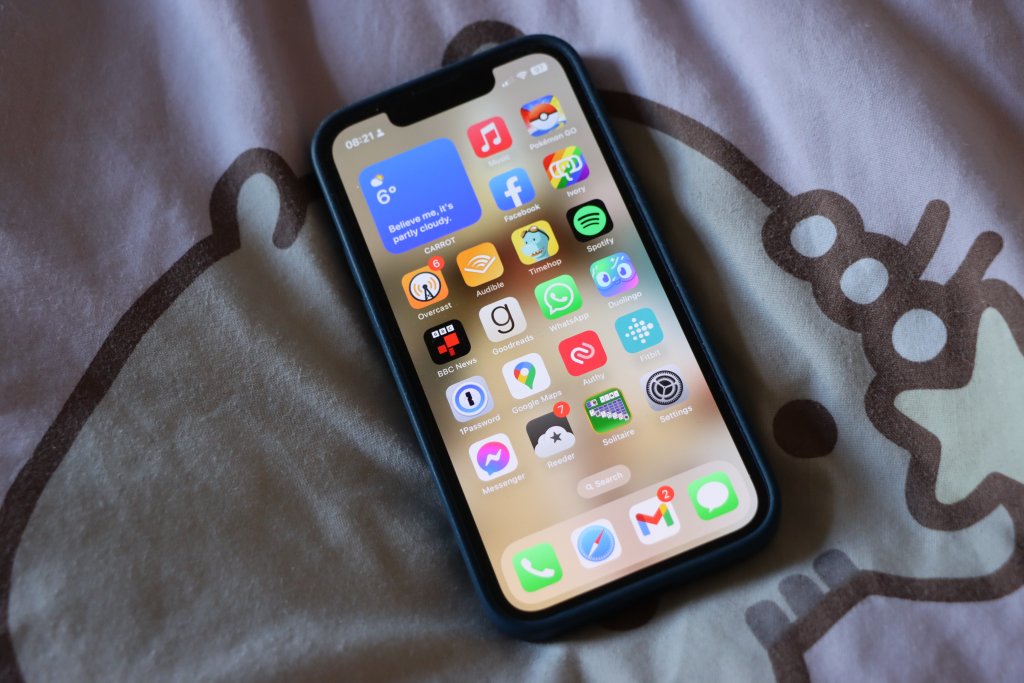
Over recent weeks, I’ve been plagued by calls from numbers not in my contacts. Sometimes, as per the screenshot, I’ll get three calls from three different UK mobile numbers within seconds of each other. So, I’ve enabled Silence unknown callers on my iPhone.
I made a mistake by answering the first call, and it turned out to be some kind of cryptocurrency scam. However, it wasn’t just a random dial; they had my name and email address as well as my phone number. This suggests that they’ve hoovered up my personal data from a previous breach – possibly the Patreon breach of 2015, but there have been many others.
Since then, I’ve been getting three or four calls at a time, usually twice per day. It’s a different number every time, so whilst I may have not been fully convinced it was a scam when I answered the first time, I am convinced now. I’ve tried to hide the numbers in the screenshot because the numbers have almost certainly been faked and probably belong to innocent people. It also suggests to me a deliberate effort to get around call blocking apps like Truecaller, for which I have a premium subscription.
What this means is, if people call me, my phone will only ring if the number is in my contacts, if I’ve called it recently, or it’s a ‘Siri suggestion’. The latter could include numbers in recent text messages and emails, for example.
If you want to enable this yourself, open Settings on your iPhone, go to Phone and then scroll down to ‘Silence Unknown Callers’.
I’ll keep this on until the random calls stop. At the time of writing, they’ve slowed down but haven’t stopped completely. Maybe they’ll get the hint in time.
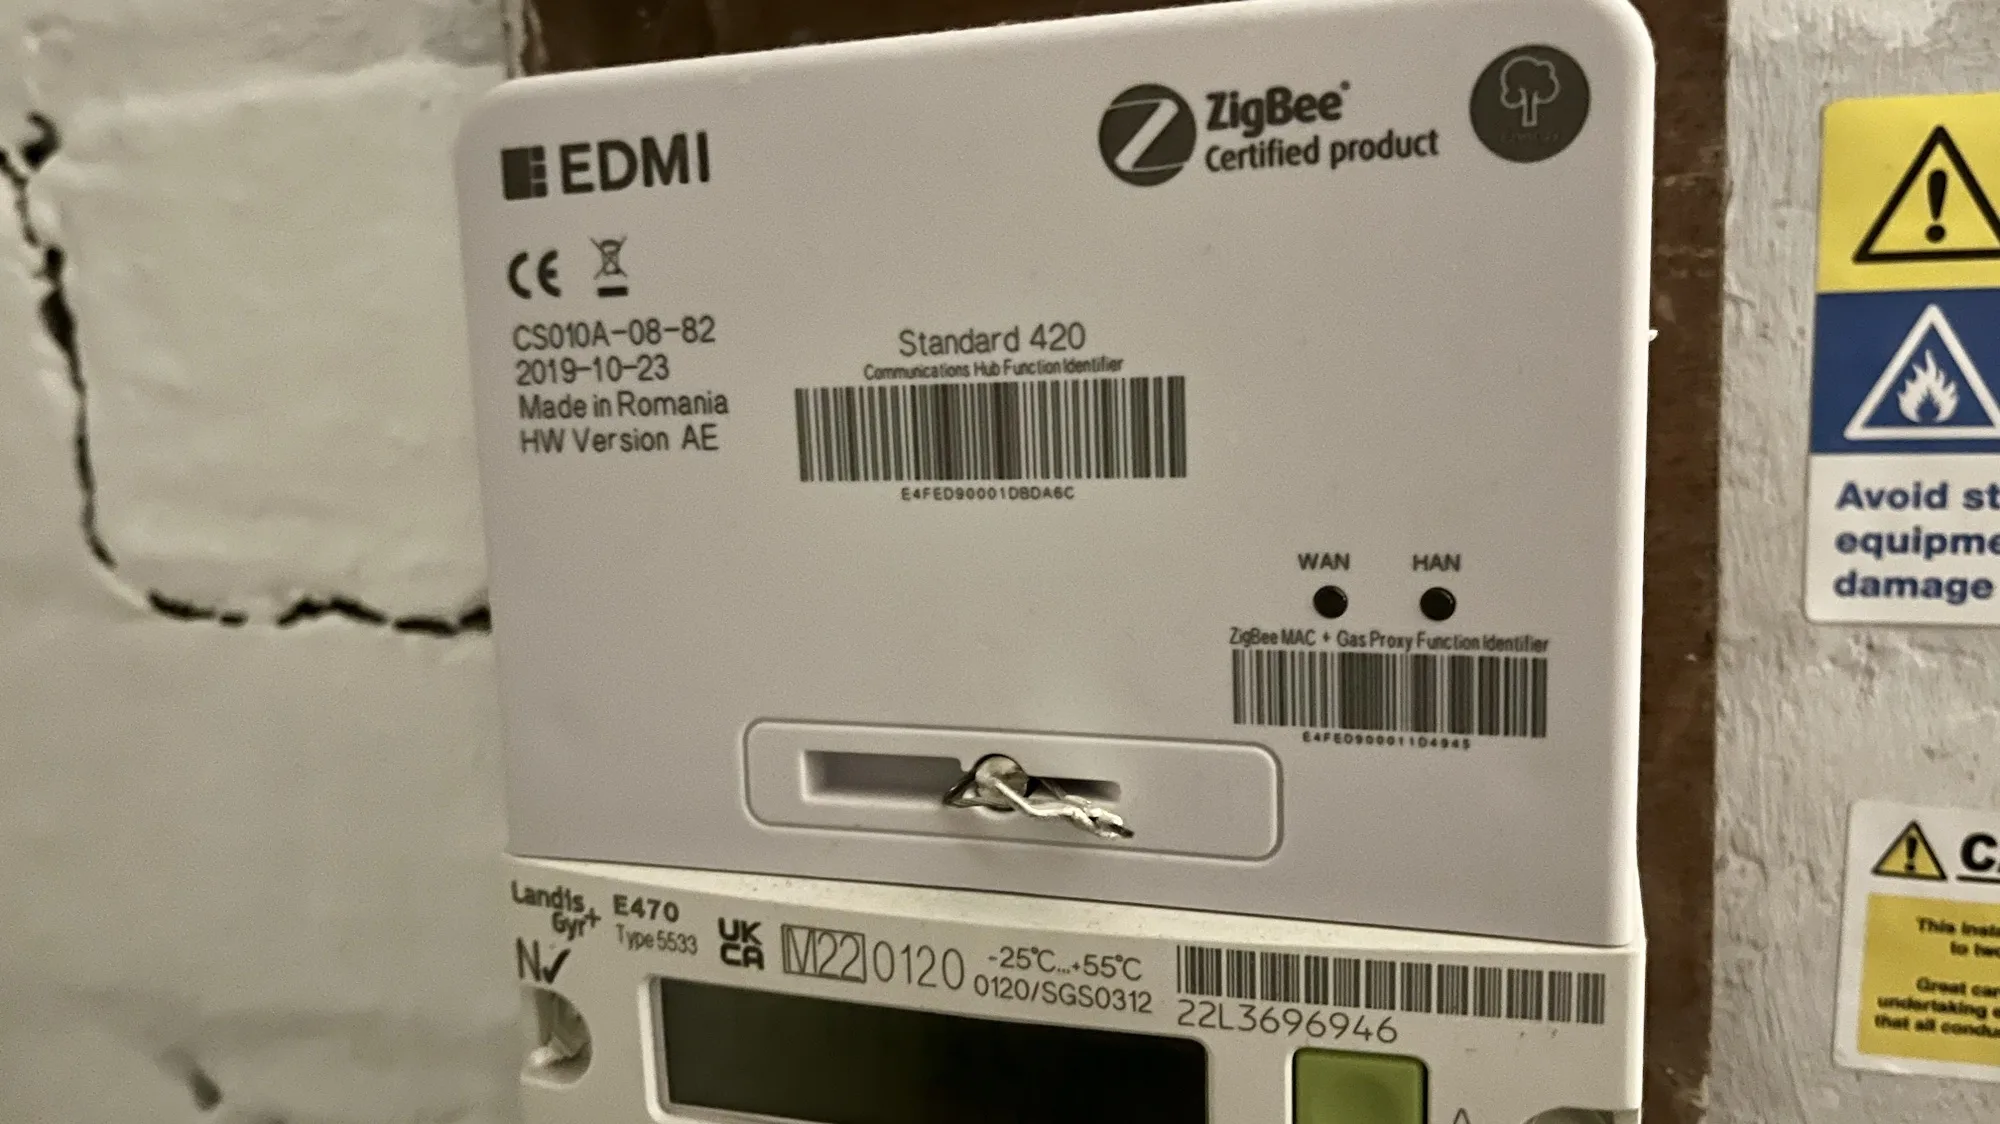
If you’re in the UK, and have a smart meter, then your home probably has a Zigbee network that you may not know about.
What is Zigbee?
Zigbee is a wireless mesh networking protocol, that is commonly used for smart devices. If you have smart lightbulbs, such as the Ikea Trådfri or Philips HUE range(sponsored link), then Zigbee is what these devices use to communicate with their hub.
Zigbee isn’t the same as Wifi. Wifi devices belong to the 802.11 family of IEEE standards, whereas Zigbee is in the 802.15 family . There’s a difference at the hardware level, so a device that supports Wifi can’t use Zigbee unless it has a specialised chipset. However, there is commonality between the two; like Wifi, Zigbee uses IP addresses, and operates on the 2.4 GHz band.
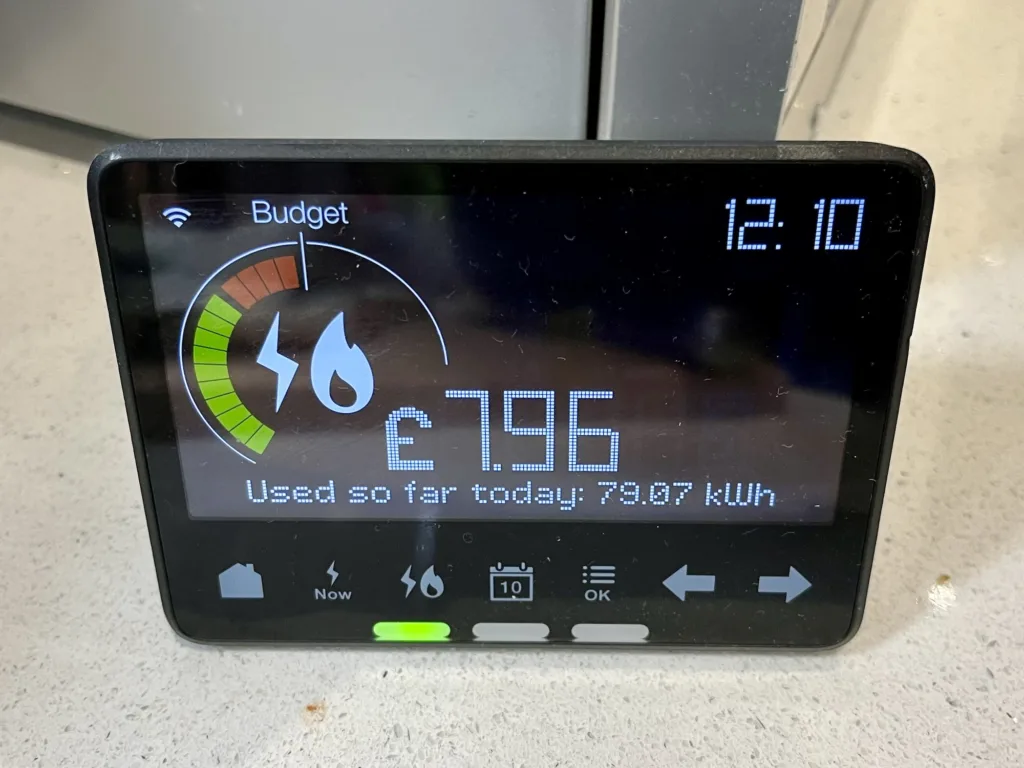
If you have smart meters for your electricity and gas, then these will use Zigbee to communicate with your IHD (In Home Display). This is the small device that shows your current and daily usage.
Can you access this Zigbee network?
No. Even if you have a device with Home Assistant and a Zigbee dongle, it won’t be able to see the Zigbee network that your meters and IHD use. I suspect this is because your electricity meter has its own SIM card, to access the internet to send your readings. If you could access this Zigbee network, then it may use your electricity meter’s internet connection and not your own.
Update (January 2025): Depending on where you live, your smart meter may not actually have a SIM card. If you live in Wales, or central and southern England, then it will have a SIM card and will send your data using 2G or 3G internet services on O2’s network. However, if you live in Scotland or the north of England, as in north of the M62 corridor, then your smart meter will send data on the 400MHz band. This offers lower bandwidth, but higher range, and more likely to penetrate the insides of houses in remote areas. We have the latter type of smart meter, as we live just north of the house in the middle of the M62.
There are, however, some devices that will bridge between this Zigbee network and your own Wifi network at home. Some newer IHD devices offer this, and if you’re an Octopus Energy customer, you can join the waiting list for the Octopus Home Mini. I joined the waiting list a few months ago, but I haven’t heard anything yet. Meanwhile, you can also buy a Glow CAD (Consumer Access Device) for £65, which can connect to Home Assistant. Alas, it’s out of stock at the time of writing.
Another option for Octopus Energy customers is this Home Assistant addon, which brings in your usage data. However, it updates half hourly unless you already have an Octopus Home Mini.
Other ‘secret’ networks in your home
In our home, we also have a couple of Thread networks. Thread is related to Zigbee in that it’s also in the 802.15 family, and is arguably a successor. Nest developed it to enable their smart thermostats to talk wirelessly to the heat link that connects to your boiler, so this makes one network. Newer Nest thermostats can act as a Thread Border Router and so other devices using Matter can connect to it, but we have an older model.
We also have a pair of Google Nest Wifi devices (a hub and a point) which use Thread to communicate with each other. Google has updated these to offer a Thread Border Router, and so I’ve been able to access this with Home Assistant, ready for when we have some Matter compatible devices. So at least I can access one of the three non-wifi networks in my home.
Further reading
Whilst researching this, I came across this Hacking Your Smart Meter (Part 1) article, although there doesn’t appear to be a part 2. Instead, the author, Terence Eden, uses an API from his energy company as above.
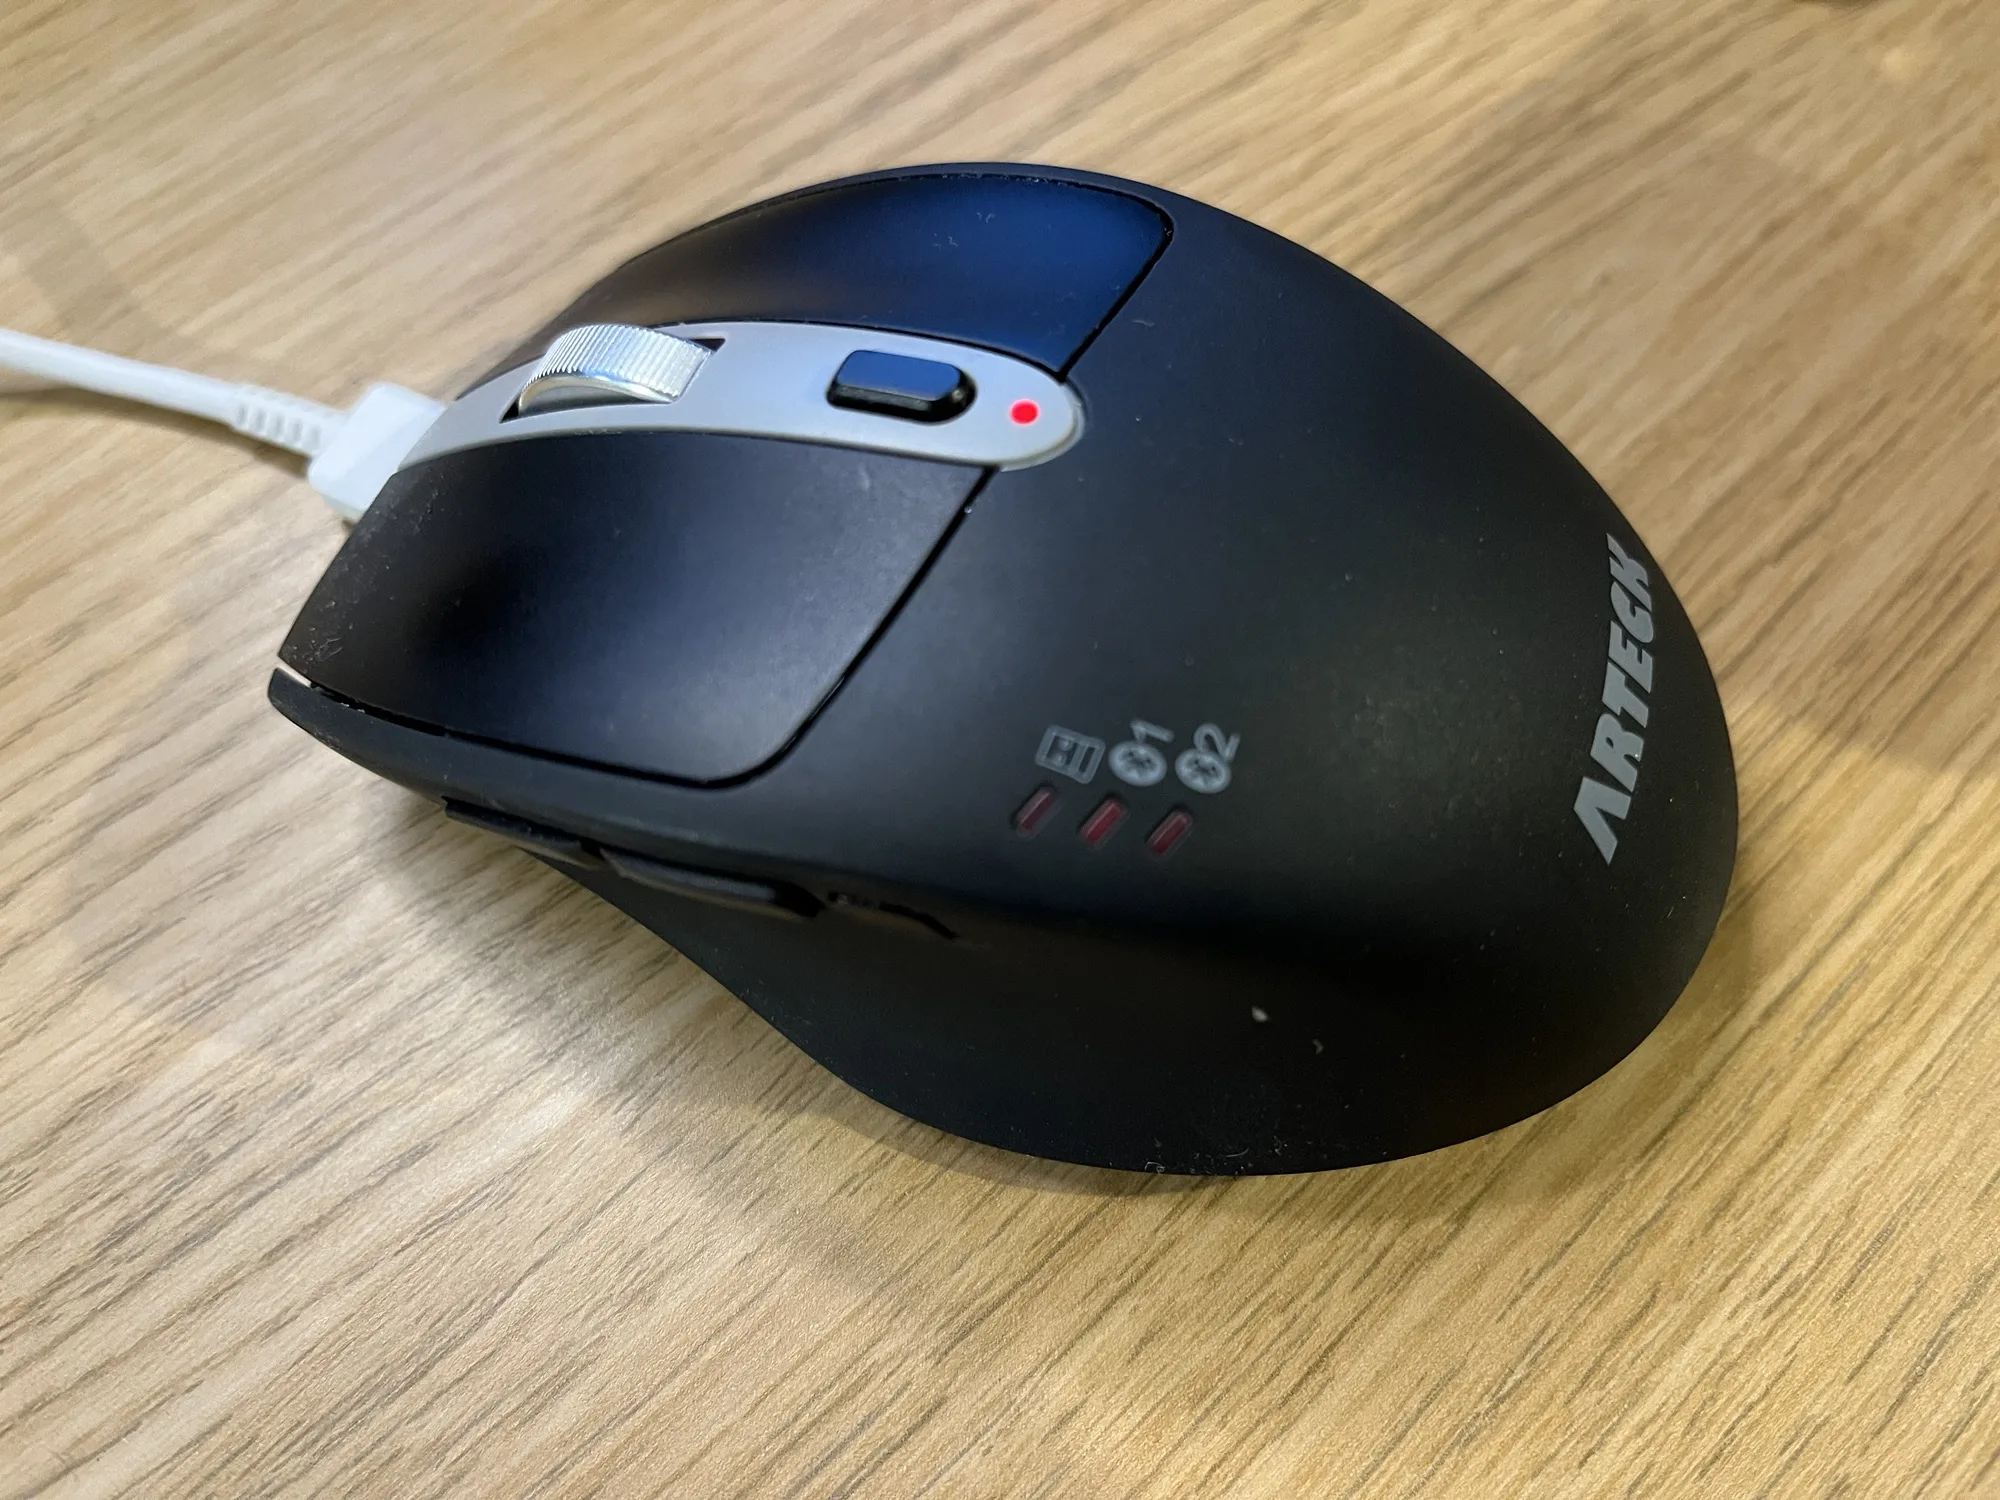
I bought it so that I could use it both with my desktop, and my iPad – because yes, you can use a mouse with an iPad. It supports two Bluetooth devices, and can connect to a third using an RF USB dongle. I use the dongle with my desktop, as RF uses less power. Switching devices is as simple as pressing a button on the side.
As a mouse, it works quite well – clicking is quiet, and I’ve been using it for almost 18 months with no complaints. It’s a comfortable size too – not as big as some mice, but larger than some laptop mice. However, this model is designed for people who are right handed; I had a look for left-handed multi-device mice on Amazon but couldn’t find any.
The battery life is also really good – I recharge it about every three months. It has a built-in battery which charges using a USB-C cable, and this plugs in at the top so that you can still use it whilst charging. This makes it better than Apple’s Magic Mouse, which has its Lightning connector on the bottom and so can’t be used while charging. The USB-C port is just for charging though; it won’t turn your mouse into a wired mouse. There is also a small slide-out compartment to store the USB RF dongle if you’re not using it.
As well as the device switch button on the left side, there are two additional buttons which, by default, act as back and forward buttons in a web browser.
Whilst I’m sure there are other multi-device mice out there, this suits my needs and has worked well for me. It’s reasonably priced at around £19, at time of writing.
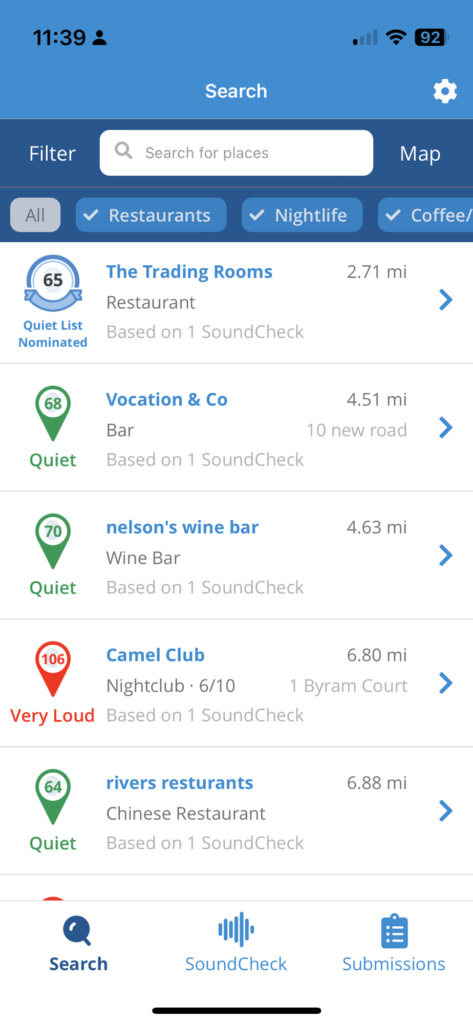
Today I want to share with you an app called SoundPrint, which is an app for finding quiet spaces to eat and socialise.
You can install the app on your phone (iPhone and Android), and it’ll pop up a list of places nearby where other SoundPrint users have done a brief sound test. The venue database is from Foursquare, a site where I’m a superuser and still an active user of its Swarm app.
Incidentally, Swarm came in very useful when writing my review of 2023 and 2023, quantified, as I could see exactly where I had been all year.
Using the SoundPrint app
You don’t have to register an account if you’re just browsing to find a venue. However, if you want to contribute your own sound checks, then you can register an account. A sound check is as simple as holding your phone up for 15 seconds to measure the noise levels, and then telling SoundPrint where you are. You can also specifically recommend places for SoundPrint’s ‘Quiet List’ if they are particularly quiet, and submit noise complaints for very loud venues. SoundPrint will try to reach out to such venues with suggestions for how they can become quieter.
That being said, SoundPrint isn’t just for people who have hearing loss. If you are autistic, then you may benefit if you find noisy places overwhelming. I can see my wife using this app as well, as though she has good hearing, she struggles in noisy environments.
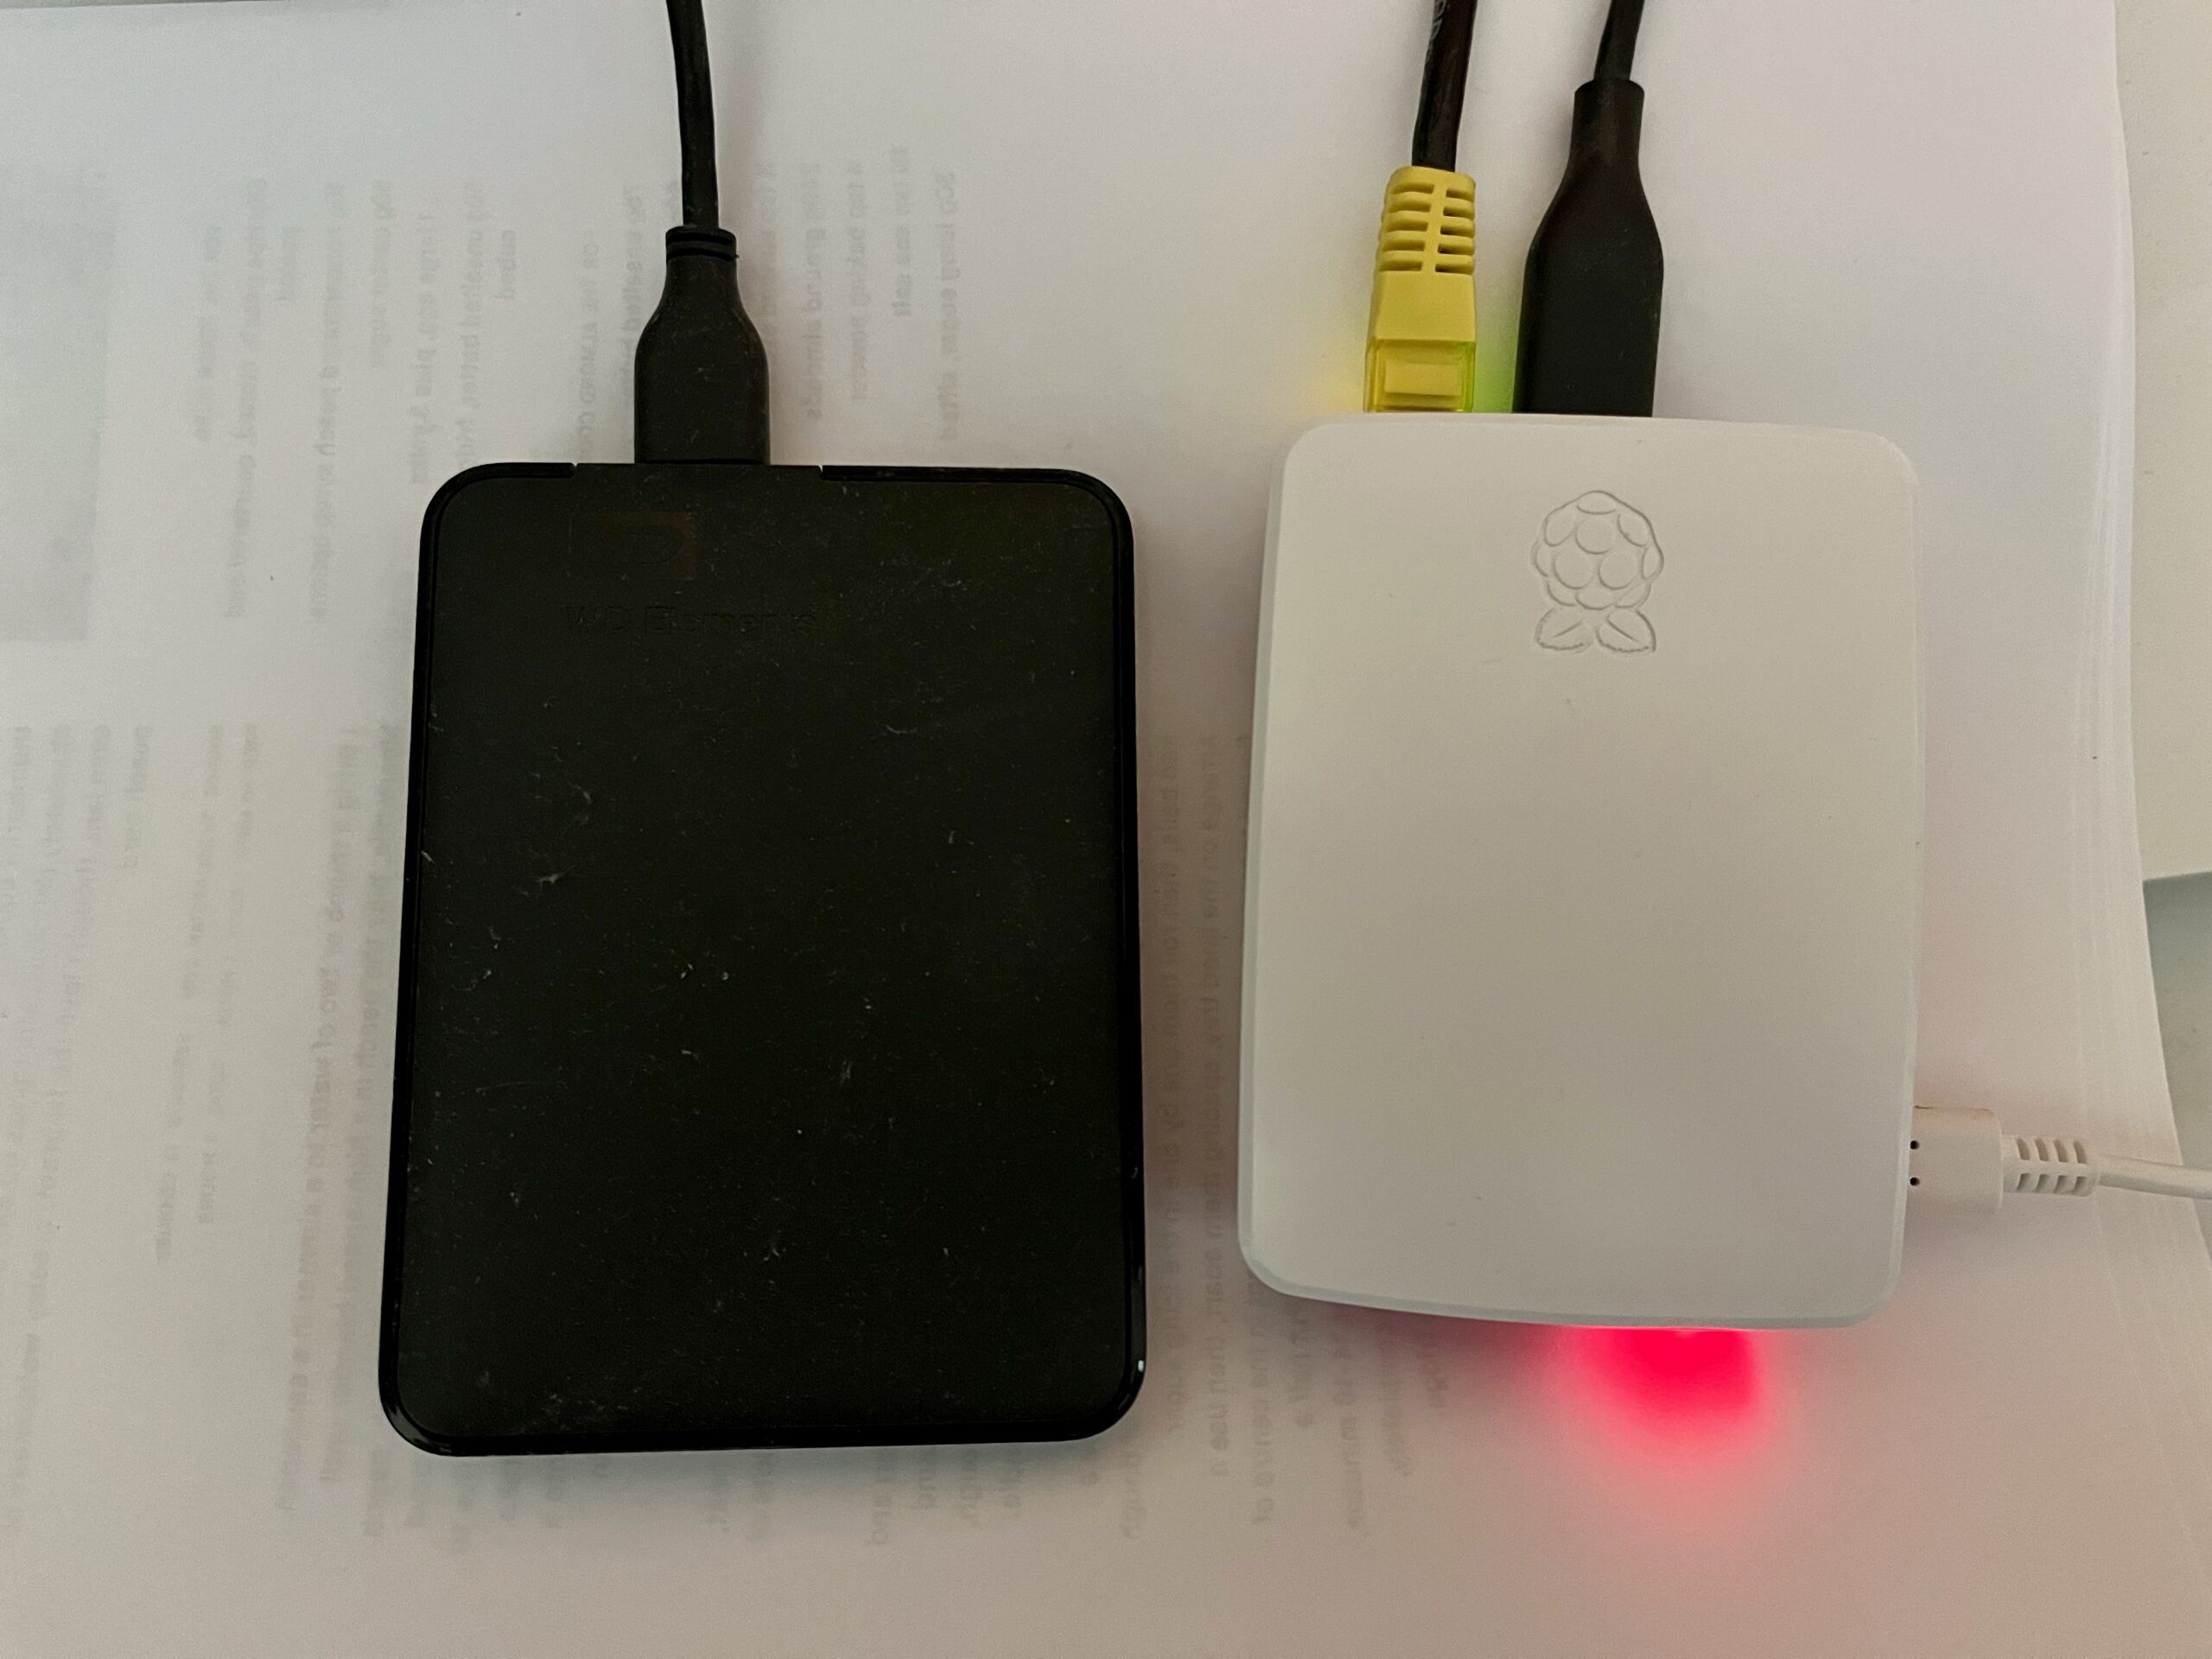
As you’ll be aware from my regular posts about it, I have a Raspberry Pi 4 running Ubuntu Core, which acts as a server for Home Assistant, Plex and Calibre-Web. Here’s how I’ve set it up to mount an external USB hard drive on boot up.
As it’s a Raspberry Pi, the operating system and binaries set on a microSD card, which in this case is a mere 16 GB. Whilst the me of 20 years ago would have been astounded at the concept of something so tiny holding so much data, 16 GB isn’t much nowadays. So, I have a 1 TB external USB hard drive for storing the media files for Plex and Calibre-Web.
Ubuntu Core doesn’t automatically mount USB storage devices on startup unless you tell it to, and the instructions for doing so are different when compared with a regular Linux distro.
There’s no fstab
Most Linux distros, including regular Ubuntu, include fstab for managing file systems and mounting devices. But Ubuntu Core is designed to be a lightweight distro to act as firmware for Internet of Things devices, and so it doesn’t include many tools that are common in other Linux distros. fstab is one such tool which is missing.
You can, of course, just mount a USB drive manually with the following:
sudo mkdir /media/data
sudo mount /dev/sda1 /media/data
But this won’t persist when the computer restarts. After a bit of searching, I found a solution on StackExchange; it’s for Ubuntu Core 16, but works on 22 as well.
How to tell systemd to mount your USB hard drive
It should go without saying that you should back up your system before doing any of this. If you make a mistake and systemd stops working, your device could become unbootable.
Firstly, you’ll need to run sudo blkid to list all of the file systems that Ubuntu Core can see. Find the one that starts with ‘/dev/sda1’ and make a note of the long hexadecimal string that comes after UUID – it’ll probably look something like ‘2435ba65-f000-234244ac’. Copy and save this, as this identifies your USB hard drive.
Next, you’ll need to create a text file. Ubuntu Core only seems to offer the Vi text editor, which I haven’t bothered to learn to use properly. My favoured text editor is nano, but it’s not available on Ubuntu Core. Therefore, my recommendation is to create a file on another device and FTP it across. The file should be called media-data.mount; it’s really important the file name matches the intended mount point. For example, if you’re instead planning to mount the USB hard drive to /mnt/files, this text file would need to be called mnt-files.mount.
Here’s the template for the file:
[Unit]
Description=Mount unit for data

[Mount]
What=/dev/disk/by-uuid/[Your UUID]
Where=/media/data
Type=ext4

[Install]
WantedBy=multi-user.target
You’ll need to paste in the UUID for your USB hard drive where it says ‘[Your UUID]’. You’ll also need to match the file system type; I have my external USB hard drive formatted as ext4 for maximum compatibility with Linux, but yours may use ExFAT or NTFS.
This file needs to be saved to /etc/systemd/system/media-data.mount . You can either use vi to create and save this file directly or FTP it across and copy it over.
If you’ve done this correctly, then the next time you restart your device, your USB hard drive should mount automatically. If not, then you should receive some surprisingly helpful error messages explaining what you’ve done wrong.
So you may have noticed that I have a thing going on with Docker at present. I’ve set up Home Assistant in Docker, and more recently also set up calibre-web with Docker. Between these, and other Docker images, it’s quite a lot to manage – especially on a headless remote device. Thankfully, Portainer is a web-based solution to managing multiple Docker containers.
There’s a free community edition which offers sufficient features to manage one Docker system, which I’m using. If you need to manage multiple systems, there’s a Business Edition available that you need to pay for, but home users should get by with the Community Edition. Although you will see lots of greyed out options which are only available in the Business Edition – something anyone who uses a freemium WordPress plugin will recognise.
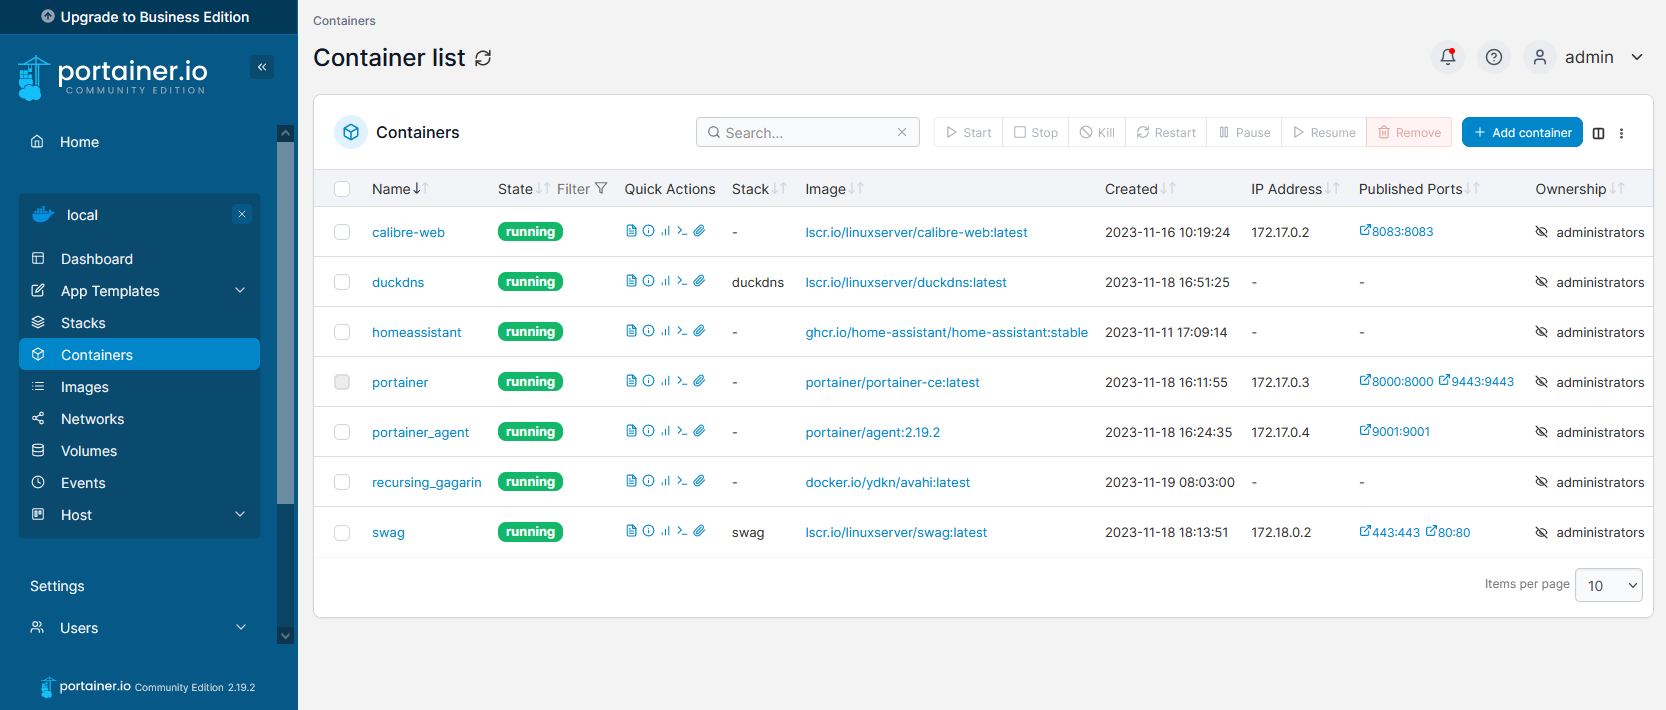
The installation instructions are detailed, and there are a number of steps that you’ll need to follow using the command line. Once everything’s set up, you’ll be able to open a web browser and see all of your Docker containers, and their status.
Portainer lets you start, stop and restart containers from the web interface, and delete any containers no longer needed. The feature that I’ve found most useful is the ‘Duplicate/Edit’ function, which allows you to easily duplicate a container, and optionally replace the original container with a new one with updated variables. This is great for people like me who invariably make a mistake when setting up a Docker Compose file. Logs are also made easily accessible, which helped me when troubleshooting a container that was starting but then wasn’t accessible through a web browser.
You can also run new containers in Portainer; whilst this is easier than typing out commands, Docker Compose works better for me as you can just copy and paste them.
If you’ve got a few Docker images up and running, I would recommend Portainer as an easier way of managing them. It’s much nicer than having to type out commands in a ssh session, and is a friendlier way of working with Docker for less experienced users, like myself.
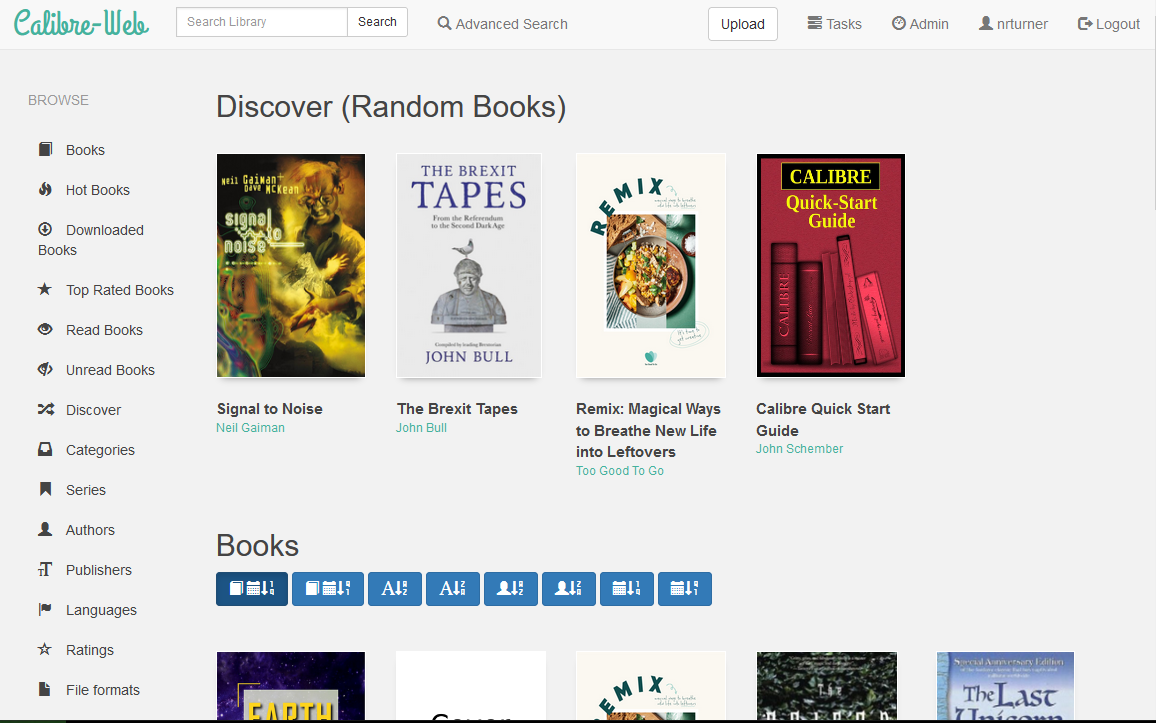
If, like me, you’ve picked up a number of e-books over the years, you may use Calibre as your e-book manager. It’s a desktop application with an optional web interface, but it has its drawbacks. The user interface is clunky, and it tries to cram lots of advanced features in – even the latest version 7 is overwhelming for new users. So, if you can forego the desktop application, there’s an alternative called calibre-web that does the same thing in a web browser, and with a much nicer interface.
Once installed, you can migrate your existing metadata.db from Calibre and the e-book folders, and calibre-web will pick up where you left off. I particularly like the ability to download metadata from sources such as Google Books, to get more complete data about each book besides its author and title. There’s a built-in e-reader, or you can use an app that supports OPDS – I used Aldiko.
By far the easiest way to install it is using Docker. There’s a good image on DockerHub; it’s maintained by a third-party but recommended by calibre-web’s developers. Once installed, it doesn’t require much additional configuration.
By default, calibre-web doesn’t allow uploads, but you can amend this in the Admin settings. The settings toggle s rather buried away, and it took me some time to find. But once uploads are enabled, it allows you to completely replace the desktop Calibre app if you want to. You can also set up multiple user accounts, if you want to share your calibre-web server with others.
I have calibre-web installed on the same Raspberry Pi as my Plex and Home Assistant servers. Indeed, calibre-web essentially offers a kind-of Plex for e-books, seeing as Plex doesn’t offer this itself. Unfortunately, most of my e-books were purchased through Amazon, and so only accessible through their Kindle apps and devices. But for the handful of books that I’ve picked up through the likes of Unbound and Humble Bundle, it’s helpful to have them in one place.
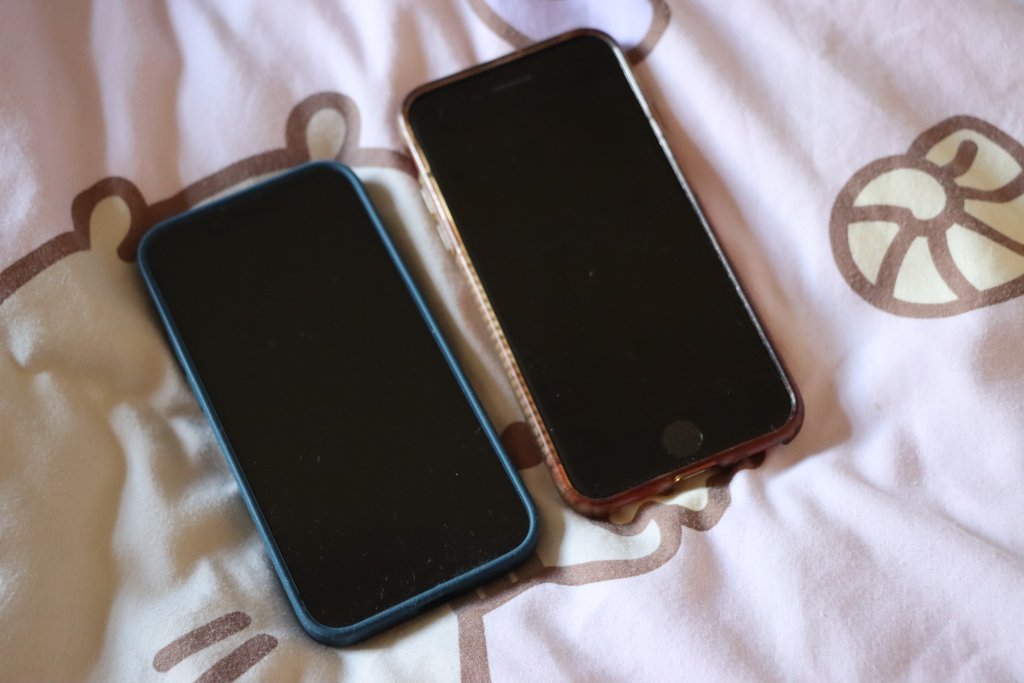
iPhone 13 Mini (blue, 128 GB), bought in spring 2023
As you can see, with each model I’ve kept it a little longer than the previous one. Before my first iPhone, I would generally keep a phone handset for 18-24 months at a time, and indeed that was the case with my first iPhone – it was on its last legs by the time I traded it in. Its replacement, the iPhone 5 laster a little longer but I had issues charging it after a while. The iPhone 5s laster slightly longer again, but in the hot summer of 2018 its battery started expanding and the back was coming away from the phone body, so I decided it was high time for a replacement.
I was hoping to get my iPhone 8 to make it to five years, and in late 2021 I even had the battery replaced to give it some extra life. Alas, this new battery was also starting to wear out – I would have to recharge my phone more than once a day to get through.
Whilst I could have had yet another new battery fitted, I suspect that Apple won’t support such an old model much longer with new iOS updates, and they were offering up to two years 0% finance on new models. I’m not eligible to upgrade with my current phone network, as I’m on a 2 year fixed SIM-only contract, so buying the new phone direct from Apple on 0% finance seemed like the best option.
Apple conveniently provides a Compare iPhone models tool, and so I was able to decide between the various models on offer to work out which was best for me. As you may note from the above, my purchases of the 5s and 8 were at times when physically larger models were available, but I’ve generally preferred the smaller iPhone models. That pretty much ruled out buying an iPhone 14, as there’s ‘mini’ version available – and it was also £200 more than the iPhone 13 Mini.
Apple also offers its iPhone SE range, and the current third generation is essentially an iPhone 8 body with iPhone 13 internals. However, that means a smaller screen, and Touch ID rather than Face ID, as well as a more basic camera, slower 5G, less water resistance and no support for MagSafe, when compared with the iPhone 13 Mini.
The iPhone 13 Mini is also slightly smaller and lighter (albeit by a mere four grammes) than the iPhone SE. Despite this, the screen is bigger, as the bezel is smaller – it doesn’t need to accommodate the home button for Touch ID.
As for the iPhone 14, as well as it being too large for my liking and more expensive, it’s not much of an upgrade. Again, there’s an even better camera, the ability to make SOS calls via satellite, crash detection and slightly better battery life, but the processor is the same as the 13 Mini and SE; the only benefit is one extra GPU core.
Having had the new phone for a week, I’ve appreciated the extra speed, and the convenience of Face ID which seems to work well, even when I’m wearing glasses. The transfer process from old phone to new also went pretty well and I was mostly up and running on the new phone in a couple of hours – some of which was spent installing iOS 16.4. The new camera is also great and I’ve taken a couple of photos with the ultra-wide aperture lens (giving a fish-eye appearance).
Hopefully I’ll be able to keep this new phone going for the full five years. Whilst it’s always nice to have the latest and greatest device, I also appreciate the cost savings of not upgrading regularly. If everyone held onto their phones for several years, I’m sure there would be wider environmental benefits.
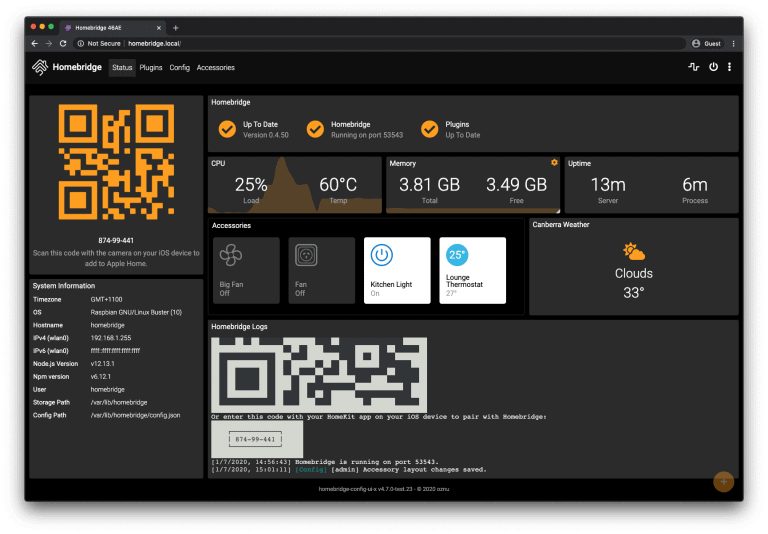
A recent project of mine has been to get Homebridge up and running. It’s a server-based program that acts as a bridge between smart devices in the home, and Apple’s Home app on iOS.
One thing, I don’t know why
HomeKit, the technology underpinning Home, is famously limited; whilst most smart devices support Amazon’s Alexa and Google Assistant, very few support HomeKit. Indeed, out of the various smart speakers, plug sockets, dishwasher, thermostat, smoke alarm and TV that we have in our house, it’s only the TV that natively supports HomeKit.
Whilst just about everything else (except the smoke alarm) supports Google Assistant, and the Google Home app, it would be helpful to be able to use these devices with Siri. For example, when I’m driving, I want to be able to use the Hey Siri command to turn the heating on, so that we don’t come home to a cold house.
I tried so hard, and got so far
There’s a few ways to run Homebridge. If you have money to spare, then by far the easiest way is to buy a HOOBS box. HOOBS stands for ‘Homebridge Out of Box System‘, and you’ll get a plug-in device with a customised version of Homebridge that is simple to set up. You can also buy HOOBS on an SD card, that can be slotted into your own Raspberry Pi. Or, you can just download the HOOBS SD card image for a donation of £10.
I have two Raspberry Pis – a RPi 400 which is our seven-year-old’s computer, and a RPi 4 which is my Plex server. The latter runs Plex under Ubuntu Core, a minimal version of Ubuntu Linux which doesn’t include a graphical user interface, or even the Aptitude package manager. Instead, apps can be installed using Snap packages, which enforces greater sandboxing and security. There is a Snap package for Homebridge, but I couldn’t actually get it to work; once installed, I couldn’t open the browser page as instructed.
So, I’ve installed it using Apt on our child’s Raspberry Pi 400, and followed the proper instructions.
There’s only one thing you should know
When you first start Homebridge, it won’t do much initially. To get it talking to your devices, you’ll need to install the appropriate plugins, which you can do through the web UI. I suggest going with the plugins that have been ‘verified’ first, as you’ll probably find that there’s more than one plugin for some of the more popular services like Nest. Whilst installing plugins is relatively easy, configuring them can be difficult:
The Nest plugin, for example, has you logging into your Google Nest account in Chrome’s Incognito mode, whilst having Developer Tools open. You then have to copy and paste various data from the HTTP headers.
I have a series of smart plug sockets which use the Tuya Smart Life platform, but I had them registered under a different app which Homebridge can’t connect to. I had to de-register them and then set them up again on the official Tuya app.
Despite following the instructions, I couldn’t get my Bosch smart dishwasher to connect
Setting up Homebridge is therefore something best reserved for people who are comfortable using the Linux command line and with at least an intermediate understanding of how devices work. However, it does mean that I now have these devices in HomeKit as planned.
Homebridge even supports my Solar Inverter, although in a rather odd way. It appears as 12(!) separate accessories in the Home app, seeing as HomeKit doesn’t ‘know’ what a solar panel is. You can also make the Google Home app talk to Homebridge – again, this is the only way that I can make my Solax system work with Google.
But in the end, it doesn’t even Matter
Those of you who follow news in the smart devices/Internet of Things space will be aware of Matter, a new unified smart device standard with the support of Amazon, Apple, Google and Samsung. Matter will hopefully do away with the separate ecosystems that each company offers, and any Matter approved device should work with any other. However, the final Matter specification was only agreed last year, and I’m not expecting many of my existing devices to be updated to support it. At best, my Google Nest Mini devices will be updated soon, and my thermostat may be updated. For others, I would probably have to replace them with Matter-enabled devices in due course. Therefore, Homebridge offers me the flexibility that Matter will hopefully bring as an interim solution.
Today, a colleague of mine asked for help with connecting her Amazon Kindle Fire(sponsored link) to the university Wi-Fi network (which is linked to eduroam). Whilst I’m not an IT employee, I offered to help.
eduroam, for those who aren’t aware, allows staff and students at universities to access Wi-Fi at any other participating university. This includes almost all UK colleges and universities, and many others across the world. To do this, it uses WPA-Enterprise, with authentication using a username and password, rather than a Wi-Fi key like you would get on a home Wi-Fi network.
The problem was that the Kindle Fire couldn’t connect, despite the username and password being correct. And then I noticed that the time was wrong.
Problem 1: wrong date and time
The underlying cryptography behind WPA-Enterprise, and most other secure internet systems, is reliant on accurate clocks. For whatever reason, this Kindle Fire thought that it was about 3am in September 2010. Consequently, it couldn’t establish a secure connection.
So, I went to change the date and time.
Problem 2: you can’t manually change the date and time on a Kindle Fire
There’s no option to manually change the date and time on the Kindle Fire (although this may have existed on older devices). If you try to change the time, you get an error, telling you that your device will get the correct time from Amazon automatically. At best, you can change the time zone if this is incorrect, but this was no help when the clock was out by almost 8 years.
Problem 3: The Kindle Fire cannot automatically update the date and time without an internet connection
So now we’re at an impasse. We can’t get on the internet because the time is wrong, but Amazon has locked down the ability to change the date and time, and we can’t get the correct time from the internet because we can’t connect to the internet. ARGH.
Solution: use a second device as a Wi-Fi hotspot
Fortunately, I managed to solve this by using my iPhone as a personal hotspot. As this doesn’t require authentication via WPA-Enterprise, the Kindle Fire was able to connect, get onto the internet, and update the time on the device to the correct time. I was then able to disconnect from the personal hotspot, and connect to eduroam without any problems.
I can understand why Amazon have locked down the date and time settings, as, if they are wrong, all your secure connections will fail. And considering that many web sites now use HTTPS all the time, this would break a lot of things. But it doesn’t account for when a Kindle Fire’s battery goes completely flat, and it resets to a default time. Which I assume is what happened in this instance.
I checked my iPhone, and Apple does let you manually override the automatic date and time that it receives when you’re online. I assume most Android devices are similar – by default, they set the time automatically but give the user the opportunity to override this if needed. Amazon’s decision, whilst understandable, is frustrating in edge cases like this one.