The RealPlayer Expirement

n light of the news that the BBC is abandoning RealMedia for its live streaming and listen again services, I’ve decided to uninstall RealPlayer from my Mac. Because, as far as I can remember, the only web site that I visit that still uses RealMedia was the BBC’s site and all of the streams that I used to listen to or watch have been replaced with Flash or Windows Media.

I’m therefore going to see how long I can survive without RealPlayer. Hopefully, it’ll be 50 MB of program files which I’ll never need to re-install. While the Mac version is far less annoying than its Windows counterpart, it feels strangely liberating to be rid of it.

LG Flatron W2353V review

LG Flatron W2353V

This is the second of 3 entries about the LG Flatron W2353V (sponsored link), a 23″ flat screen TFT monitor that LG have asked me to review. In my previous post, I went over the basics. Meanwhile, in this entry, I’ll go into a little more detail about the screen and what it is like to use.

Compared to my previous monitor, a 17″ ViewSonic VX715 which I bought in 2005, the Flatron comes in a relatively small box. This is partly due to the detachable base and less polystyrene, so there’s less waste. In the box is the monitor (obviously…), the base, power lead, DVI cable, VGA cable, quick start guide and a CD-ROM. The CD-ROM disc presumably contains the manual and drivers but oddly my MacBook couldn’t read it.

1920x1080 desktop

In any case, the screen works fine on Mac OS X without any extra drivers. Despite me having a first generation MacBook with Intel GMA 950 onboard graphics, it can still manage the screen’s native resolution of 1920×1080. This provides a huge amount of screen space. The screenshot above should give some indication of just how much window space you get. It’s enough to show a 2 megapixel image at actual size.

Instead of using buttons, you simply touch labels on the bottom of the screen. The ‘Smart’ button is used to activate features such as auto-contrast, and the ‘Fun’ button lets you apply a sepia or black and white filter to the screen. There’s also the standard menu and a button to switch between multiple input sources.

If I had any complaints it would be the plastic-y feel of the construction. It feels a little cheap – especially the thin transparent strip at the bottom of the screen. This does, however, make the screen very light and easy to carry as there’s very little metal in the construction. The touch areas aren’t very sensitive so sometimes you have to touch more than once for it to register the action.

Overall I’m really happy with it. The size means it’s fantastic for watching films and television programmes on BBC iPlayer, even from a distance. I don’t have any Blu-Ray discs but I’m sure they would look good too thanks to its full HD support.

If this all sounds convincing, watch out for a competition that I’ll be holding in the coming days to win your very own model!

LG Flatron W2353V

This post is coming to you via my new LG Flatron W2353V TFT monitor!

I’ll be posting one or two entries about this screen as LG have asked me to review it for them. There will also be a chance to win your very own monitor as well, details of which will be posted in the coming days.

Since I know may of you are techie people, here are the technical details:

  • Features LG’s SMART technology, which automatically adjusts the screen brightness depending on how much light is around the monitor – this is to help reduce eye strain, and also reduces power consumption by up to 25% in well-lit rooms.
  • Cinema mode, designed for sites like YouTube – when activated, the non-movie part of the screen is dimmed, so that you can focus on the movie.
  • 2 millisecond response time and no after-image
  • 50:000 to 1 dynamic contrast ratio, to ensure that images are still bright and detailed even in high-light conditions.
  • Has VGA, DVI and HDMI ports, so you can connect your XBox 360, PlayStation 3 or a Sky+ HD box to it without needing any special adaptors. Comes with VGA and DVI cables in the box.
  • Native 1920×1080 resolution.
  • And it’s a whopping 23 inches across!

I’m really pleased with it so far, even it is rather large, but that’s because I’m mostly used to a 13-inch MacBook screen – this is almost twice the size. The resolution is also mind-blowing – you can have many more windows open on the same desktop.

Part 2 of my review, where I go a little beyond my initial observations, will follow tomorrow.

There’s no leopard like Snow Leopard…

If you’re at all interested in all things Apple you’ll know that Mac OS X 10.6, aka Snow Leopard, was released yesterday. I haven’t got my copy yet but it is on order from Amazon (sponsored link), so hopefully I’ll have my paws on it next week. I’ve only ordered the single license copy this time and not the Family Pack, as Apple have decided that my 4-year-old PowerPC Mac Mini is too decrepit to run Snow Leopard. A shame, but that’s the price of progress I suppose.

It will, however, run on my 3-year-old MacBook, as it has an Intel processor. I won’t be able to take advantage of some of the new features, such as OpenCL or H.264 hardware acceleration in QuickTime X. And the processor is 32-bit so none of the 64-bit code will be used. But it does have a dual-core processor so Grand Central Dispatch will be able to make both cores work harder, and based on various first-hand reviews I should expect faster startup and shutdown.

In terms of new features, full support for my HP DeskJet F2100 series printer is provided out of the box (partly due to a new version of CUPS) so I won’t need HP’s drivers – this includes scanning and copying support built-in to the OS. Mac OS X will also now remove printer drivers for any printers that I don’t use, freeing up a few gigabytes of space.

Support for Exchange 2007 doesn’t really affect me as I don’t use Apple Mail or Exchange for my email, nor do the iChat changes since I use Adium. The improvement to Services are welcome – until now they’ve been a useful but misaligned feature of the OS.

There are some pitfalls for early adopters, however, as some programs won’t work straight off the bat. The release of Snow Leopard was brought forward with little warning and so some programs are not yet fully compatible – there are issues with Growl, for example, and while a new version is on the way it’s not ready yet. I’ve also heard there’s problems with third-party screensavers. I’d therefore recommend you install AppFresh which is great for notifying you of available software updates for third-party programs. And obviously do a full backup of your system before you upgrade in case you have a power cut while it’s installing, or encounter some other issues.

I may or may not give my own first impressions of Snow Leopard next week, depending on how I’m feeling. Today was my first day off work in 13 days and so I haven’t really had the time or the inclination to think about things to blog about.

Fun with HP Printers

Do you have an HP printer with an LCD display that is network addressable? Want to have a bit of fun with it? Follow these instructions to get something like this:

Emo printer has feelings too
Emo printer has feelings too by Joe Attardi, used under license

There’s more on the ‘hpinsertcoin’ tag on Flickr.

All the printers we use at work are HP, but if the office was evacuated because I’d made a printer say it had a radiation leak I probably wouldn’t have a job for much longer. Besides, I don’t know their IP addresses.

[Via Utterly Boring]

Mac Mini alive again

January wasn’t a great month for me and my 2 Macs, as I managed to get both of them to stop working. First of all, the backlight on my MacBook’s screen stopped working, which I managed to fix after about half an hour’s Googling. Then I found my Mac Mini was refusing to boot but alas was not able to fix it.

The good news is that I have now fixed it. The bad news is that I’m not entirely sure what it was I did that got it to work again. Essentially, I took the lid off (easier said than done as it requires using a thin, flexible knife to prize the shell away from the base), poked at it, put the lid back on again and it booted up fine.

I say essentially because there was more to it than that. Because I was receiving the error ‘ALLOC-MEM request too big!’ from OpenFirmware while booting, I first assumed it to be a RAM error, so I took the RAM out and re-seated it, then booted the machine without putting the cover back on. That didn’t work, so I poked at the Bluetooth and Airport aerials to see if that made any difference – again nothing. So I put the lid back on and was about to concede defeat, but decided to see if putting the lid on had made any difference. And it had – the machine booted up, albeit slowly.

The computer is now running, although it does seem slow – that may just be because it always has been slow and I just haven’t used it recently. I haven’t yet restarted it so it may of course be a fluke, but right now all the programs on it seem to be working fine – no unexplained crashes and no grey screens of death as yet.

So if you have the dreaded ‘ALLOC-MEM request too big!’ error, trying taking your Mac apart and check if everything is seated correctly, and then try booting again. It may fix it. Of course, if it doesn’t, it may be indicative of bigger problems so don’t rule out a trip to the Genius Bar or a call to AppleCare.

And now it’s the Mac Mini’s turn

As many of you will know, as well as my MacBook, which I use as my main computer, I have a Mac Mini as well – this was my first Mac which I bought in 2005. It has spent the past year or so searching for a purpose – I was, and still am, hoping to turn it into a media centre but I’ve neither had the time or money to go ahead with it, and to be honest, I don’t really need to either.

Anyway, after yesterday’s shenanigans with my MacBook, it’s the turn of the Mac Mini to refuse to work. It’s actually not a problem that developed today – I noticed it wasn’t working last week, but as I run it headless I didn’t have a computer monitor to plug it into. All I knew was that it wasn’t registering itself on the network.
Today I had chance to use it with an external monitor. I heard the startup sound, saw the Apple logo on the screen, and then, nothing. No status indicator, just the Apple logo.

So, I zapped the PRAM – Command+Option+P+R. This time, the status indicator appeared for about 10 seconds before the Grey Screen of Death appeared, showing a kernel panic. This happened with subsequent boots.

So, I tried booting from the OS X CDs. Same problem. In fact, after a while, all I could do was access the Open Firmware command prompt.

This therefore means that there’s something wrong with the RAM or another component. Over the Christmas period, I took my Mac Mini with me to my parents in York, rather than leaving it in Bradford as I figured it would be safer. I’m guessing that it may have got jolted in transit and one or more of the components is out of place. It could also be bad RAM, but the RAM was only replaced in November 2006 and it was good-quality Crucial RAM. Plus, it’s a faff trying to get the damn thing apart and will probably require the purchase of another putty knife seeing as my existing one has gone missing.

In the meantime, I have a nice iOrnament.

How to: fix your MacBook screen

Had a bit of a panic this morning when I let my MacBook go to sleep, and upon re-awaking the screen’s backlight would not come on. The screen itself was working, as I could see a small portion of the desktop in the middle where the Apple logo is, but the rest was un-viewable.

It’s working now, but not after trying almost every trick in the book. I’ve listed all of the methods here, mostly for my own reference in case it happens again but also for anyone having a similar problem.

Diagnostics

First of all, make sure that the rest of the computer is working. If you have an external display handy, plug that in and use Fn+F7 to activate it (you may not need to hold down the Fn key depending on your Mac’s settings). If you can see your desktop on the external display then the problem is with the display – if not, you computer may have deeper problems. If you have VNC set up, you could try this too.

1. Set your brightness

Sometimes it’s the basic things – your brightness might be set to minimum. Use Fn+F2 to turn up the brightness (you may not need to hold down the Fn key depending on your Mac’s settings).

2. Zap your PRAM

One trick to deal with minor hardware problems is to reset your PRAM and NVRAM. To do this, power down your Mac, then, turn it on and hold down Command+Option+P+R at the same time, until your Mac makes the ‘ding’ noise again. Command is the Apple key, Option may be labelled as ‘alt’ on your computer.

3. Reset your Energy Saver settings

You may need to use an external monitor or VNC for this. While you Mac is booted, open System Preferences and choose Energy Saver. Under ‘Put the displays to sleep’, set the timer to 1 minute, and then wait 1 minute for your machine to go to sleep. Wake it up, and hopefully your screen will spring back to life.

4. Take out the battery

If your Mac is a portable, turn the computer off, unplug the AC power cord, and take the battery out. Next, hold down the power button for 5 seconds, and the re-insert the battery. Then boot up again. In my case, this is what worked.

How to migrate a Parallels virtual machine to VirtualBox

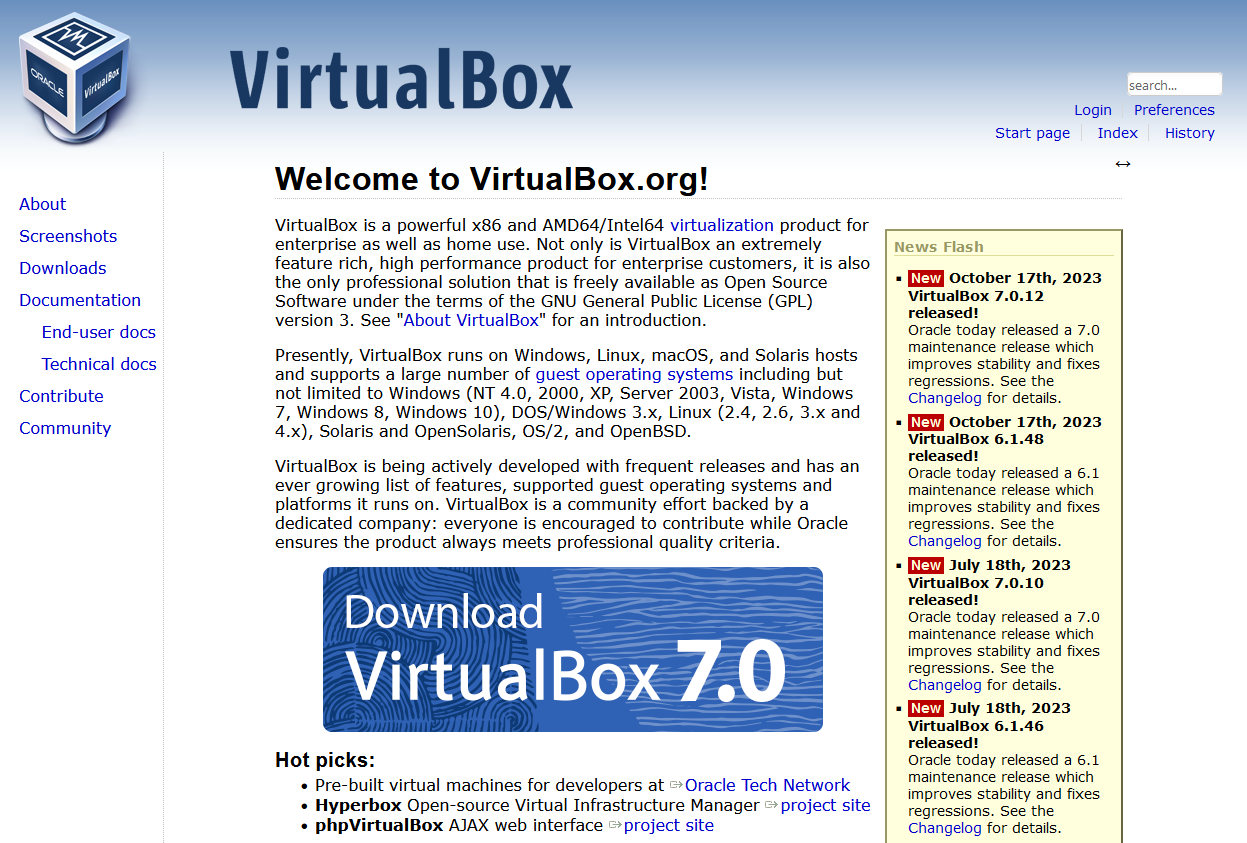
A screenshot of the web site for VirtualBox

Despite Parallels and VirtualBox both being programs which run virtual machines on Mac OS X, they both use different file formats for storing the virtual machines on disk. Though I believe Parallels will open a VirtualBox disk, VirtualBox cannot automatically import Parallels disks. But it’s not impossible…

If the guest operating system, i.e. the system that is running inside Parallels, is Windows 2000/XP/Vista, then it is possible to use a free tool from VMWare to do the conversion. Here’s a step-by-step:

1. Back up your virtual machine

Seriously. We’ll need to modify it a bit before it’s converted, so you’ll want a backup copy just in case things go wrong, or if you may use Parallels again in future.

2. Uninstall Parallels Tools

This is the modifying bit. Load your Windows virtual machine in Parallels, and uninstall Parallels Tools (the helper program that adds drivers and clipboard sharing, and other stuff). This is important as otherwise your virtual machine won’t boot in VirtualBox – and I know this from experience. You also can’t uninstall Parallels Tools unless you are running Parallels at the time.

3. Close all programs

Close as many running programs in your virtual machine as possible. We’re about to take a snapshot image of it while it is running, so any unsaved data may be lost when you boot the image in VirtualBox. That includes programs with icons in your notification area, such as virus scanners, instant messaging programs etc.

4. Install VMWare Converter

Once Parallels Tools has been uninstalled (you may need to reboot the virtual machine for this), we can begin the conversion process using a tool ironically made by VMWare. Go to the download page for the VMWare Converter in whatever web browser you use in your virtual machine (it’s a Windows program) Download it, and then install it.

Run the Converter tool, and click ‘Convert Machine’ – this should pop up a wizard which walks you through the process of setting up a new virtual machine image. You want to tell it to use a ‘Physical Computer’, and then on the next screen choose ‘This Local Machine’. Select the hard disk of the virtual machine and leave ‘Ignore page file and hibernation file’ ticked as this will just bloat the new virtual disk with unnecessary rubbish.

For the type of virtual machine, select ‘Other virtual machine’, and on the next screen, give it a name (e.g. ‘Windows Vista’). Next, you will also need to save it somewhere, and this should not be the existing hard disk of the virtual machine. You can either use your Mac’s main hard disk, mapped to drive ‘Z:’ under Parallels, a network drive or an external drive if you have it forwarded through to the virtual machine. You should be able to use the top option for the type (i.e. ‘Workstation 6.x’) but if it doesn’t work try another option. Keep ‘Allow disk to expand’ checked on the next screen. Click through until you’re ready to complete, and start the conversion.

5. Go and grab a cup of coffee

Or go out shopping. Or read a few chapters of War and Peace. Either way, the machine will take a significant amount of time to convert – mine took around 45 minutes and was only around 15 GB. Bigger disks may well take longer. It helps if you don’t have lots of other programs running on your Mac at the same time as then more of your CPU juice can be used for the conversion.

6. Shut down the machine in Parallels

Now that you’ve exported the machine, shut down Windows and close Parallels. This is mostly so that you can stay within the terms of the license agreement for Windows which won’t allow multiple instances.

7. Import the disk into VirtualBox

Open VirtualBox, choose ‘File’ and then ‘Virtual Disk Manager’. Add the disk file that you created, and click OK. Then click ‘New’ to create a new virtual machine, and select the correct operating system from the list. Try to ensure that you give the virtual machine the same settings (such as RAM size) as you did in Parallels. When asked for a hard disk, click the ‘Existing’ button and choose the disk file that you created from the list. Then click Finish.

8. Boot up in VirtualBox

Hopefully all will have gone to plan, and you will be able to boot into Windows as before. All of your files and programs should be there waiting for you.

If, however, you encounter a blue screen mentioning ‘prlfs.sys’ like I did, boot the machine but press F8 during the boot to enter Safe Mode with Command Prompt. Type in cd c:\windows\system32\drivers and then rename prlfs.sys prlfs.sys.old and then reboot – that should get you up and running.

For the inquisitive, prlfs.sys is part of Parallels Tools and this should have been removed as part of step 2, however muggins here forgot to this when he tried it himself and therefore encountered this error.

9. Install VirtualBox Guest Additions

Guest Additions are to VirtualBox what Parallels Tools are to Parallels – in other words, they make Windows sit better in the virtual machine and improve integration with the host operating system. On the main VirtualBox menu, select Devices and then ‘Install Guest Additions’ and follow the on-screen instructions. Though this is optional, it will improve the experience of using Windows in VirtualBox.

Hopefully now you’ll be up and running in VirtualBox. Feel free to post comments below and I’ll try to do what I can to answer them but I’m not the world’s greatest expert in this. I also don’t know how to do this in other versions of Windows or other operating systems.

More on the upgrade

As promised, here is more about the upgrade I did to my parents’ computer last weekend.

The computer will be 4 years old in October and I wanted to sort out its current shortcomings while also making it capable of running for at least another 2-3 years. The agreed budget was £100, about 6 times less than the original cost of the computer.

In the end, we went for the following internal components:

  • 2 GB of Corsair Value Select PC3200 RAM
  • 256MB XFX nVidia GeForce 6200A AGP 4x/8x graphics card
  • A no-brand USB and FireWire PCI card

The memory was the most important part of the upgrade. Originally, the machine only had 512 MB of RAM, and as such was struggling. As a matter of principle I only buy Corsair or Crucial RAM as I know it’s good quality, and on this instance I went for Corsair as it was slightly cheaper and could be shipped as part of the same order from Scan. It was still the most costly aspect of the upgrade at £39.32 (ex VAT), taking the majority of the £100 budget.

Next was the graphics card. Right now the machine has onboard VIA graphics, which can do some basic 3D but not much more (it will just about handle the original World of Warcraft with all of the effects turned off, but it’s not pretty), and it leeches system RAM rather than having its own. Furthermore, the manufacturer has not produced any new drivers for Windows Vista. So, as part of my plan to keep the machine running for a few years, allowing for a potential Vista upgrade is important. I doubt nVidia are due to disappear any time soon, so hopefully this new card will be a safe bet. It also adds DVI and S-Video output, allowing connection to a TV or a more modern TFT screen.

Finally, I added a USB and FireWire PCI card. The machine had 2 USB ports at the front and 2 at the back, but both of those at the back were full and my parents were already having to use a hub. The machine is due to be moved to a room where there is no wired socket for Ethernet, so we’ve opted to go for a USB wireless dongle (the Netgear WG111 previously mentioned), so that would be another USB port used up. As an extra PCI card was only around £5, it made sense to add 4 more ports. It also adds 2 FireWire 400 (IEEE 1394a) ports, which the computer previously lacked; whether my parents will ever use them is perhaps questionable but at least they are there, and it may add resale value to the machine.

These 3 items, plus the Netgear dongle, packing and VAT, came to £100.19, so only a bit over budget 🙂 . The difference is very noticeable – startup times are improved and general performance is much better. The machine is now almost ready for Windows Vista – the only device lacking a Vista-compatible driver is the internal modem, which isn’t in use anyway and could be removed if necessary (it’s made by SmartLink who sold their assets to Connexant in 2006, and then disappeared off the face of the earth. Their latest drivers don’t even work correctly with Windows XP SP2).

Creative Commons License
Except where otherwise noted, the content on this site is licensed under a Creative Commons Attribution-ShareAlike 4.0 International License.