The advantages of a smart home

An AI generated image of a house, with a giant light bulb floating above it that has a depiction of Albert Einstein

Okay, so it’s fair to say that I write a lot about Home Assistant and the smart home – I have a whole category of blog posts about it. Whilst it’s probably a sign of a mid-life crisis project, I thought I would set out the advantages of having smart devices at home, as a justification of why I spend so much time setting and configuring devices.

Delayed start

Many devices, like washing machines, dishwashers and the like, offer a delayed start facility. If you need to wash clothes, but are out at work all day, you probably want your washing machine to finish just before you get home. Otherwise, you’ll have wet clothes sat there for several hours. Similarly, we have a bread maker that we set to finish at around 4am, so that the bread is still fresh but not too hot when we need it.

I also use a delayed start on our dishwasher, so that, in winter, it runs during the middle of the day when there’s more sunlight. That allows us to make the best use of the cheap energy from our solar panels. This may also be useful for people whose electricity tariffs vary at different times, such as the Octopus Agile tariff.

Not all devices offer a delayed start feature as standard, so smart plugs can fill this role. I also use a smart plug to turn off a device that lacks a timer.

Remote control

The first smart device that we got in our house was a Nest thermostat, and this allows us to control our heating whilst outside the home. That means that we can ensure the heating is off when we’re away, saving money, but also ensure that it comes back on before we get back home.

Even when we’re at home, we have a couple of standing lamps in hard-to-reach places – smart plugs allow us to use voice control to turn these on and off.

Dashboard overview

As Home Assistant supports more devices than most other platforms, I can have a very powerful dashboard that brings in data from every smart device in the home (and some outside data too). That way, I can see at a glance whether the TV, dishwasher, washing machine and tumble dryer are on, as well as control several lights and the various Google Home speakers around the house. This is also possible in other apps like the Google Home app, but with a more limited range of devices.

Notifications

Through Home Assistant’s automations, I can create notifications for things happening in my home. For example, although our washing machine beeps loudly when done, it’s in the cellar. Combined with my hearing loss, I might not hear it when in another part of the house. So having a message pop on my phone to say that the washing is done is very helpful.

Logging

Home Assistant in particular has a useful logging feature, so it can automatically log when devices are turned on/off or change state. So if you can’t remember when a device was last used, Home Assistant can tell you.

Quick access to information

We have Google Home smart speakers in almost every room (not the bathrooms). They’re great for asking quick questions about things like the weather, without needing to look it up on a phone or computer. We also use them extensively for setting timers and alarms, and for playing music. And having them across the house means that we can use broadcast messages – again, better than shouting for someone like me who sometimes struggles to hear.

There are other advantages that I don’t have personal experience of; a colleague has a smart doorbell and smart lock, so that if someone tries to deliver a package and no-one’s home, it’s possible to remotely open a door into the porch to allow the delivery driver to leave it securely. We don’t have a smart doorbell or smart lock – or a porch for that matter. We also don’t have a garage, but having a smart garage door opener would be good if we did have one.

Meross energy monitoring smart plugs

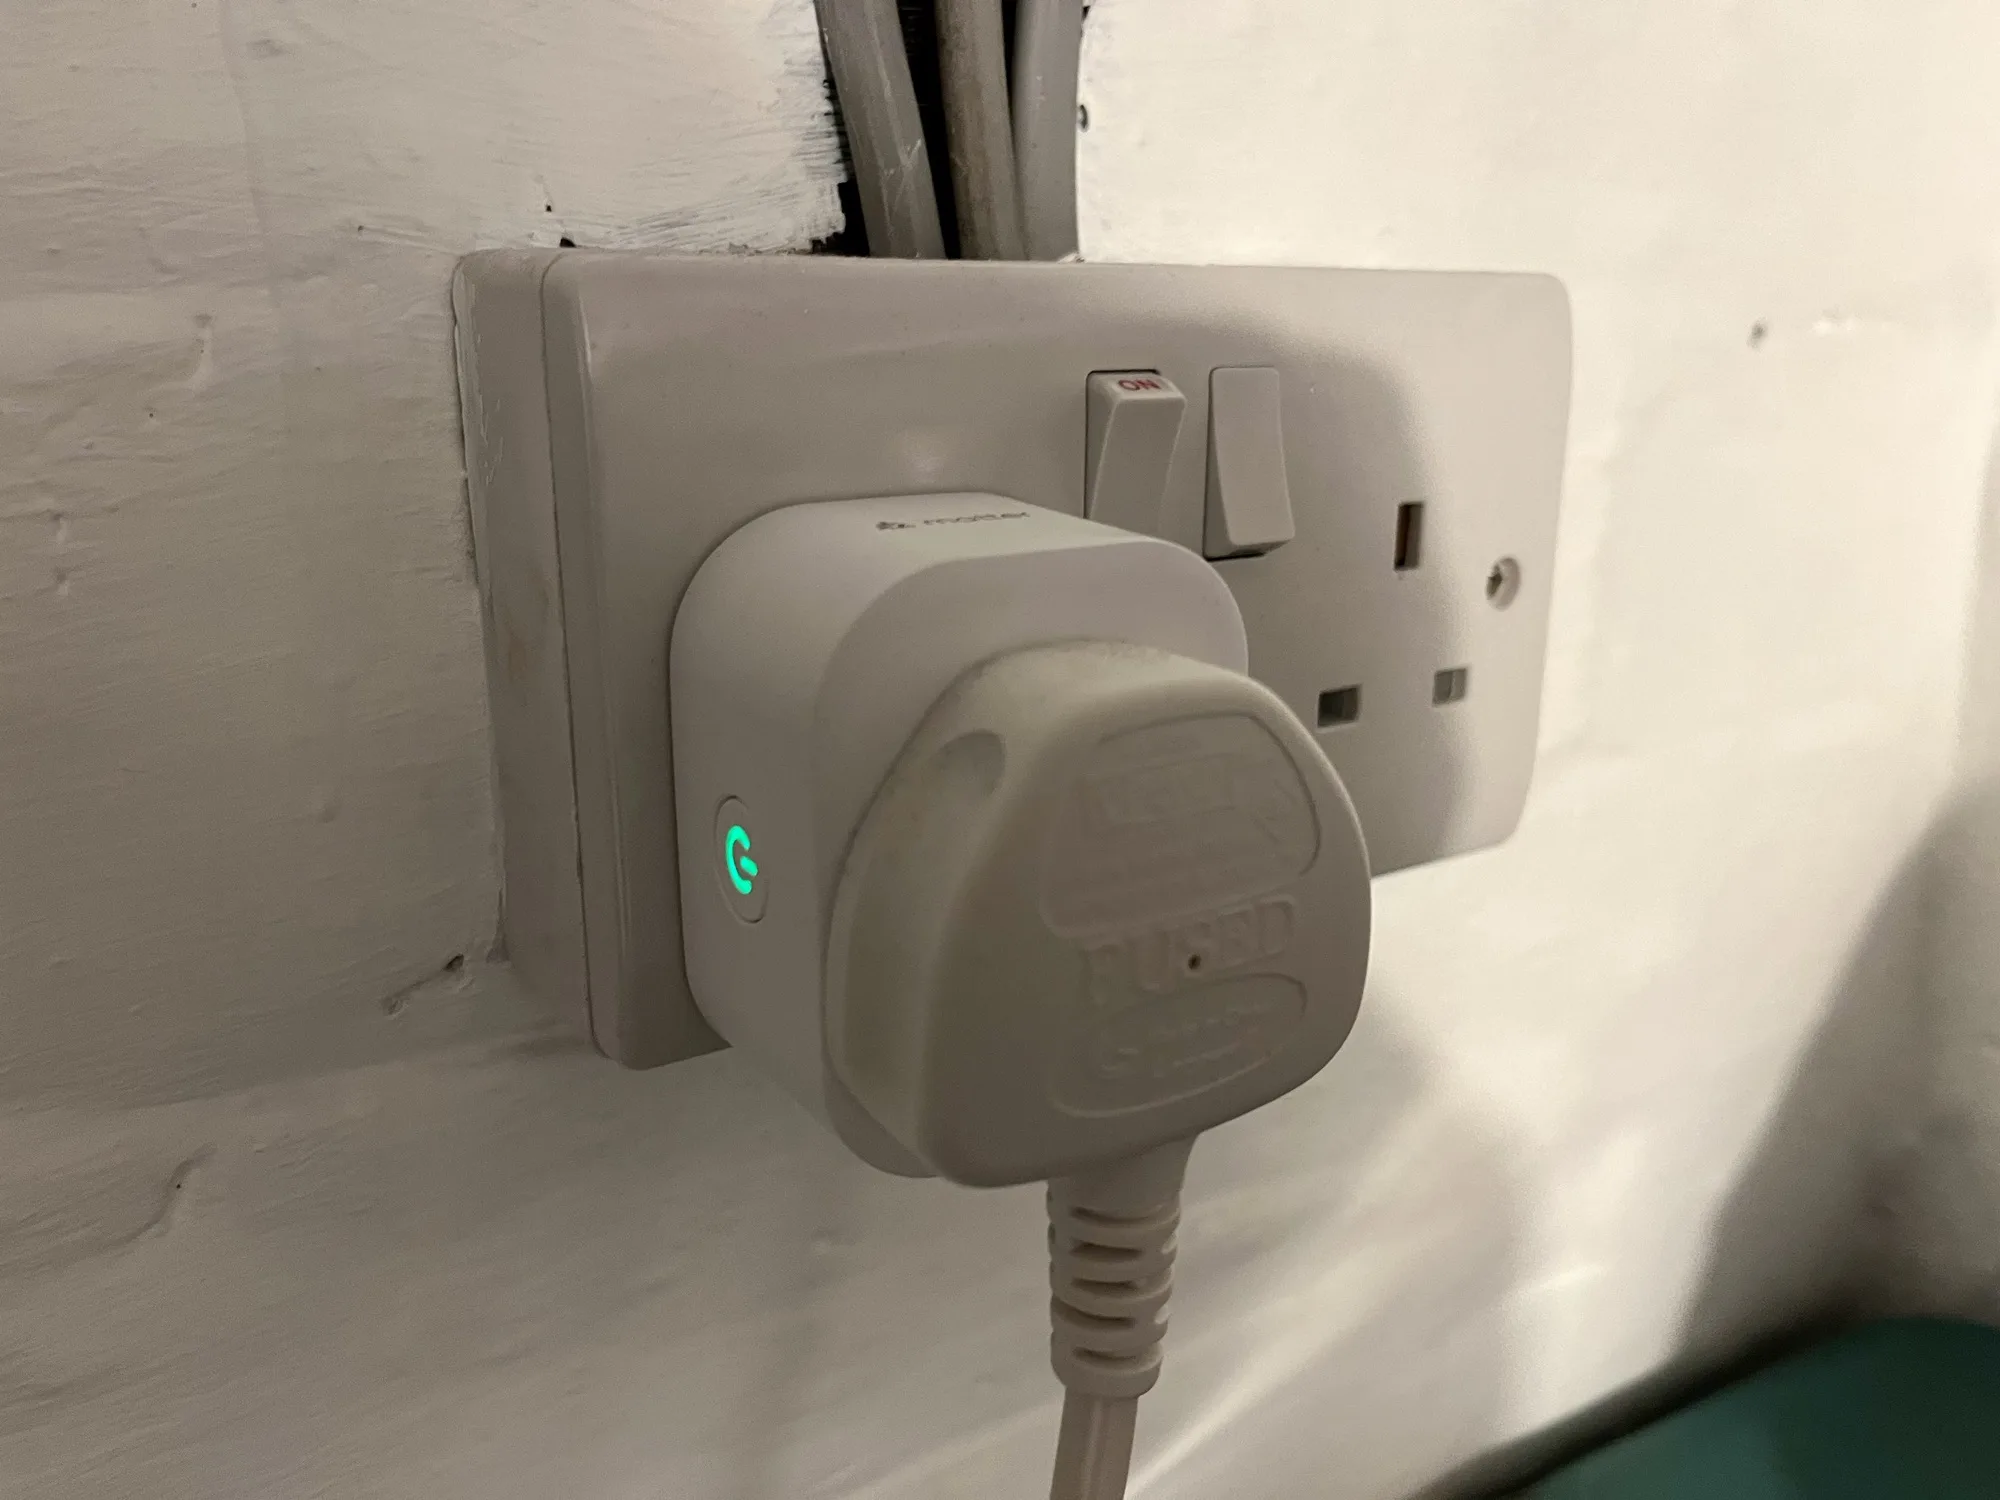
A photo of a Meross smart plug in a UK plug socket

I’ve recently bought a pair of Meross energy monitoring smart plugs (sponsored link), and by integrating these with Home Assistant, I now get notifications when the washing machine and tumble dryer have finished.

Previously, I’ve used Tuya smart plugs. Which are fine, but these ones don’t do energy monitoring, don’t work with Apple HomeKit and I have some privacy concerns. The Meross plugs, on the other hand, do offer energy monitoring, can be used with 13 Amp devices, and also work with Matter. They’re also smaller, and feel more solidly built than the older Tuya plugs.

Matter support

These smart plugs also support Matter, the open smart home standard. This should mean that you can use them with any smart home ecosystem, whether that’s Amazon, Google, Apple HomeKit, Samsung SmartThings or Home Assistant. I was able to get them to pair with Home Assistant, but not with HomeKit. It turns out I need a device that can act as a HomeKit hub, which can be a permanently plugged-in iPad, Apple TV or Apple HomePod. It won’t just use any other Matter server on my home network. This is ironic as the Home Assistant app uses the same Matter provisioning process on iOS devices.

It’s also worth noting that Matter support is limited to turning the smart plugs on and off. I’m guessing the Matter specification doesn’t include energy monitoring as yet. Also, these smart plugs connect over 2.4 Ghz Wifi, which is worth noting if you’ve configured your Wifi network to only use 5 GHz. They don’t use Thread.

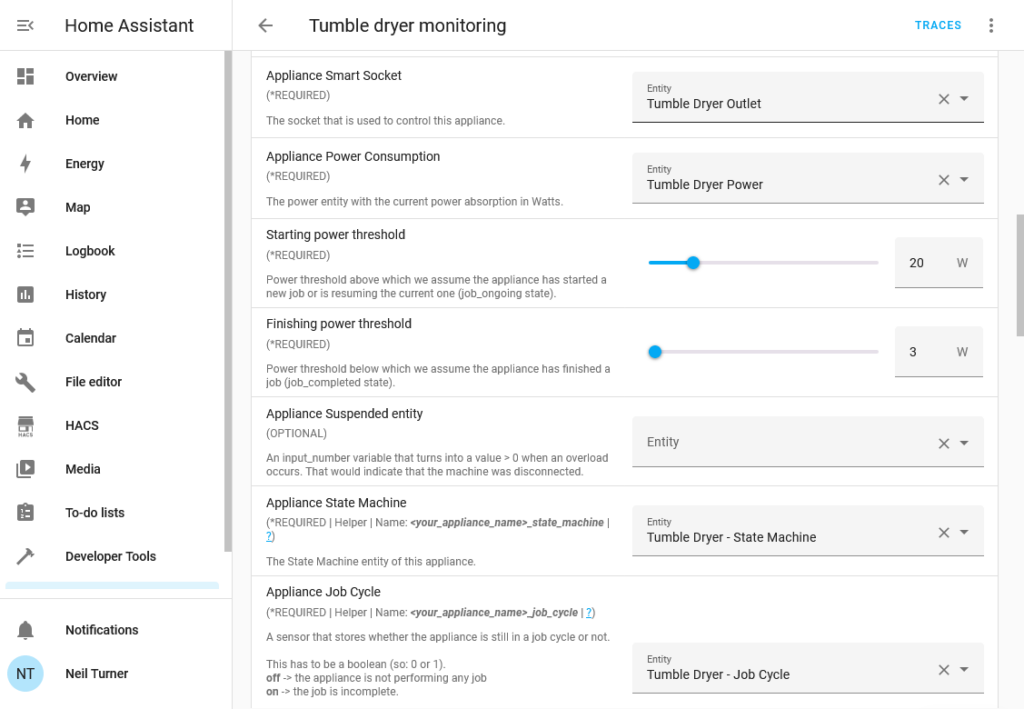
Screenshot of the hassio_appliance-status-monitor Blueprint being configured as an automation in Home Assistant

Making use of energy monitoring

If you want to take advantage of the energy monitoring capabilities of the smart plugs, you’ll either need the official Meross app (for iOS and Android), or use Home Assistant. Whilst I have installed the Meross app, I’ve set up the automations in Home Assistant. There isn’t an official Home Assistant integration for Meross, so you’ll need to install the Meross LAN custom integration which is available through HACS.

Once you’ve set it up and added your devices, you’ll need to set up the energy monitoring automation. By far the easiest way is to use this BlueprintBlueprints are essentially templates for automations that you can download and configure. Make sure you follow the instructions, as you’ll need to create four Helpers for each smart plug, and give them specific names.

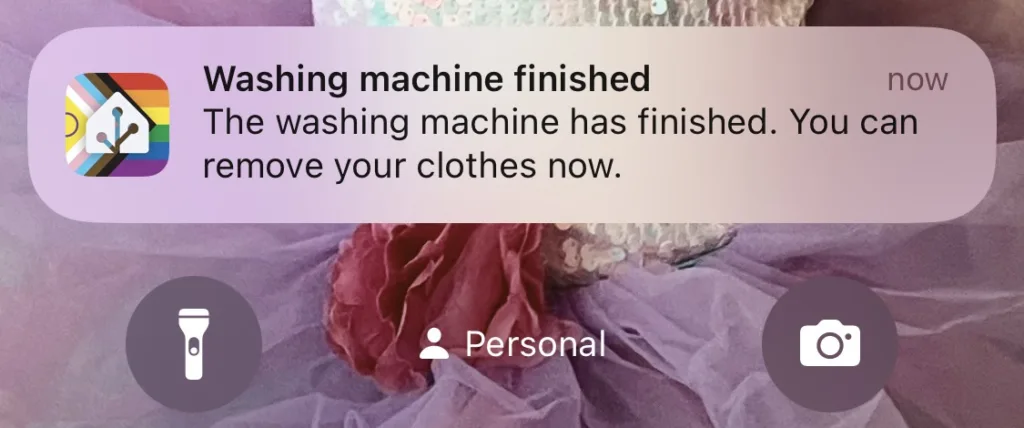
You can then define actions to take when the energy monitoring detects the appliance has started and ended. In my case, I’ve told it to send a notification to my phone when the device has finished. In the case of my tumble dryer, this includes a 15 minute delay as it uses less power towards the end (and otherwise results in notification spam). You may need to tweak the power thresholds as well. If all goes well, then you’ll get a notification like the one in the screenshot below.

A screenshot of a notification from Home Assistant stating that the washing machine has finished, triggered by the energy monitoring smart plugs

Doing this means that you can get one of the key features of a smart device, without paying a significant premium. I paid £25 for the two plugs from Amazon, whereas it would have cost at least another £100 to buy a smart tumble dryer. Our washing machine is 9 years old and I’m not even sure that smart washing machines were on the market at the time.

Converting Tuya devices to Tasmota

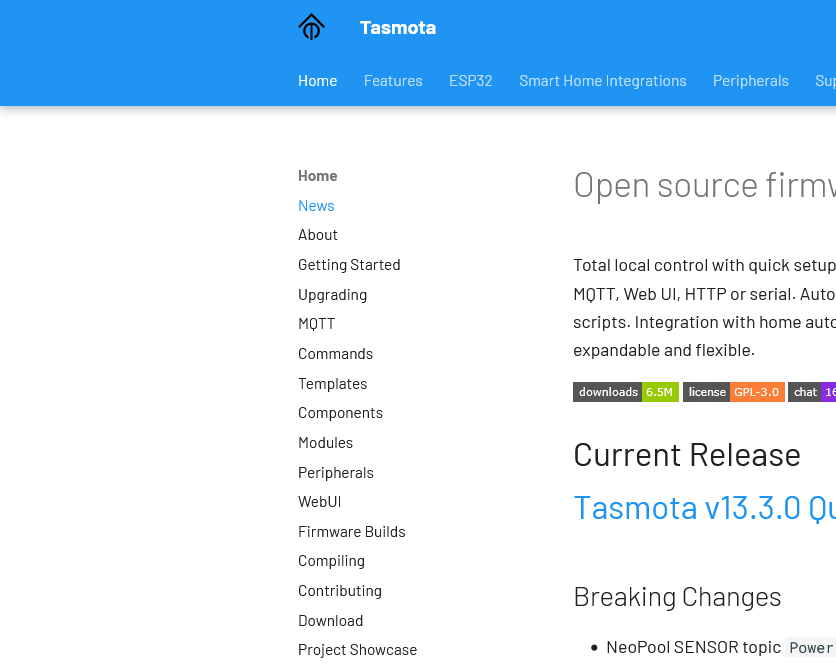
Screenshot of the Tasmota web site

I’ve mentioned that I have a few Tuya smart plug sockets around the home. It’s possible to convert these to run on open source firmware called Tasmota, to gain some additional features, and it’s something I’ve been considering.

The logic boards for many Tuya devices are from the Espressif ESP family, which can easily be flashed with different firmware. Tasmota is one such provider, as is ESPHome which is a sister project to Home Assistant.

What’s wrong with Tuya?

Tuya mostly manufacture ‘white label’ devices that are then sold under a variety of brands. Mine are branded ‘Coosa’ but I’ve seen others called ‘Hey!’ being advertised. Often, they come with their own branded app, but you can use them with Tuya’s own app as well.

I bought them a few years ago because they work well with Google Assistant and IFTTT (which I no longer use). They also work well with Home Assistant (especially since last month). They don’t work with Apple HomeKit natively but can be bridged in using Home Assistant or Homebridge. The other advantage was that you didn’t need a separate hub for them to work – they connect directly to your home Wifi network.

However, Tuya is a Chinese company. Though they claim to have servers in the EU, it could be that every time I use their switches, my request goes via China. In Home Assistant, there are a couple of custom integrations in HACS called LocalTuya and TuyaLocal that can issue commands locally on your home network. But if you use Google Assistant, the commands get sent across the web.

Local control with Tasmota

The Tasmota project offers a tool called Tuya Convert, which replaces Tuya’s official firmware and allows for local control. It mainly uses the MQTT protocol, which is openly documented and used by a variety of different Internet of Things devices. Once flashed onto your devices, they can be controlled locally and don’t need to communicate with external servers. Home Assistant has extensive MQTT support and an official Tasmota integration.

They also work well with Alexa devices, by emulating a Belkin WeMo or Philips Hue device.

This all sounds good to me, but I haven’t gone ahead and done it. Unfortunately, whilst Amazon Alexa is supported, Tasmota doesn’t easily interact with Google Assistant. And once I’ve flashed a device with Tasmota, it may be difficult or impossible to go back to the official Tuya firmware.

Of course, I can configure Home Assistant to work with Google Assistant. I haven’t yet, even though there are two ways to do it:

  1. Sign up for Home Assistant Cloud from Nabu Casa, which costs £6.50 per month
  2. Set up Google Assistant manually with Home Assistant, which is lengthy and may need to be reconfigured every 30 days.

I suppose if we used Amazon Echo devices instead of Google Home, this would be a no-brainer.

In the long run, replacing these smart plugs with ones that use Matter would be better and cheaper. My Home Assistant install is pretty-much Matter ready, with no need for an additional hub. Matter, like Zigbee, mostly works locally, and therefore doesn’t have the privacy implications of my current web-based Tuya plugs.

CarPlay with Home Assistant

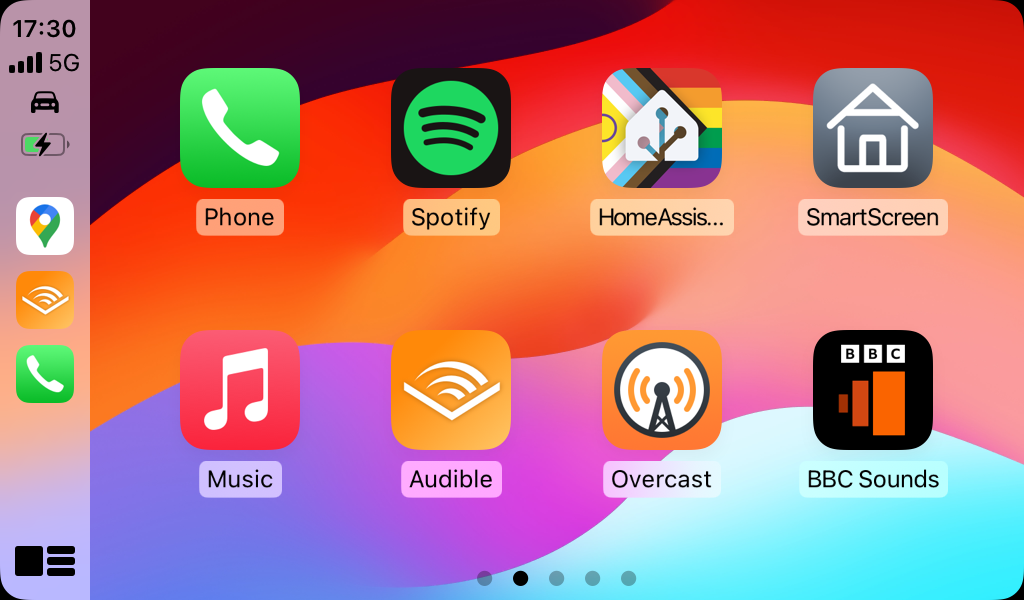
A screenshot of the CarPlay home screen showing the Home Assistant icon

There’s now a CarPlay app for the Home Assistant Companion app on iOS. This means that it’s possible to control (some) of your devices connected to Home Assistant whilst driving.

I like CarPlay, and have a standalone unit in my car. Most CarPlay apps are designed for either navigation or for listening to audio content whilst driving, but Apple has allowed some other apps more recently. For example, the RingGo parking app is now available in CarPlay; I wish the same could be said for the four other parking apps I have installed.

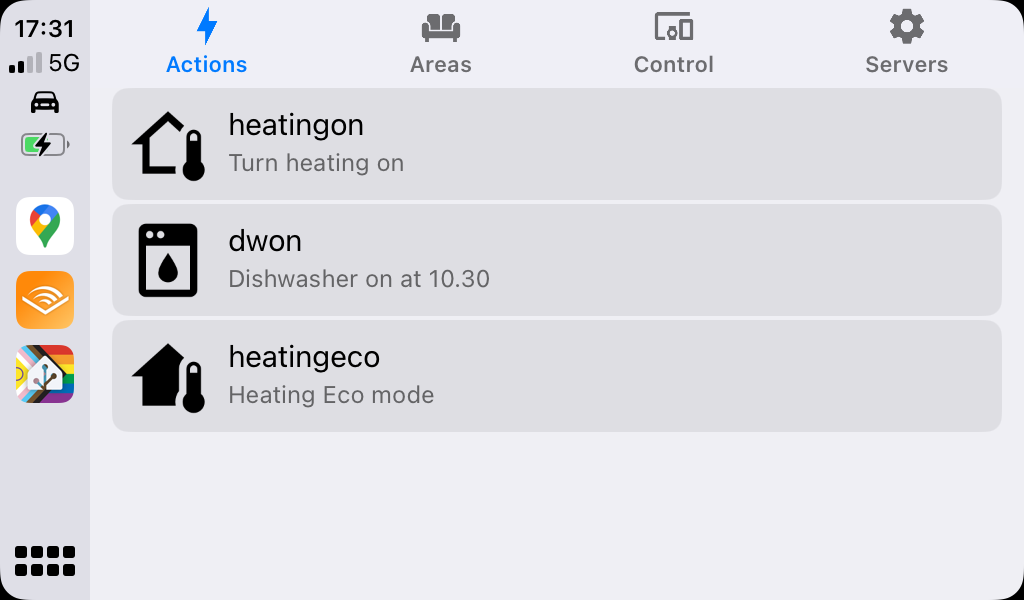
The Home Assistant app has four tabs: Actions, Areas, Control and Servers. Areas gives you the list of rooms that you have defined, and from there you can access some of your devices. Control gives you a big list of all of the devices that have a function that can be controlled whilst using CarPlay – mainly buttons and switches. Meanwhile the Servers tab is there in case you’re able to log in to more than one Home Assistant instance.

Actions are unique to the Home Assistant Companion app. They link to automations, but have a specific trigger. At the moment, I’m only really using actions to control my Nest thermostat as this is usually the only thing I want to control outside the home. Actions are also used by widgets on iOS, and by the Apple Watch integration. They’re a bit of a faff to set up at present; this video seems to be the best guide to setting them up.

It should be noted that Home Assistant also supports Android Auto, and indeed has done for longer. CarPlay support was new in January but it’s taken me until now to get it set up and remember to take some screenshots.

I’m really happy about this new feature, as being able to safely control my heating whilst driving isn’t something I’ve been able to do before. It makes the time that I’ve spent setting up and tweaking my Home Assistant server worthwhile.

A basic Home Assistant automation

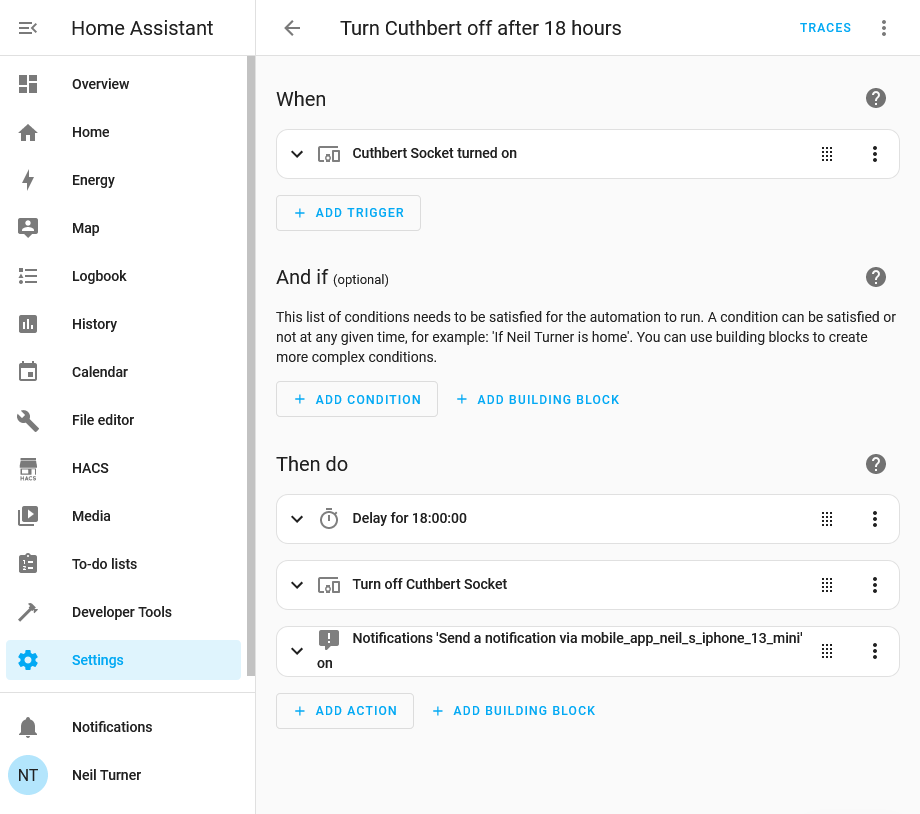
A screenshot of Home Assistant showing an automation to turn off a smart plug after 18 hours

One of the biggest benefits of running Home Assistant in your home is its powerful automation tools for controlling your smart devices. In this example, I have a smart plug socket which I want to run for 18 hours, and then automatically switch off. This is the smart plug that we use for our heated drying rack, and it ensures that the rack doesn’t continue heating for longer than necessary, to save energy. As I run Home Assistant on a Raspberry Pi 4, it only uses 15 watts of power, compared to the few hundred watts that the drying rack requires.

Automations in Home Assistant have become much easier in recent releases. In times gone by, you’d have to write YAML scripts to automate your devices, but now there’s a relatively straightforward interface. Generally, automations work on the principal of ‘if this, then that’ – a bit like IFTTT, but it runs in your own home.

Tuya me, to you

For my automation, I use the trigger of the smart socket being turned on. In my case, this is a Tuya wifi-enabled smart plug, which I’ve called ‘Cuthbert’. We have four Tuya plugs, all with silly names like Cuthbert, just because. Tuya are a white label manufacturer, and so the brand names on the plugs vary despite them being exactly the same. I wouldn’t necessarily recommend them, as presumably every time you turn them on and off, your request goes via Chinese-controlled servers. I would probably buy Matter-enabled plugs instead now but they work fine. Plus, the recent 2024.02 release of Home Assistant massively improves Tuya support and no longer requires you to create a developer account, which is nice.

Automation actions

Anyway, having selected the ‘When’ event, we now need to specify the ‘Then do’ actions to take. First of all, we need a time delay, otherwise as soon as the socket is turned on, Home Assistant will turn it off again. The ordering of actions is important, as I found out the hard way; I originally had the delay after the command which meant that the socket just turned off straight-away. So, we specify a delay and then the action to turn the socket off.

The third action is optional, but it just sends a notification to my phone to tell me that the automation has completed. I’m using the Home Assistant Companion app but you could use an app like Pushover, or trigger an email.

This is a really simple automation, but you can create more complex ones. I’m hoping that, at some point in the future, we’ll have some smart blinds in our kitchen, and I’ll be able to use Home Assistant’s sun integration to open and close them at sunrise and sunset.

How to join a preferred Thread network in Home Assistant

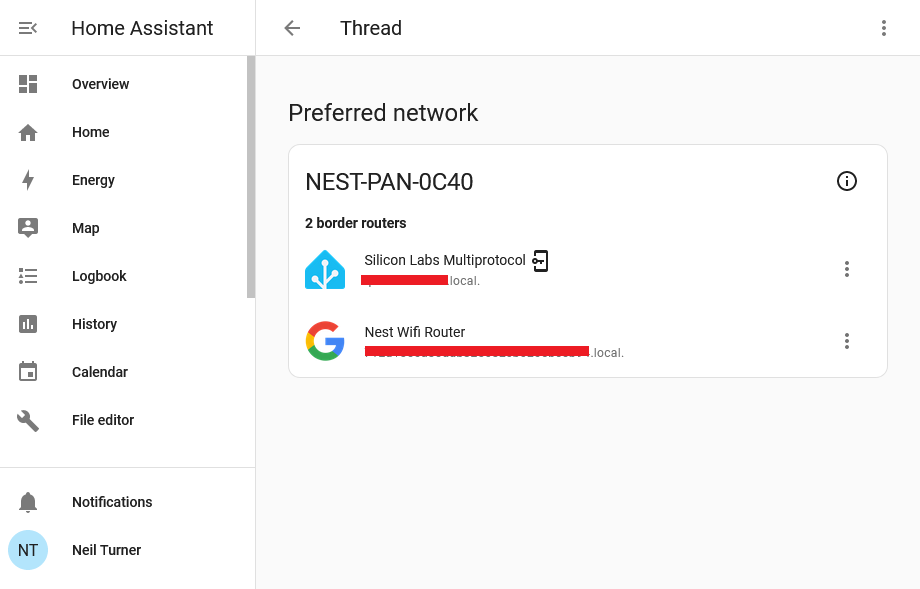
A screenshot of Home Assistant's Thread Integration showing two Open Thread Border Routers on the same network

If you use Home Assistant, and have an existing device that includes a Thread Border Router, then it should automatically add the Thread integration so that it can communicate with Matter devices. Some of Google’s Nest Hub and Nest Wifi devices include Thread, as do some of Apple’s newer Homepod devices and some of Amazon’s Echo devices. Because they broadcast their existence on your home Wifi network using mDNS, Home Assistant can detect their presence.

What Home Assistant can’t automatically do, however, is join these existing Thread networks. As this article from The Verge states, there isn’t a mechanism for sharing Thread network credentials between devices. That means that you can end up with a home that has several devices, all with the own Thread networks that don’t talk to each other, and your Home Assistant device not able to talk to any of them.

Hiding on your phone

The good news is that Home Assistant can access Thread network credentials from your phone, and this should allow you to join one of your existing Thread networks. In the above screenshot, I have my third party Thread dongle attached to the existing Nest thread network used by my Google Nest Wifi system.

The reason why I’m writing this blog post is that it’s not obvious how to enable Home Assistant to join a Thread network that it doesn’t have credentials for. Think of the Thread network credentials as being a bit like your Wifi password (or ‘pre-shared key’ to give it its official name). However, whilst you’ll usually either use whatever password is printed on your router, or a short password you set yourself, your Thread devices will come up with their own long alphanumeric key. And then, they’ll keep it a secret.

Thankfully, your phone should have this key – in Google Play Services on an Android device, and iCloud Keychain on an iOS device. And, thankfully, the Home Assistant Companion app for these platforms can access these credentials and provide them to Home Assistant, allowing you to connect to your existing Thread networks.

Matching the manufacturer to the network

But there’s a catch:

  • If you have a Google Wifi or Nest Hub device, then you’ll need an Android device to access the credentials.
  • If you have an Apple HomePod, then you’ll need an iOS device to access the credentials.

This is why I found it difficult to join the Thread network that my Google Wifi devices had created. I’m an iPhone user, and so it wasn’t able to access the credentials. They’re not available to the Google Home app on iOS, for example.

Thankfully, my wife has been a stubborn Android user for as long as I have been a stubborn iOS user. So, I just needed to ‘borrow’ her Android tablet, install the Google Home and Home Assistant Companion apps, and log in to both. Then, on the Home Assistant app, navigate to the Thread settings where an ‘Import Credentials‘ button appears. Once I tapped this, Home Assistant was able to join the Thread network created by my Google Wifi devices. Had I owned a HomePod, the process would have been similar.

One Thread network to mesh them all

Thread is a mesh network protocol, and having all devices on the same network is beneficial. Each additional device helps maintain the reach of the network. So it’s a shame that new devices just seem to set up their own networks, and don’t bother to try to join a Thread network that may already exist. Some of this is down to the Connectivity Standards Alliance, who haven’t specified a way of exchanging Thread network credentials. But it’s also worth noting that Matter and Thread are still very new standards. By comparison, Zigbee was designed in the 1990s and standardised over 20 years ago.

A few weeks ago, the Home Assistant developers hosted a livestream about ‘The State of Matter’, and there’s a useful summary here (which is good as the live stream was the best part of three hours). There’s still work to be done with supporting Thread networks in Home Assistant.

Sonoff Zigbee and Thread/Matter dongle

A photo of the Sonoff ZBDongle E which offers Zigbee and Thread support

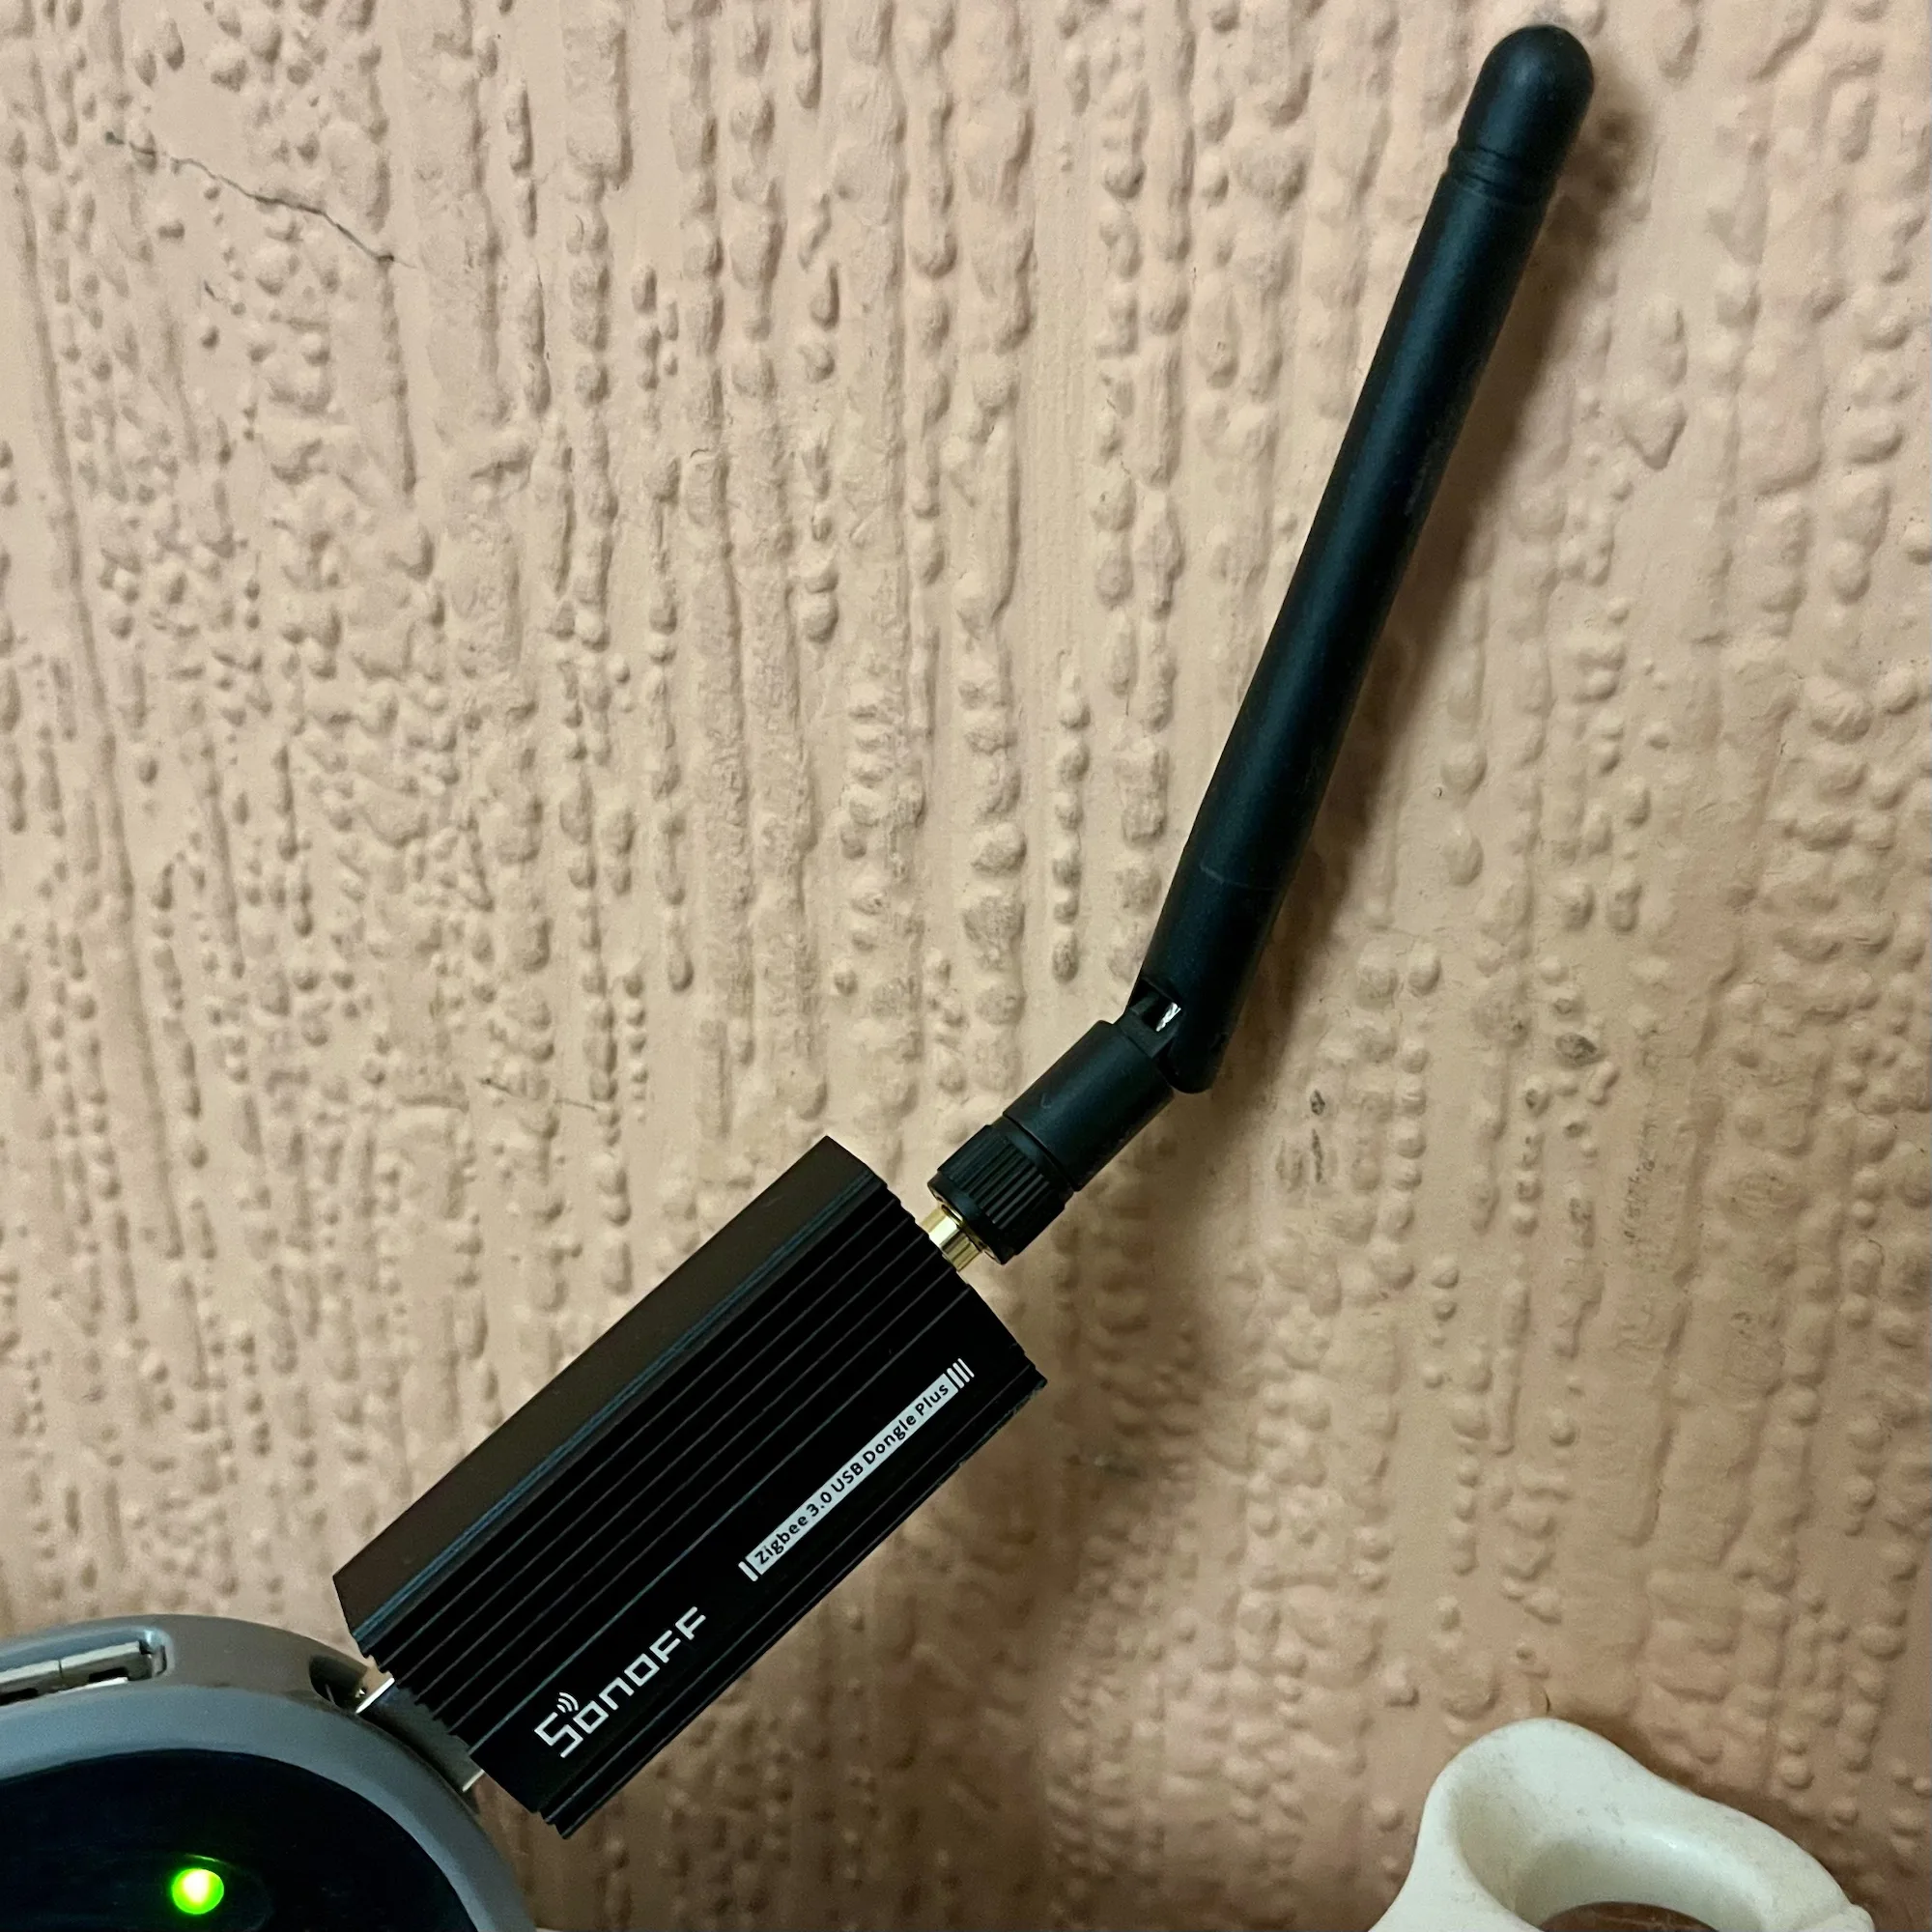
If you’re a Home Assistant user, and want to connect your Zigbee and Matter devices, then one option to consider is this Sonoff ZBDongle E. I bought one a couple of weeks ago, and it seems to work fine with my Home Assistant setup.

One thing you will notice if you view its Amazon product page (sponsored link) is that there’s no mention anywhere of Thread or Matter. Out of the box, this Sonoff dongle will only work with Zigbee devices. However, if you follow this handy guide from Smart Home Scene, you can flash the dongle with custom firmware, which adds support for Thread as well. As I mentioned in my recent is there a Zigbee network in your house blog post, both Zigbee and Thread are protocols in the 802.15 family.

The firmware flasher is actually browser-based, and so there’s no need to download additional software. However, it’ll only work in Edge or Chrome, as seemingly Firefox doesn’t have away of allowing web pages to access serial ports.

Note that the guide linked above is for Home Assistant Supervised and OS. If you’re running Home Assistant as a Docker Container, then you’ll need to install this Docker Image as well. I haven’t tried it myself, as I run Home Assistant Supervised, but this seems to be the way to get it to work.

Once it’s all set up, you’ll be able to add both Zigbee and Matter devices to your Home Assistant installation.

The Sonoff dongle cost £22 when I bought it earlier this month, although at the time of writing the price has been hoicked up to £30. That makes it only £1 cheaper than the Home Assistant Skyconnect, which is the official dongle. Therefore, my recommendation of the Sonoff dongle being a cheaper option no longer applies and it’s up to you which one to buy.

How to: install Home Assistant Supervised on a Raspberry Pi

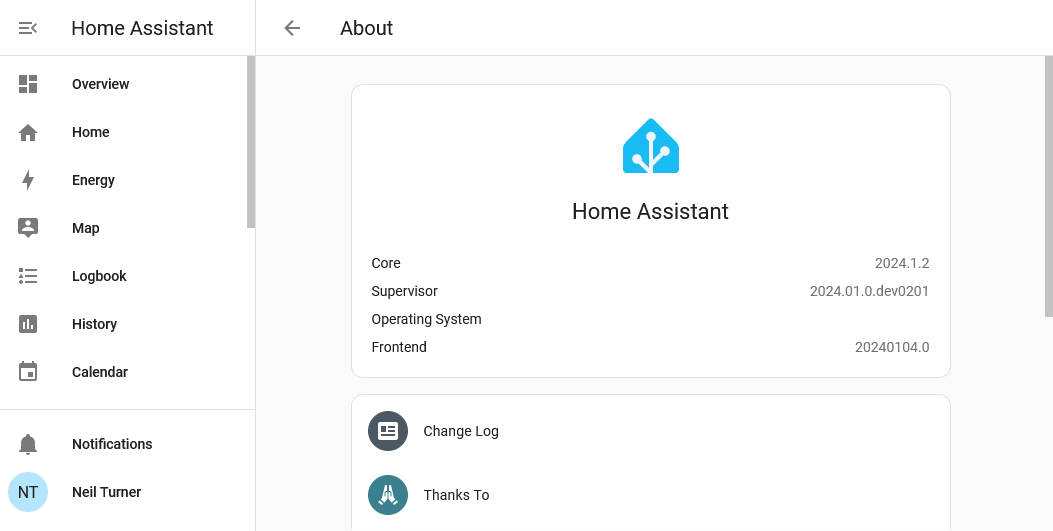
Screenshot of Home Assistant showing Supervisor installed

There are several ways to install Home Assistant. The easiest way (besides buying a dedicated device such as Home Assistant Yellow or Green with it pre-installed) is to use what is known as ‘Home Assistant Operating System’. This bundles Home Assistant with a system manager called Supervisor and an underlying Linux distro.

There are other methods, and I’ll probably write another blog post comparing them all later. Probably the most difficult is Home Assistant Supervised, which includes the Supervisor from Home Assistant OS (HAOS), but with a self-administered Linux operating system. I’ve got over 10 years of experience working with Debian Linux, as this blog runs on it, but it took some trial and error on my part to get working.

By setting up Linux yourself first, you gain more control over your system than is offered by HAOS. For example, whilst you can enable shell access on HAOS, it’s a limited user account with no root access. And, bizarrely, HAOS doesn’t support USB mass storage devices. So even though you can install Plex from within HAOS, if your media is on an external hard disk, you can’t grant Plex access to it.

At the weekend, I set up my Raspberry Pi 4 with Home Assistant Supervised. Here’s how I went about it.

Note: This guide was current in January 2024. The instructions below may not necessarily work on future releases of Debian and Home Assistant.

Step 1: Installing Debian 12 (Bookworm)

I strongly advise you to start with a fresh Linux installation; trying to bolt this onto an existing Linux image may break other things. Home Assistant is designed to run on Debian 12 – and not Raspberry Pi OS, although I’ve seen some forum posts from users who are using this. For this guide, I’m using Debian 12.

For the most part, you can simply follow the instructions on this guide to flash an SD card and complete the initial setup. The newer versions of the Raspberry Pi imager may ask if you want to configure Wifi and SSH access for your image; don’t bother, as this won’t work on Debian. The other thing to bare in mind with this guide is the Wifi settings, where you un-comment several lines in a configuration file if you’re not using an Ethernet connection. This is fine at this stage, but you’ll need to re-comment those lines later.

The other thing that I did in addition to this guide was type in dpkg-reconfigure tzdata and set my timezone to Europe/London rather than UTC.

You can stop following the guide at the point at which it tells you to install a graphical user interface, as this isn’t needed for Home Assistant. Of course, if you’re planning to use this device for other things and a graphical UI would help you, then follow the whole guide by all means.

Step 2: Install the necessary additional packages for Home Assistant

Here, we start following this official guide from HA. You’ll need to install various additional packages to enable the Home Assistant Supervisor to run.

Once installed, I found that I had to edit the /etc/NetworkManager/NetworkManager.conf file and change managed=false to true. This was also the point where I needed to re-comment the wifi settings. Without doing this, my Raspberry Pi wasn’t able to connect to the internet for the next step.

Step 3: Install Docker

As per the official instructions, run curl -fsSL get.docker.com | sh to install Docker. This took quite a while, so maybe go and grab some lunch.

If you’re getting an error about being unable to resolve get.docker.com, then go back to step 2.

At this point, I found it easier to continue the installation remotely over SSH, rather using the keyboard and a screen.

Step 4: Install the OS Agent

Next, you’ll need to install the latest version of the OS Agent. For a Raspberry Pi 3 or later, you’ll need the aarch64 version. I downloaded the ‘os-agent_1.6.0_linux_aarch64.deb‘ file and then uploaded this using WinSCP, but you could also download it using curl or wget. You’ll then need to run the command dpkg -i os-agent_1.6.0_linux_aarch64.deb as root.

The next command to run is gdbus introspect --system --dest io.hass.os --object-path /io/hass/os . This should give some multi-coloured code and not an error; if you get an error about the ‘gdbus’ command not being found, then you may have missed the libglib2.0-bin package in step 2.

Step 5: Install Home Assistant Supervised

Finally, we’re at the stage where we can actually install Home Assistant. Here’s the command to run:

wget -O homeassistant-supervised.deb https://github.com/home-assistant/supervised-installer/releases/latest/download/homeassistant-supervised.deb apt install ./homeassistant-supervised.deb

Once this is complete, wait a few minutes and go to http://[your IP]:8123/ and you should be greeted with the Home Assistant web UI. It may take a minute or to before you can start the onboarding process. If you’re migrating to Home Assistant Supervised, then you can also restore a backup at this stage, but be aware that such a backup can take a long time to restore.

And then you’re done. You may get some warning messages about the system being ‘unhealthy’ but these seem to disappear after a reboot, in my experience.

Things to consider

Although installing Home Assistant this way does allow it to co-exist with other software, bare the following in mind:

  • Even if you mount a USB hard disk/flash drive to your device, Home Assistant doesn’t seem to want to know about it, or let you attach it to any addons.
  • Although you need to install Docker for Supervisor to work, you’ll get errors in your Home Assistant settings if you install any other Docker images that are not managed as Home Assistant Addons. So, if you want to install any other software, do it manually, or in another container system like Snap. Or you could try Kubernetes I suppose, if you really hate yourself.

Installing Home Assistant Supervised is by far the most difficult method, but for me, it offers the best balance of overall control, and ease of use once set up. If you can find the time to set it up, then once it’s up and running, it’s easier to add new devices and configure on an ongoing basis. Whereas setting up HTTPS and HomeKit can be a challenge on Home Assistant Container, enabling these on Supervised is much more straightforward.

That being said, if you can dedicate a device to running Home Assistant on its own, then I would definitely recommend just running Home Assistant Operating System.

Home Assistant with HTTPS and HomeKit

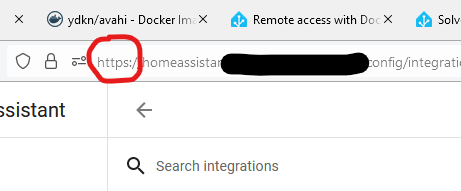
A screenshot of Home Assistant running in a web browser with HTTPS enabled and no certificate errors

Welcome to the latest chapter of getting Home Assistant working on a Raspberry Pi using Docker. Last time, I’d managed to get it working in Docker, but only over a regular HTTP connection and without HomeKit. The good news is that I’ve solved both of these problems.

Using SWAG to enable HTTPS

Firstly, I recommend reading this paragraph whilst listening to ‘Swagger Jagger’ by Cher Lloyd.

I’ve tried lots of different ways to get Home Assistant working over SSL/TLS. There’s a good reason why this is one of the key selling points of Home Assistant Cloud, as it can be difficult. Thankfully, there’s a Docker image called SWAG (Secure Web Application Gateway) that handles much of the legwork. Once you’ve installed SWAG, follow this guide, and you should find that you can access your Home Assistant setup at https://homeassistant.[yourusername].duckdns.org/ . No need to specify a port, or accept any certificate warnings.

Inside SWAG, there’s a DNS client, which will automatically renew the SSL certificates every 90 days for you, using ZeroSSL or Let’s Encrypt. There’s also nginx, which is used to set up a reverse proxy, and support for dynamic DNS services like DuckDNS.

SWAG has sample configurations for lots of different services, including calibre-web, so I have SSL access to my calibre-web image too. My only issues with it so far were last week when DuckDNS went down on Sunday morning. Most services, like Home Assistant, need to be mounted as subdomains (as above), but others (like calibre-web) can be mounted as subfolders, e.g. https://[yourusername].duckdns.org/calibre-web. This reduces the number of subdomains that you need SSL certificates for; ZeroSSL only offers 3 subdomains for a free account so it’s worth considering subfolders if you want to add more services.

If you have your own domain, then you can also add a CNAME to it to point it at your DuckDNS account, should you wish to use that rather than a [something].duckdns.org address.

Getting Apple HomeKit working

Carrying on the musical theme, here’s ‘Carry Me Home’ by Gloworm, a 90s dance classic which has only recently become available on digital platforms again.

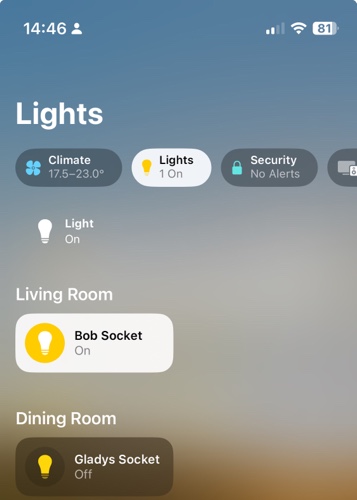
After getting my swagger jagger on and getting HTTPS working, the final issue I’ve been having with Home Assistant is the HomeKit bridge. Adding Home Assistant devices to Apple’s Home app is something that normally works out of the box if you install Home Assistant OS, but takes more work if you use Docker.

The instructions which helped me where these on the Home Assistant forums. You’re going to need to install another Docker image containing avahi; there are several but this one worked for me. It’s bang up to date, unlike the most common Docker image which is, um, 8 years out of date and also only works on x86 machines. Which isn’t much help for my arm64-based Raspberry Pi 4.

Once you’ve installed avahi, added the relevant lines to configuration.yaml in Home Assistant and restarted it, HomeKit should work. To get started, add the HomeKit integration to Home Assistant – you may want to specify which devices will show if you don’t want all of them. Then, use your iPhone or iPad to scan the QR code in your Home Assistant notification panel, and add the bridge. If all goes well, it should immediately tell you that it’s an unsigned device, but will then let you set up each device in turn.

If it just sits there for several minutes and then gives up, you’ll need to do some more digging. Don’t worry, this happened to me too. I suggest downloading the Discovery app, which shows all of the mDNS devices broadcasting on your network. If you can’t see ‘_hap._tcp’ in the list, then there’s a problem. In my case, this turned out to be because my Raspberry Pi wasn’t connected to the same wifi network. It’s plugged in to my ADSL router with a network cable, but we use Google Wifi which results in a ‘double NAT’ situation. Connecting the Raspberry Pi to both wired and wireless connections seemed to fix the issue.

Indeed, as a side effect Home Assistant managed to autodiscover some additional devices on my network, which was nice.

Home Assistant Core in Docker? Done it, mate

All in all, I’ve successfully managed to get Home Assistant to where I want it to be – self-updating in Docker, secure remote access, and a HomeKit bridge so that I can ask Siri to manage my devices. I’m looking forward to being able to turn my heating on whilst driving, for example.

It’s been a challenge, requiring a lot of skimming through the Home Assistant forums and various StackExchange discussions. Ideally, I would have a spare computer to run Home Assistant OS, which would have taken some of the leg work out of this, but I’m happy with the setup. Finding SWAG and getting it to work was a moment of joy, after all the setbacks I’d had before.

Running Home Assistant in Docker and Snap

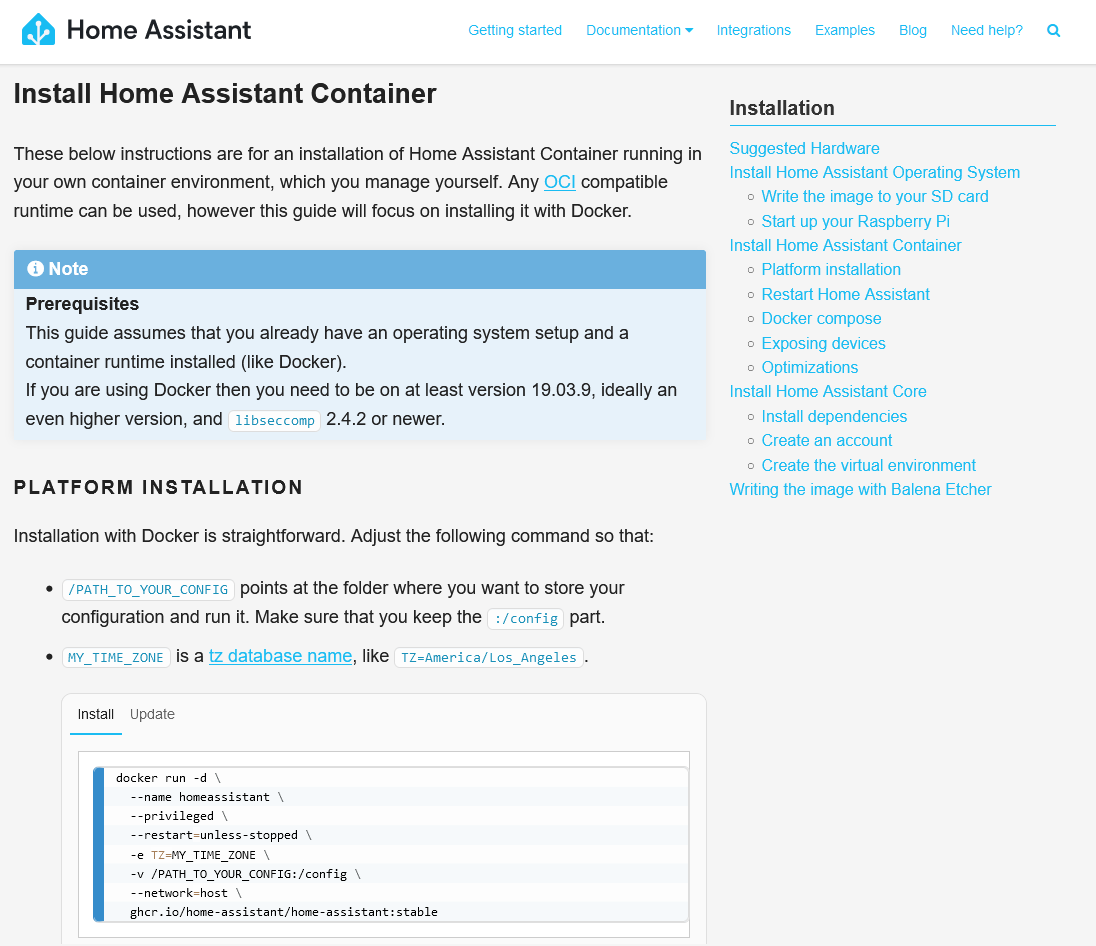
A screenshot of the Home Assistant installation instructions for Docker

So, as I mentioned a couple of weeks ago, I’ve set up Home Assistant (HA) to control the various smart devices that we have around the home. At the time, I just used a snap package, but now I’ve migrated to using Docker, and here’s why.

Firstly, there are some disadvantages of installing Home Assistant using a snap package. Namely:

  1. The snap package isn’t an official release by the Home Assistant project, and is instead built by a third party.
  2. This means that, at time of writing, it’s a couple of releases behind the latest official release.
  3. It also means that it’s not a formally supported way of running Home Assistant, and there are fewer resources out there to help you if you’re stuck.
  4. I had issues updating previously installed custom components from HACS

Meanwhile, there’s an official Home Assistant Docker image that is updated at the same time as new releases, and it’s mentioned in the installation guide.

So, on the whole, Docker is better for running HA than Snap. But I wanted to run HA on my Raspberry Pi 4 which has Ubuntu Core on it, and that only offers Snap. But wait… you can install Docker on Snap, and the Docker Snap package is one maintained by Canonical so it’s regularly updated.

You can see where this is going. What if I install Docker using Snap, and then install Home Assistant into Docker? Well, that’s what I did, and I’m pleased to inform you that it works.

Docker on Snap, step-by-step

If you want to try this yourself, here’s the steps that I followed. However, please be aware that you can’t migrate a Home Assistant setup from Snap to Docker. Whilst HA does offer a backup tool, the option to restore a backup is only available on Home Assistant Operating System, and it seems that manually copying the files across won’t work either. So, if you currently use Snap, you’ll have to set up HA again from scratch afterwards. You’ll also, at the very least, need to run snap stop home-assistant-snap before you start.

  1. Install Docker. You can do this by logging into your machine using SSH and typing in snap install docker.
  2. Enable networking. There’s probably a better way of doing this, but for me, just running chmod 777 /var/run/docker.sock worked.
  3. Install Home Assistant. You’ll need to enter quite a long shell command, which is:
    docker run -d \
    --name homeassistant \
    --privileged \
    --restart=unless-stopped \
    -e TZ=MY_TIME_ZONE \
    -v /PATH_TO_YOUR_CONFIG:/config \
    --network=host \
    ghcr.io/home-assistant/home-assistant:stable

    The two variables in bold will need changing. For ‘MY_TIME_ZONE‘ you’ll need to type in your time zone, which in my case is ‘Europe/London‘, and for ‘PATH_TO_YOUR_CONFIG‘ is a folder where you want your configuration files. I suggest /home/[username]/homeassistant .
  4. Grab a drink, as the installation will take a few minutes, and then open http://[your IP address]:8123 in a web browser. If it’s worked, then you’ll be presented with HA’s onboarding screen.

Again, if you had the HA snap package installed, then if everything’s working with Docker, you’ll need to uninstall any related HA packages (like HACS, toolbox and configurator) and then the home-assistant-snap itself. And then you’ll need to set up all of your devices again. The good news is that, if you decide to move your HA installation to a new machine, you can just migrate the Docker image in future.

Wouldn’t it be better just running Docker?

Okay, so you may be wondering why I’ve set up HA this way. After all, it would probably be easier just to install Raspberry Pi OS Lite and put Docker on that, without using Snap. Well, there’s a method to my madness:

  • I like running Ubuntu Core because it’s so minimalist. It comes with the bare minimum of software installed, which means that there’s less risk of your system being compromised if a software vulnerability is found and exploited.
  • I already have Plex running quite happily in Snap, and didn’t want to have to migrate that as well.

In other words, this was the easiest way of running HA in Docker with my current setup. And I’m happy with it – I’m running the latest version of HA and it seems to work better.

There are a couple of additional steps that I still need to complete, which are:

  • Enabling SSL/TLS for remote access
  • Enabling mDNS broadcasts for Apple HomeKit integration

I’m working on these. Home Assistant Cloud is the easiest way of setting up secure access and I’m considering it. It’s a paid-for service, but it does financially support HA’s development, and seems to much easier than the alternatives. As for mDNS, I’m still working on this, and I imagine there’ll be things I need to tweak in both Docker and Snap to get it to work.