Suppose you have two entities in Home Assistant, and you want to multiply them together to produce a third entity that always shows the product of these two entities. Here’s how I went about it.
One of Home Assistant’s built-in integrations is Template. These Template entities derive their status from other entities in Home Assistant, and appear in the Home Assistant web interface as Helpers. You can do some fancy things with these, but all I want to do is multiply the value of one by the other.
Calculating export income
In my case, I wanted an entity that shows how much I’m earning from exporting excess energy generated by my solar panels, once our home battery is full. The amount exported is available as an entity in the SolaX Modbus integration that I use, expressed as a value in kWh. I also use the Octopus Energy integration with Home Assistant, and this has an entity showing my current export rate in £ per kWh. So, multiplying these together will show how much I should be making when I export.
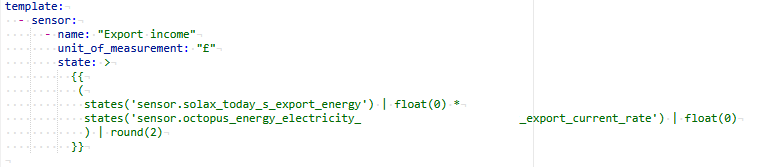
This should be possible to set up as a Helper in the Home Assistant interface, but I personally found it easier to do so in YAML. Also, this is where I was able to ask ChatGPT to help write the YAML code. After tweaking its output to fit my needs, here’s what I’m using:
The name is a human-readable name that I have given to the entity. The unit of measurement is optional – Home Assistant will accept just about anything you type in here, but as the amount will be currency I’ve put in the £ sign.
The ‘state’ bit is where I needed help from ChatPGT, as this isn’t really standard YAML here. We specify the first entity, and add '| float(0)'. The ‘float’ is necessary to provide a floating point number. The * character represents multiplication, and then we repeat the same notation for the second entity. Finally, we specify ‘| round(2)‘ so that the resulting entity rounds to two decimal places. Which, when dealing with an amount of money, makes sense as 0.3333 of one pence isn’t really worth knowing about.
As with any changes to Home Assistant’s YAML configuration, you’ll need to restart Home Assistant after setting this up. You’ll then have a nice new helper, in my case ‘sensor.export_income‘ to plop somewhere on your dashboard. Personally, I have it as a badge which appears once the value is higher than 0. Which, at this time of year, isn’t very often, but we did have a nice enough day a couple of weeks ago to be able to export some electricity.
I recently bought a GeekMagic SmallTV Pro (sponsored link), which is a small, always-on desktop screen that runs on USB power. Out of the box, it can display the weather, a small range of photos, share prices and cryptocurrency prices. However, I’ve connected it up to Home Assistant to display a dashboard.
There are two varieties of the GeekMagic SmallTV – the ‘Ultra’ and the ‘Pro’. The ‘Ultra’ is actually the more basic model, and isn’t available to buy on Amazon. Both types are available on AliExpress, however. Inside, the ‘Ultra’ model has an older ESP8266 chip, whereas the ‘Pro’ has the newer and more powerful ESP32 chip. Both offer a roughly one inch square screen and connect using USB-C.
Setting up the GeekMagic SmallTV
Like many ESP-based devices, when you first plug the GeekMagic SmallTV in, it’ll create its own Wi-Fi access point. Connect to this on your smartphone, and it’ll pop up a captive portal where you can select your home Wi-Fi network and provide the password.
It’ll then reboot and connect to your home network, and will flash its new IP address whilst booting. You can then go to http://[IP Address]/ in your web browser to configure settings. Note that the cheaper ‘Ultra’ model doesn’t support stocks or cryptocurrency tracking.
Integration with Home Assistant: Method 1
There are two ways that you can integrate your GeekMagic SmallTV with Home Assistant. Method 1 is the method that I have used, as it’s less invasive and leaves the stock firmware intact.
Inside Home Assistant, open HACS, and add the above-linked GitHub page as a repository. You can then install the GeekMagic integration – once done, reboot, and then add your device on the Integrations panel.
How this integration works is by generating an image of several dashboard entities, which it then pushes to your device. You should notice a new ‘GeekMagic’ section on the main sidebar that allows you to open the dashboard editor – click this, and you’ll be able to create a new dashboard.
There are multiple layouts available, allowing you to display between one and nine entities. Theoretically, any entity in Home Assistant can be added. Personally, I’ve added the date and time, my solar battery status, the weather, my car’s charge status, how much energy is being generated by my solar panels, and my dishwasher’s progress through a cycle. Most of these are ‘gauge’ displays in the ‘ring’ style, so as well as showing the percentage, the ring gives a clearer visual indication of progress. This is good on such a small screen.
Once set up, the integration pushes a new image to the GeekMagic SmallTV device on a regular basis. I found that I had to remove all of the other images, and set it to change every 10 seconds, to keep the dashboard showing and updated.
Integration with Home Assistant: Method 2
If you clocked that these devices have ESP chips earlier, then it won’t surprise you that people have installed ESPHome on them. This involves replacing the stock firmware with ESPHome, which is easy to do – the web interface on the stock firmware has a firmware upload tool that should accept an ESPhome binary. I say should because I haven’t tried it personally.
If not, then the good news is that this device is easily dismantled – there are a couple of standard screws on the bottom. Inside, the printed circuit board includes GPIO pin holes for its UART interface. That may also help if you accidentally brick the device and need to replace the firmware manually.
I haven’t gone down this route as yet, as it takes more work. You would have to specify what to display on the screen in the ESPHome YAML configuration, and you’ll lose all the other functionality provided by the stock firmware. Also, be aware of various copycat devices with slightly different chips; they’ll almost certainly still run ESPHome but you may need to amend the configuration slightly.
I quite like my GeekMagic SmallTV Pro – it’s handy to be able to track key entities in Home Assistant without having to open my phone or look at the full dashboard. And it’s sufficiently low power that it can run all the time.
If you’re looking for custom firmware for your devices with an Espressif ESP chip, then two of your options are ESPHome and Tasmota. I’ve used both – first Tasmota and later ESPHome – on some smart plugs that used to run Tuya firmware.
I’m going to share my experience with both and highlight the strengths of each. Other ESP firmwares are available, but for this I’m just going to focus on comparing ESPHome and Tasmota.
Tasmota is easier to install
If you’re new to installing custom firmware, then Tasmota is the easiest to install. This is because you first install Tasmota on the device, and then configure it using a web interface on the device after installation.
With ESPHome, the configuration is done first, using a YAML file. You then have to compile a binary and install this on the device. This can mean some trial and error with getting the configuration right.
If you’re running Tasmota on an older ESP8266 device, then it can be a pain to update. This is because of the limited storage space on ESP8266 devices and the size of the Tasmota binaries – there isn’t enough space to store the current and new firmware side-by-side. Instead, you have to install a ‘minimal’ version of Tasmota, and then install the new full version as a two step process.
Because the ESPHome Device Builder compiles the firmware specifically for each device, it’s smaller and so can be updated over-the-air more easily.
This shouldn’t be an issue with newer ESP32 chips, as these have more storage and so updating Tasmota should be easier.
ESPHome is updated more regularly
It’s a good thing that ESPHome updates more easily, because updates are also more regular. Normally there’s a big update every other month, and smaller bugfix updates most weeks. It also has a much larger developer community.
Tasmota receives updates less often, and its development is largely led by just one lead person.
ESPHome supports more DIY devices
Whilst Tasmota is generally used to convert existing devices with ESP chips, ESPHome is more suited to DIY projects that you can make yourself. For example, you could build your own thermostat, a miniature weather station or control your blinds. With the right boards and cables, you can build and automate lots of things using ESPHome that Tasmota may not support.
ESPHome integrates better with Home Assistant
Being both projects of the Open Home Foundation, ESPHome has better integration with Home Assistant. You can run the ESPHome Device Builder as a Home Assistant add-on, and devices should show up without much additional configuration.
Tasmota works over MQTT, so you have to set up an MQTT Broker like Mosquitto in Home Assistant first, and then configure your Tasmota devices to use it. You also have to enable an option using the device’s command line to allow Home Assistant to discover the devices.
In summary
Whether you want to use Tasmota or ESPHome will depend on your use case:
If you’re relatively new to all this, or are replacing the firmware on an existing device, Tasmota may be best for you as it’ll be easier to install and configure.
If you’re a more advance user, or have built a DIY device that requires functionality not normally supported by Tasmota, then you should use ESPHome.
As I write this, there doesn’t appear to be a public API for Rolec’s charge point back office system. The Rolec EVO charger in particular is relatively new to the market, and so I’m not aware that anyone has found a way to integrate this with Home Assistant through other means.
However, like many chargers, the Rolec EVO charger supports OCPP. This means that you can change which back office system your charger talks to, and I’ve specifically chosen Monta because it offers a public API. And, because someone has developed a custom Home Assistant integration that can be installed from HACS.
Aside from this, the Monta Charge app is better, in my opinion – it supports Live Activities on iOS, so you can monitor your car’s charging progress on your phone’s lock screen. You can also make your charger public and allow people to pay to use it, if you wish.
Changing the OCPP provider
Part of the reason why it’s taken me until now to do this, was because I couldn’t work out how to change the OCPP provider. There’s no option to do so on the standard Rolec EVO app, and I tried setting it up using the app in the Monta integration guide, but that didn’t work either.
However, I came across a thread on the SpeakEV forums that made me aware of a third Rolec app. Confusingly, this is called ‘Rolec Connect’ (with a black icon) rather than the ‘Rolec EV Connect’ app (with a green icon) that I was using previously.
Once you’ve installed the Rolec Connect app, it’ll ask for your name and email address. This needs to be a valid email address, as you’ll be sent a link that you need to click on, but you might be able to get away with using Sharklasers.
You then choose the type of charger, and then need to place yourself within Bluetooth range of it. I apologise in advance if you’ve got this far and it turns out to be cold, dark and raining when you read this, but you can’t do this over Wi-Fi. You’ll be asked for a PIN code; mine was printed in the manual.
Once connected, on the second tab, you can change the provider. The good news is that you can simply select ‘Monta’ from the drop-down list, and continue. Leave every other field blank, but make a note of your charger’s serial number – mine was in the format of Rolec_XXX12345. You’ll need this later.
Add your Rolec EVO to Monta
Your charger should now be talking to Monta’s servers, rather than Rolec’s. Next, you’ll need to create a Monta account; I already had one, as Monta has a network of public chargers including the one we used at Portmeirion in Wales.
The guide to follow is here; I found that I had to enter the serial number manually, but hopefully it’ll read the QR code on the outside. If all goes well, the app will be able to connect to your Rolec EVO charger, and you’re done. From now on, you’ll need to use the Monta Charge app to manage your charger; the Rolec EVO app will now only work via Bluetooth as you’ve severed its internet connection to Rolec’s OCPP server.
Install the Home Assistant integration
Finally, you need to install the Monta integration from HACS. Whilst it’s not an official integration, it is linked from the Monta API documentation, and it’s regularly updated with a major new release just a few weeks ago. As with all new integrations from HACS, you’ll need to restart Home Assistant before you can add your charger.
Once you have restarted, add the Monta integration as you would any other. It’ll ask for a Client ID and Client Secret, which you can get from this page. I would leave the rest of the values as is, and that should be it. Your Rolec EVO charger now appears in Home Assistant!
This means you can use Home Assistant to start and stop charges, view the charging status, and have the energy usage appear on your Energy Dashboard. That also means you can build in automations; for example, if you’re able to access your car’s charge status, you could stop charging at, say 80%. I use the Nissan Connect integration from HACS for this.
Going fully local
The great thing about OCPP is that it’s an open standard, and so it’s supported by a range of back office suppliers with Monta being just one. Should Rolec or Monta go bust, then I can easily switch my charger to a different OCPP server and carry on using it. That’s not an unfounded fear: another EV charger manufacturer, Simpson & Partners, were in administration last year, although they seem to be running again.
If I wanted, I could self-host my own OCPP server and have everything running locally at home, with no dependencies on third-party cloud services. Again in HACS, there’s a OCPP Server for Home Assistant, and it supports the Rolec EVO charger amongst a range of others from other manufacturers. I’m not quite at that stage yet, as it would mean I would have to manage charging solely through the Home Assistant app. Although I did come across this ESPHome project for a hardware control using an m5stack Dial (looks a bit like a Nest thermostat) which could be something to consider.
A bigger project would be to build a new integration that allows communication between Home Assistant and the Rolec EVO charger via Bluetooth. That would require me learning Python, and another Bluetooth proxy, but it would at least work without needing to change the OCPP server.
For the third year running, I’m summarising all those end of year reviews that apps like Spotify and Goodreads offer you. You can take a look at 2024 and 2023 if you want.
Countries and counties visited
Unlike last year, I did manage to leave England a couple of times – Athens in June, and Wales in July. I also spent some time at Amsterdam Schipol Airport in the Netherlands, but as I was airside the whole time, I’m not really counting it.
Over the course of the year, I have spent at least some time in the following English counties:
West Yorkshire
North Yorkshire
South Yorkshire
East Yorkshire
Lincolnshire
Greater Manchester
Lancashire
Cheshire
Norfolk
County Durham
Merseyside
West Midlands
Oxfordshire
Northamptonshire
Staffordshire
Tyne & Wear
That’s a few more than last year – East Yorkshire, Oxfordshire, Northamptonshire, Staffordshire and Tyne & Wear weren’t on last year’s list.
My trip to Athens was something of an outlier, but we also went further west than last year. Not so far north this time, though.
Methods of transport used
For the first time since doing this, I can include planes in this (Athens again). There was also a lot of driving, in our old and new cars, and I continued to mostly take the train to work. No trips to London last year, but I did travel by train to and from Manchester Airport, when heading to Athens, and to Leeds. Apart from those Manchester trips, which included time on Transpennine Express, all my journeys were with Northern. Speaking of which, I had 8 successful Delay Repay claims, totalling £6.25 (78p on average).
I’ve been on a few buses and trams as well. No ferries last year, but I did spend some time on a boat in Oxfordshire.
Music listened to
Over the year, I scrobbled 15,063 tracks on last.fm, which is more than the past few years. That’s a little over 41 songs per day, so on average I listened to six additional songs per day in 2025 compared to 2024. Assuming an average song is around three minutes, I listened to slightly over two hours of music every day on average. My ‘listening age’ was 42 – only out by a year, which is nice.
Whilst I don’t exclusively listen to music on Spotify, on there, trance was my top genre this year (it was pop last year), according to my Spotify Wrapped. My most-listened to song was Lady Gaga’s Abracadabra – look, a song that was released in 2025 – as it’s one of our (now) ten-year-old’s favourites. Similarly zeitgeisty was my top album – the soundtrack to K-Pop Demon Hunters.
My top artist was Alex Christensen, which is a weird outlier; he released several albums of classical cover versions of dance music which I marathon-listened to one day. Last year’s top, Armin van Buuren, was second.
Books read and listened to
According to My Goodreads Year in Books for 2025, I read 76 books this year, which is one less than last year (and 17 fewer than 2023). Unfortunately, I set my 2025 reading challenge at 80 books, so didn’t achieve it. Also, books ‘read’ include those that I have listened to as audiobooks.
The shortest book I read, at 64 pages long, was ‘Our Super Japanese Adventure‘ by Sarah Graley and Stef Purenins (not available on Amazon), who we met at Thought Bubble. Meanwhile, the longest book was ‘Rule of Cool‘ (sponsored link) by Matthew Siege at 479 pages, although I listened to the audiobook which was narrated by Felicia Day over 12 and a half hours. The longest audiobook was ‘Neurotribes‘ (sponsored link) by Steve Silberman, which was over 20 hours and probably the longest audiobook I’ve ever listened to, although the print edition is 477 pages (two less than the Rule of Cool)
Overall, the average length of book that I read was 270 pages, which is 39 more than 2024. ‘A Brief History of Time‘ by Prof Stephen Hawking (sponsored link) was the most popular book that I read last year. Although, I found it a struggle in parts and, unsurprisingly, some of the science has changed in the 37 years since it was first published.
Beers and ciders consumed
I log the beers and ciders that I drink using Untappd, and these stats are from my year in beer. Like last year, I drank less than one per month (11 in total) and my main style was ‘non-alcoholic’.
Steps taken
My total steps taken was very similar to 2024 and 2023. Overall I took 3,455,761 steps, which is only slightly less than 2024. My average is 9,468 per day; January was my most sedentary month and July was my most active, but not by much.
Time spent learning French
I started Duolingo’s French course on the 1st January 2022 (so I have a four year streak now), and in 2025, I spent 3,560 minutes learning – that’s 59 hours in total. Compared to 2024, that’s 11 hours less, but we didn’t go to France again this year.
My Duolingo Score for French is 118, which means that I’m in the medium B2 level (‘vantage’) of the CEFR for French. Currently Duolingo’s maximum score for French is 130, which is high B2 level and should be sufficient to study a university course taught in French. I was expecting to have reached 130 by now, but clearly not.
Still, not much further to go. I’m probably going to switch to German next – I got an A* in GCSE German in 2000, but a quarter of a century has passed since then and I’ve forgotten most of it.
A new stat that I tracked in 2024 was an estimate of photos taken, although it will also include some screenshots as well. In 2025, I took 1536 photos, so less than 2024 but more than 2023.
So, that’s 2025 quantified, and a useful summary of the statistics from various web services that seem to spend their December telling me data they hold about me but in a nice way.
One of the features I like about Home Assistant is its Energy dashboard. It can analyse and display various data about power and energy usage in your home – provided that you have the correct sensors available. As we have solar panels, our inverter provides lots of live data via a local API that we can use.
We also have a number of energy monitoring smart plugs that track energy usage. We have a couple of Meross plugs, and a couple of cheap Tuya Zigbee plugs. Home Assistant can then display the power usage of these devices, and so you can see where your energy is going.
But we can’t fit these onto every device. For example, devices like our oven, hub and dishwasher are all built-in, and don’t use standard 3-pin plug sockets. We could have smart relays fitted, but that would be a paid job for an electrician. So, instead, there’s a potential software solution, in the form of PowerCalc.
PowerCalc is a custom integration that you can install from HACS. Once set up, you can use PowerCalc to estimate the power usage of your devices, or use its extensive library where other users have provided this data already. Indeed, when I installed PowerCalc, it automatically added entries for our various Google Home smart speakers. Once added, these appear as additional entities attached to your existing devices, which is nice – they don’t appear as separate devices.
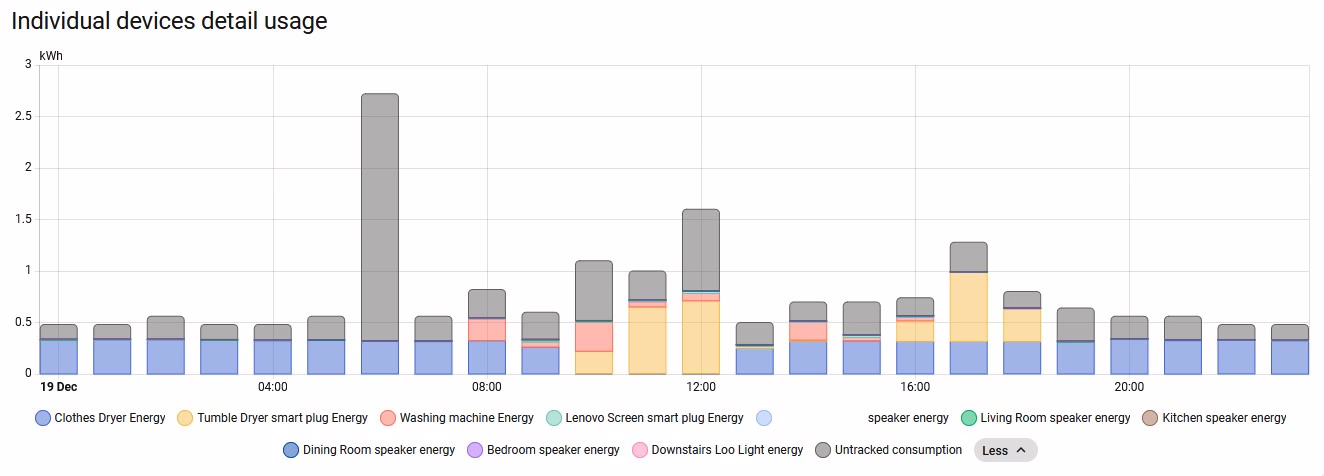
You can then add these entities to your energy dashboard, to see where your electricity usage goes. Here’s a Sankey graph from last week from our house; it was quite a dull day with little solar generation. There’s a lot that we can’t track, but you can see that a significant amount of our energy usage was spent drying clothes.
PowerCalc gets regular updates, with new devices being added all the time. And, of course, you can add these yourself, if you have the means to record the energy usage. The energy usage data also updates in realtime, so you could add the data to a dashboard and see how changing the brightness of a bulb affects its calculated energy usage.
Our house is actually two smaller properties that were knocked through years ago. That means it’s a long, narrow house, and whilst we have our optical network terminal and router in a relatively central position, the Wi-Fi signal doesn’t reach the whole house from the router. Initially we used a little Netgear Wi-Fi Range Extender, and then a few years ago I replaced this with a Google Nest Wi-Fi 5 mesh system. Mesh Wi-Fi works better, as all devices use the same network name (SSID) and so mobile devices can seamlessly move between your router and repeaters without needing to re-connect. It’s how most corporate Wi-Fi systems work, but consumer mesh devices aren’t as common.
Design
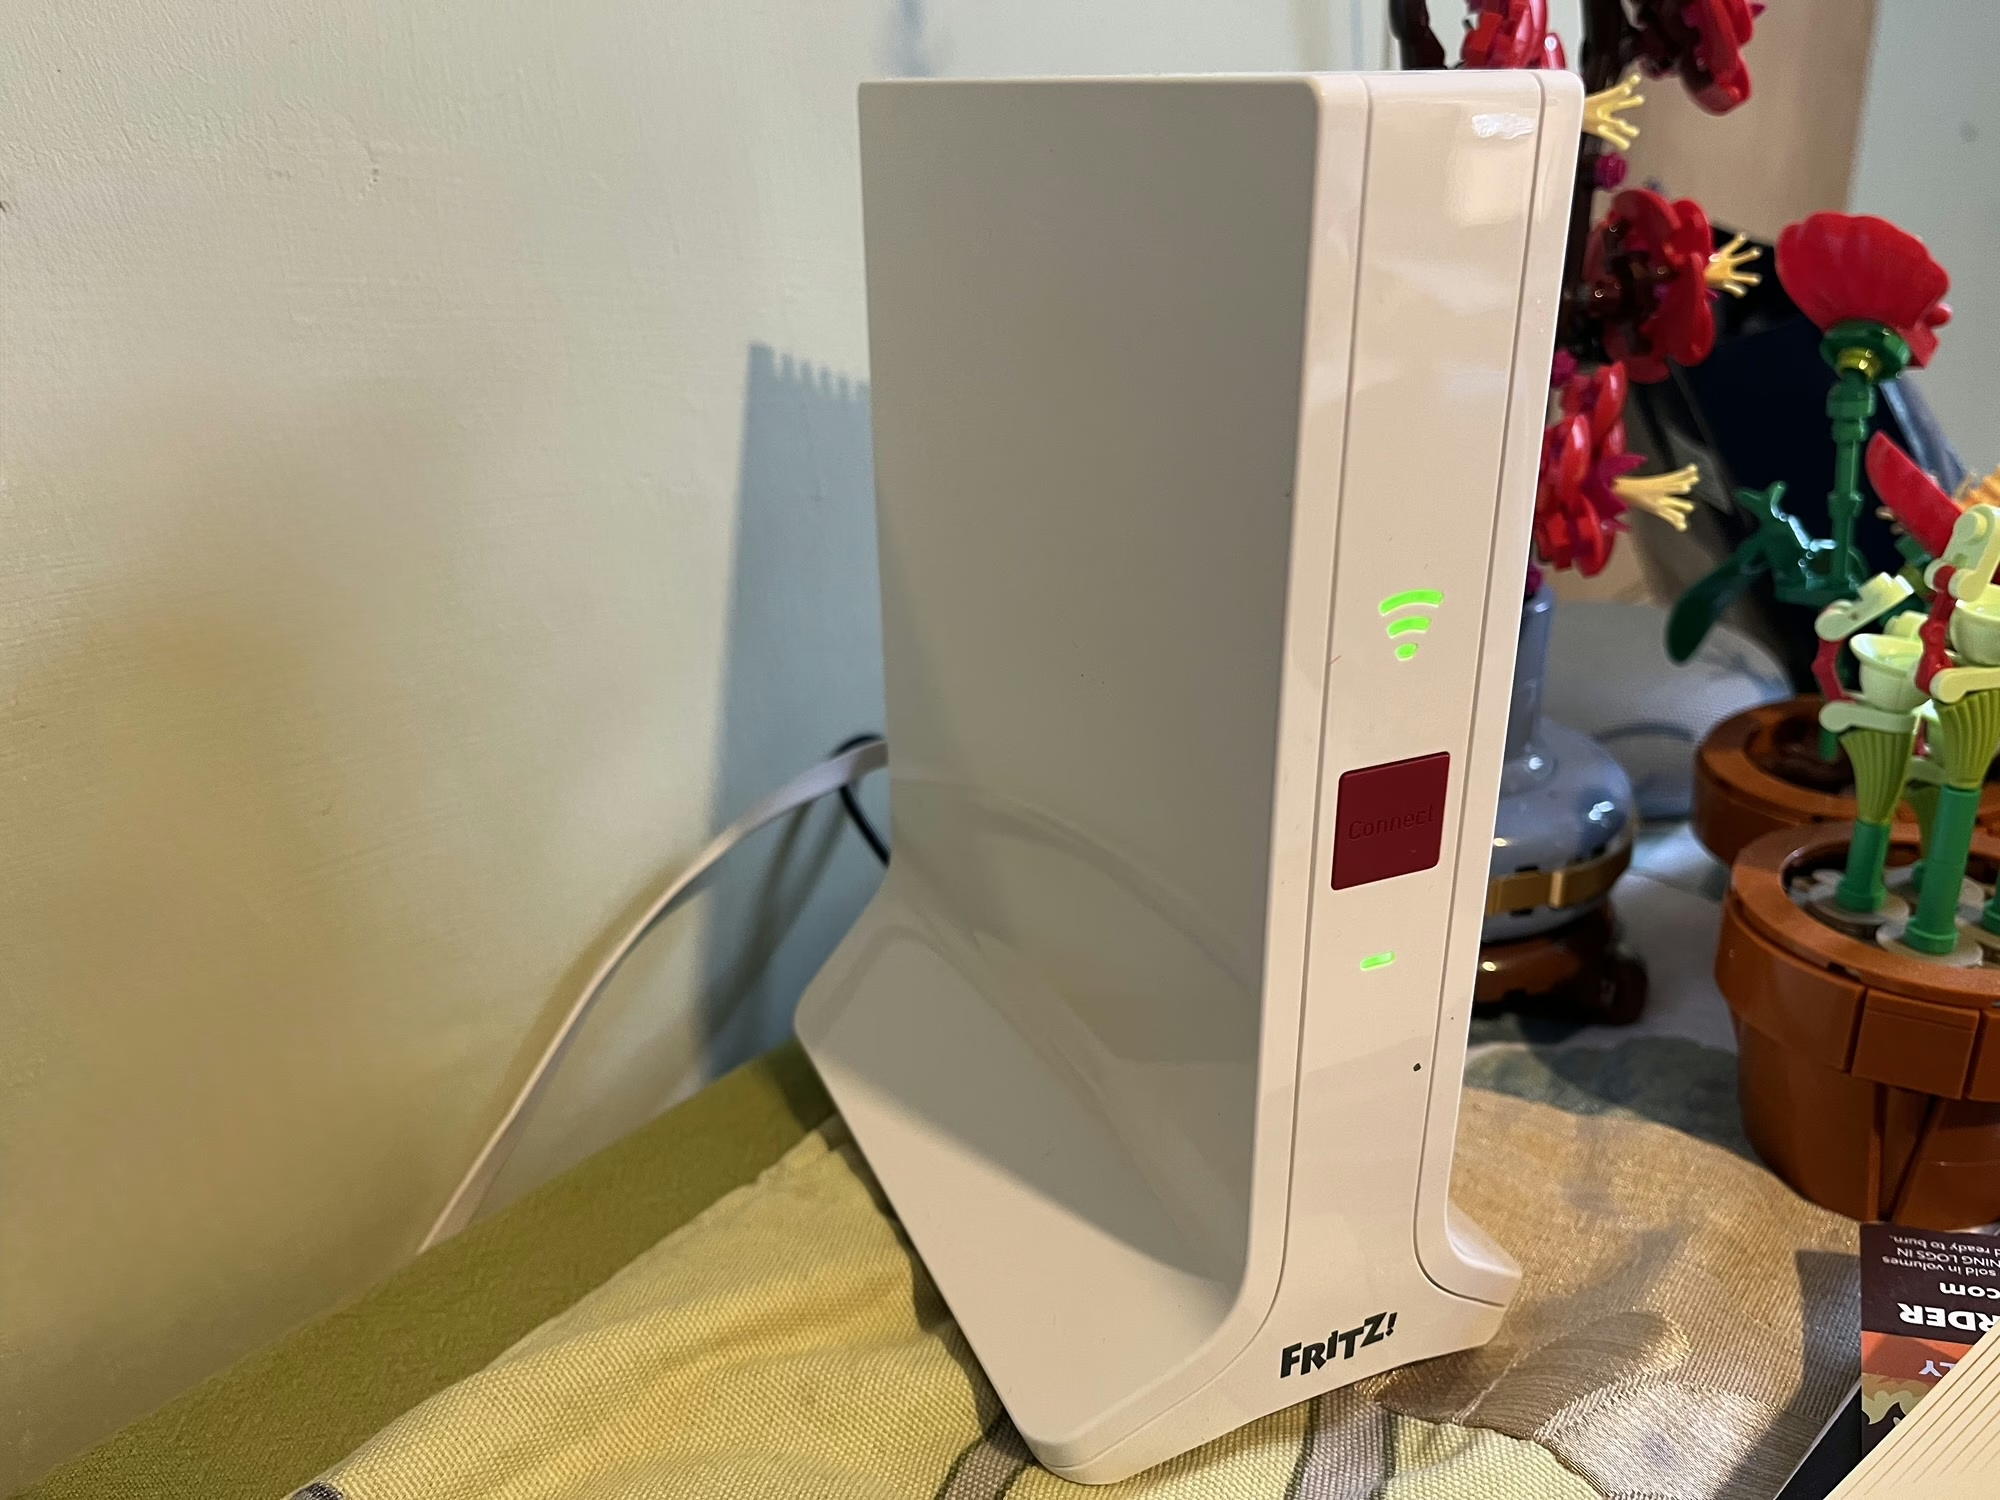
Like the Fritz!Box router, I’m not a massive fan of the design of the Fritz! Repeater either. Whilst it looks better, it still feels a bit like a cheap plastic box. Furthermore, unlike the router which is in our spare bedroom, this is in quite a prominent place in our dining room.
On the front, there’s a Wi-Fi Protected Setup (WPS) button, a power light, and a light to show that it’s connected to Wi-Fi. On the back, as well as the connector for the DC adaptor (a non-standard barrel plug), there are also two gigabit Ethernet sockets. I’ll come on to those later.
Setting up the Fritz! Repeater is as simple as plugging it in, and using WPS to establish the connection with your router.
Operating modes
The Fritz! Repeater can operate in different ways, depending on what other hardware you have:
It can work as a simple Wi-Fi repeater with any other brand of router, or an older Fritz!Box.
With a new Fritz!Box like ours, it can form a Wi-Fi Mesh.
You can also use connect it to either a Fritz!Box or other router using an Ethernet cable as a LAN bridge
We’re currently using it in the third way, with our Powerline network acting as a back-haul. Therefore, there’s an Ethernet cable running from the Fritz! Repeater, via our Powerline adaptors, to the Fritz!Box upstairs. I figured this would be more reliable and stable, but it turns out that it’s actually slower. When doing speed tests, I get around 60-70 Mbps using Powerline, but the full 100 Mbps when using Wi-Fi to reach the internet. It’s odd because the Powerline connectors reckon they’re working at 400-500 Mbps. I’ll need to try running the Fritz! Repeater just on Mesh Wi-Fi to see if it’s faster, but it’ll need reconfiguring to do so; simply unplugging the Ethernet cable isn’t enough to get it to switch operating modes.
Range and performance
The range seems pretty good – there’s a reasonably strong signal even in our cellar. Certainly, between the Fritz!Box Router and the Fritz! Repeater, there are no dead zones inside the house.
Both Fritz! devices support Wi-Fi 6, aka 802.11ax, hence the ‘AX’ in their names. This should offer better speeds for those devices that support it. Neither supports Wi-Fi 6E, which offers enhanced speeds using the 6 GHz frequency band.
Compared with our previous Google Nest Wifi mesh system, the coverage seems better. Previously, we were also able to use the Google Nest Wifi Point in our dining room as a Google Assistant smart speaker, and the Fritz! Repeater unsurprisingly doesn’t support this. That’s not a major issue as we had a spare Google Nest Mini to use alongside it.
What is notable is that the Wi-Fi signal from the Fritz! Repeater seems to be strong than the Fritz!Box; devices in range of both seem to connect to the repeater more than the router. That could be to do with where the repeater is placed, but it looks like it could have larger internal antennae.
Mixing and matching Mesh Wi-Fi products
As we’ve moved from one Mesh Wi-Fi system to another, it’s worth noting that mesh products from one manufacturer aren’t compatible with those from another. In other words, we wouldn’t be able to keep our Google Nest Wifi Point, and have it mesh with our Fritz!Box. Whilst there is a standard, 802.11s, only a handful of manufacturers support it; most use a proprietary meshing protocol.
In any case, our previous Google Nest Wifi system used Wi-Fi 5, and this is a Wi-Fi 6 system.
If you have a very large home, then you can buy additional Fritz! Repeater devices to extend the signal even further; all the devices should mesh together.
If you’ve upgraded to last month’s release of ESPHome 2025.11, you may start seeing this warning message about WPA when validating your YAML scripts, or compiling new versions:
WARNING The minimum WiFi authentication mode (wifi -> min_auth_mode) is not set. This controls the weakest encryption your device will accept when connecting to WiFi. Currently defaults to WPA (less secure), but will change to WPA2 (more secure) in 2026.6.0. WPA uses TKIP encryption which has known security vulnerabilities and should be avoided. WPA2 uses AES encryption which is significantly more secure. To silence this warning, explicitly set min_auth_mode under ‘wifi:’. If your router supports WPA2 or WPA3, set ‘min_auth_mode: WPA2’. If your router only supports WPA, set ‘min_auth_mode: WPA’.
The warning message is pretty self-explanatory, but it concerns upcoming changes to Wi-Fi Protected Access (WPA) in ESPHome that are due to be introduced in June next year.
A bit of a history of WPA
Honestly, if you’re using ESPHome, you’re probably sufficiently tech-savvy to know what WPA is, but if this blog post is less than 300 words, it’ll probably be largely ignored by search engines. So, you can skip this bit if you like.
WPA is what makes a secured Wi-Fi network secure. The ‘Wi-Fi password’ you put in when connecting to secure Wi-Fi networks is the WPA security key. It replaced Wired Equivalent Privacy, dating from the earliest days of Wi-Fi, which is so weak that you can probably crack it with a standard laptop nowadays in a few minutes. It used 64 or 128-bit RC4 keys.
There are three versions of WPA:
The original version, which uses 128-bit keys with TKIP
WPA2, which replaces TKIP with the more secure AES
WPA3, the newest version, which improves the security of the key exchange and mitigates against easily guessable Wi-Fi passwords
Many devices that were originally designed to only support WEP could be upgraded to support WPA through software. At the time, this was a good thing – plain vanilla WPA was (and is) more secure than WEP. But as more security research has taken place, and computers have become more powerful, WPA is now also no longer recommended. WPA2 was ratified over 20 years ago, and so there are very few devices still in use that don’t support it. WPA3, meanwhile, is still quite new, having been ratified in 2018.
ESP devices and WPA
So, to bring this back to ESP devices and ESPHome in particular. At the moment, ESPHome defaults to the following WPA versions:
Original, plain vanilla WPA on ESP8266 chips
WPA2 on ESP32 chips
Remember, ESP32 is newer than ESP8266, despite the numbers. ESPHome has long supported YAML variables, that over-ride these defaults, to specify a specific WPA version to use when compiling.
What has changed with ESPHome 2025.11 is that, where you don’t specify the WPA version, you’ll see the above error when validating or compiling ESPHome for ESP8266 devices. Remember, these default to standard WPA at present.
Next June, when ESPHome 2026.06 is due for release, support for WPA will be dropped. So, if you don’t specify the WPA version, then from around June 2026, your ESP8266 devices will start using WPA2 the next time you re-compile them. This shouldn’t cause any issues, unless your Wi-Fi router is really old and doesn’t support WPA2. To which, I would say that replacing your router should be your priority, rather than amending your ESPHome configurations.
As for WPA3, this is only supported by the newer ESP32 family of chips. That means that, from June 2026, WPA2 will be the only option for ESP8266 chips.
How you can make the WPA warning go away
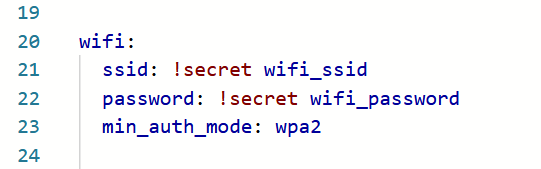
If you want, you can edit your YAML configuration files for your ESPHome devices to specify the WPA version to use. In the ‘wifi:‘ block, add ‘min_auth_mode: WPA2‘ underneath the network name and key, as so:
That will ensure that ESPHome always uses WPA2 on your devices, and will hide the warning. If your devices have ESP32 chips, and your router supports WPA3, you can add ‘min_auth_mode: WPA3‘ instead; this will offer better security. For more information, see the guide to the ESPHome Wi-Fi component.
Will ESPHome eventually phase out WPA2 support as well? Perhaps, but WPA3 is still pretty new – if your router is more than five years old then it may not support it. Maybe it will in another 15 years or so.
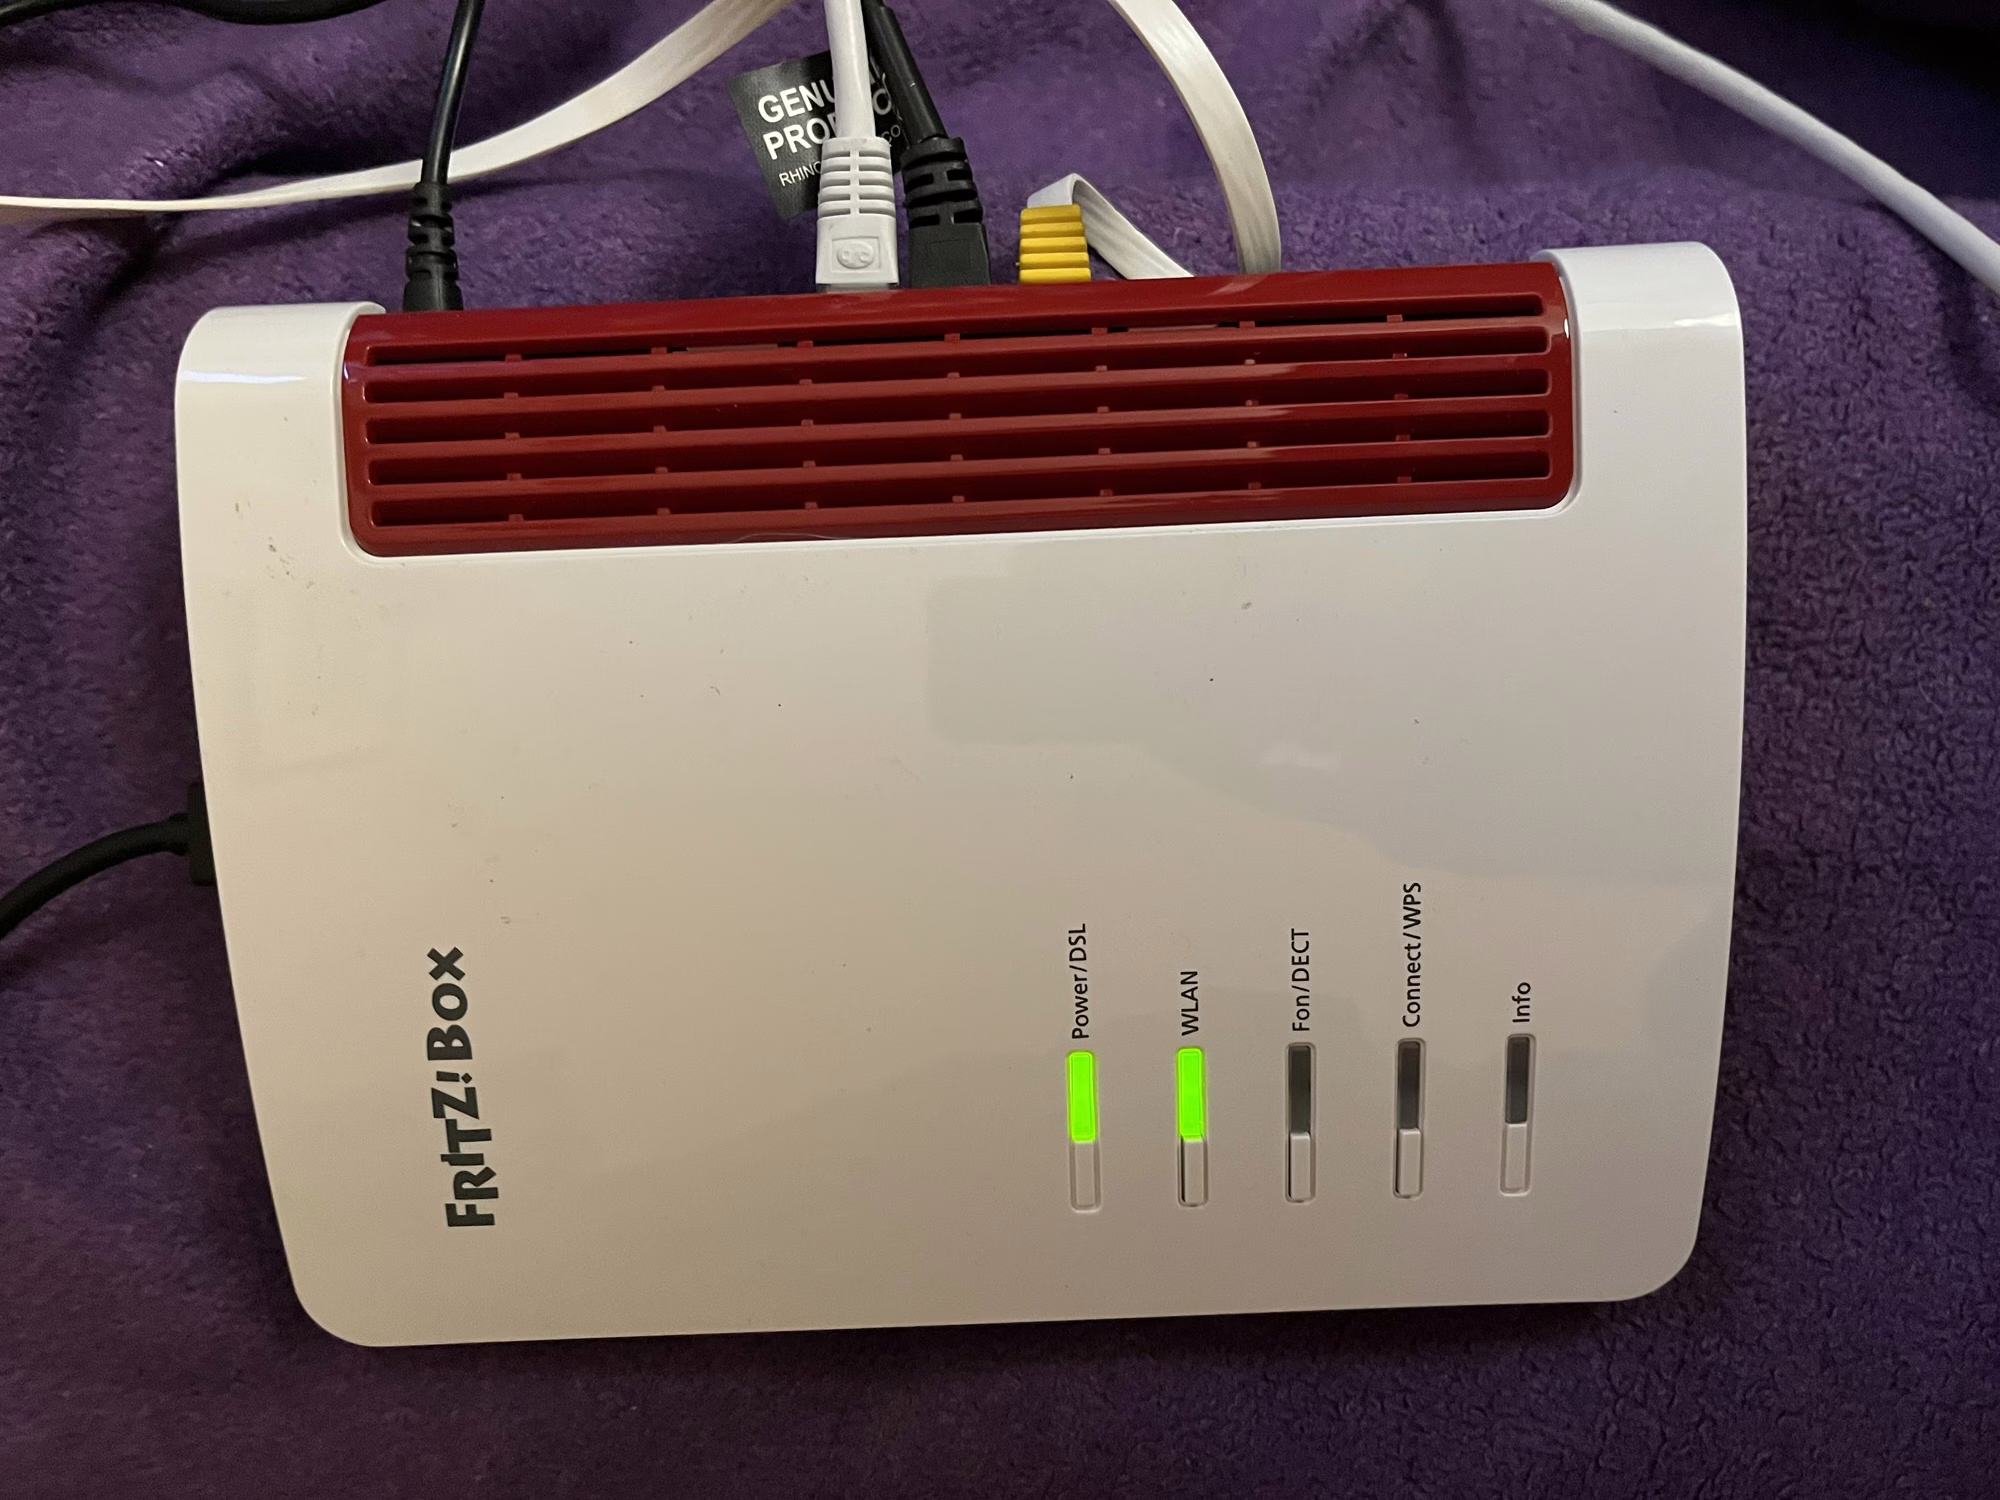
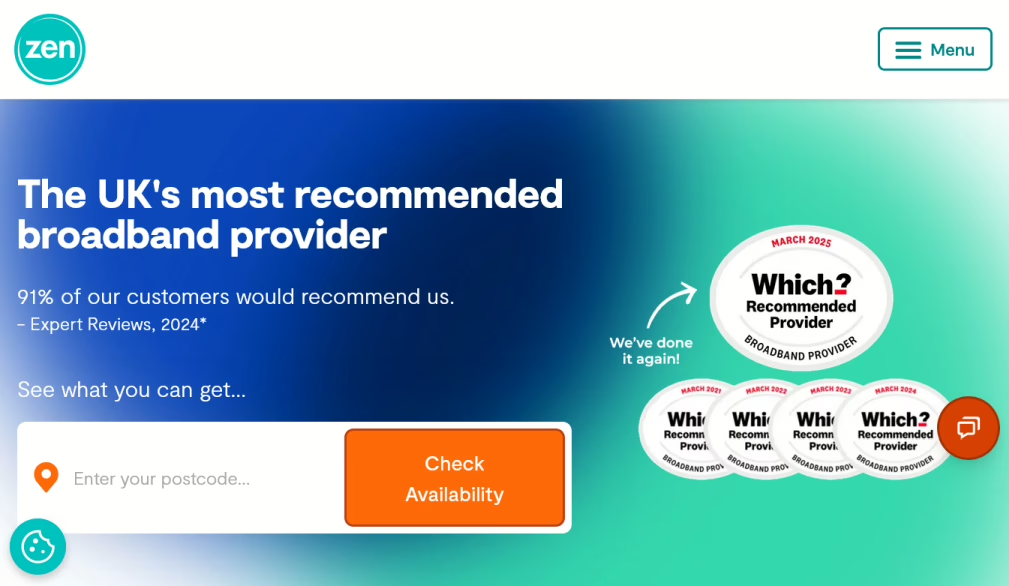
As is usual when you sign up to a new Internet Service Provider, we were offered a new router as well. We signed up with Zen Internet, who unlike their larger rivals, don’t offer their own branded router hardware. Instead, we’ve now got a Fritz!Box 7530 AX as our home router.
Fritz! devices are more common in mainland Europe – Fritz! is a German company – and Zen are one of the few ISPs that offer their devices in the UK. Indeed, their UK range is much smaller than the range available elsewhere in Europe, where you can also buy Fritz! branded smart plugs.
Connectivity
As for the Fritz!Box 7530 AX, the ‘AX’ indicates that it supports 802.11ax, better known as Wi-Fi 6. It’s ‘standard’ Wi-Fi 6, not the enhanced Wi-Fi 6E, so it uses the 2.4 GHz and 5 GHz bands only. Still, it’s an upgrade over our previous Google Nest Wi-Fi system which only supported Wi-Fi 5. As well as Wi-Fi, you get 4 Gigabit Ethernet ports, and a USB port which can be used for media sharing. It should be noted, however, that you’ll need to use one of these Ethernet ports to connect to the Optical Network Terminal, if you have fibre broadband.
Another difference with our previous Google Nest Wi-Fi system is that there’s no Thread support. This means I just have the one Thread border router now, which a USB dongle plugged into my Home Assistant Green. There is a newer Fritz!Boz, the 7690, which supports Wi-Fi 7 and Zigbee, but this is what Zen offered to us.
If we opted to have a Digital Voice Line, then we could plug our landline phone into the Fritz!Box, and it supports IP-based DECT phones as well.
Design
The design of the Fritz!Box is, frankly, a little dated. It feels like it’s made of quite cheap plastic, and I’m not a fan of the colour scheme. But to be fair, it lives in our spare room, so we don’t actually need to see it very much. It can be wall-mounted, if needed – there are a couple of screw hooks on the bottom.
All the ports are on one side, except for the USB port which is at the top.
What it’s like to use
All Fritz!Box devices ship with Fritz!OS, which is their custom Linux distro. There’s a web-based interface, and apps for iOS and Android. In fact, there are several apps – one for managing the device itself, and one for testing the Wi-Fi signal.
The web interface is pretty good, and gives you a lot of control over the box and your home network. Indeed, it was very good at showing a network topology, including those devices connected via my Powerline adaptors. Plus, the web address is ‘fritz.box’ which is nice and easy to remember.
It supports the creation of a separate guest network, which appears as a separate Wi-Fi network (SSID) to your own, and can be open or secured with a separate password.
Wi-Fi speeds and coverage
In the couple of weeks that we’ve had the Fritz!Box, the speed and coverage of the Wi-Fi signal has been excellent. There hasn’t been anywhere in our house where I’ve noticed any issues. How much of that is down specifically to the Fritz!Box, and how much is due to improvements in Wi-Fi 6 over Wi-Fi 5, I’m unsure. But either way, I’m happy with the connectivity that we’re getting.
Something I will pass on is a comment our Openreach engineer made; Fritz!Box devices don’t seem to like a change from being a DSL router to a router connected to a fibre ONT. Not a problem for us, as we’re already on with fibre, but something to bear in mind if you’re considering one and don’t have full fibre yet.
Home Assistant integration
When I first connected my Home Assistant Green to the Fritz!Box, it found several new devices. These included UPnP and DLNA, which come up when you connect most routers, but also two Fritz! specific integrations: Fritz! Smart Home and Fritz!Box Tools. Of these, the second is most useful, as it allows you to control whether individual devices on your network have Internet access, or whether they’re at home or away. This may result in a large number of devices appearing in your Home Assistant install, however, on those where the devices’ MAC address is available in the integration, the device will be shared and only appear once. That means that my ESPHome devices show as both ESPHome and Fritz! devices with the controls combined. It’s not perfect – my Matter devices show up twice, for example – but it allows you to track where devices like phones without having location services on.
Verdict
So, should you get a Fritz!Box? It’s certainly a very capable router with good Wi-Fi performance, and lots of settings for expert users to access. The web interface is clean and simple to use. However, the design is a bit dated, and there are some nice-to-have features that would make it better if they were included.
Zen also offer Eero Wi-Fi routers on their faster full fibre packages; I haven’t tested one, but they do look nicer. Eero is owned by Amazon, and is the major competitor to Google Wi-Fi.
Zen is one of the oldest Internet Service Providers (ISP) in the UK, having been founded 30 years ago, and in that time it has resisted being bought out by a larger rival. It remains one of the smaller players in the UK ISP market, but has a reputation for offering a better standard of service – it’s been Which magazine’s recommended provider for five years running, for example. A friend of mine who works in IT also uses them at home, and recommended them.
In the past, I’ve considered Zen, but found other companies to be cheaper. However, they now offer fibre-only packages (without a digital voice line) that are only a little more expensive than the mainstream providers, and so we’ve signed up.
Our previous provider was Vodafone. They were cheap, but the service wasn’t the best – a number of small outages here and there, but a big one in October was quite disruptive. Pre-2020, I would have put up with the occasional outage, but now that I work from home 2-3 days per week, and use video conferencing almost every day, I need a reliable home broadband service.
Broadband speeds
So, do Zen internet offer their advertised speeds? In my experience yes – eventually. Part of the reason why I’ve held off writing this for a couple of weeks is to give our internet speed time to settle. When your line is first installed, speeds can fluctuate for the first week or so.
I’ve shared a screenshot of a Ookla Speedtest result above – it shows that we’re getting about 105 Mbps download, and 20 Mbps download. Which is roughly the fastest advertised speeds that we should be getting. We were coping well with 80 Mbps before and so I didn’t see a reason to pay for much faster speeds. Zen apparently offers a 2 Gbps package, which I suppose is great if your household has four teenagers all running separate Twitch streams, but it would be overkill for us.
So far, I’ve been happy with Zen, but as we’ve only had the service a couple of weeks, it’s perhaps too early for a full review. The contract is for 18 months, so I’ll see if I’m still thinking positively with them in late spring 2027.