I’ve been thinking about my doorbell, and knowing when someone rings it. Obviously it chimes when I’m at home, but I was hoping that with this Sonoff Wi-Fi RF Bridge, I can get notifications on my phone and a log of when people call when I’m out.
We don’t have a smart doorbell, like Ring for example. Ours is a Koopower Wireless Doorbell that I was sent to review six years ago. The Koopower doorbell doesn’t need a battery – the act of pressing the button generates sufficient power to send a RF signal to the receivers.
What I was hoping with this Sonoff RF bridge is that it could also listen out for doorbell pushes, and send me a notification. I could also integrate it into Home Assistant, which could handle logging. As you can probably tell from how I have written this blog post so far, I haven’t been able to achieve this.
Setting up
The Sonoff RF bridge is pretty small – about 2 inches (5 cm) square. In the box is the bridge, a quick start guide and, erm, well, that’s it. You need to provide your own micro-USB cable and a power source capable of 5 volts and 1 amp – so most phone chargers, or even many batteries. The bridge just has two LEDs – a blue one indicating the Wi-Fi status, and a red one the RF status. The only other thing of note on the bridge is a hole for poking a paper-clip in to reset it – there’s no other buttons.
Once you have hooked it up to a suitable power source, you can use the eWeLink app to set it up. This allows you to connect the bridge to your home Wi-Fi network, and pair RF devices.
Pairing devices
In the eWeLink app, you put the RF bridge into pairing mode, and then have 60 seconds to perform an action on your RF device. When it detects a signal, it’ll save the codes transmitted using RF, and will give you a button in the app. By pressing that button in the app, the RF bridge will mimic the action on your remote. So, you can ‘teach’ your bridge to turn an air conditioning unit on and off, rather than using its remote.
The fun comes when you link your RF bridge to a smart home ecosystem, like Google Assistant, Amazon Alexa or Home Assistant. Your bridge will appear as a device, and so you can use your voice to control appliances that are not ‘smart’ and are not on your home network.
That’s the theory anyway
As I write this, I haven’t been able to get my RF bridge to detect my doorbell, even though they both use the same 433.9 MHz frequency band. Even with the doorbell receivers switched off, and me holding the RF bridge next to the doorbell (did I mention you could run it from a battery?), it doesn’t detect a signal.
Now, to be fair, there’s no mention of compatibility with wireless doorbells in Sonoff’s marketing. Indeed, pairing RF devices can be hit-and-miss; you won’t, for example, be able to use an RF bridge to unlock your car, as the codes are changed each time you lock and unlock your car. Trust me, this is a good thing; otherwise, devices like these could be used to break into people’s cars.
If you have RF remotes, then this should work; it should also work with RF window opening detectors, alarms and curtain controls. Note, however, most remote controls use infrared, rather than RF – if your remote requires you to point it directly at the device, then it’s probably infrared, not RF.
RF bridge Home Assistant integration
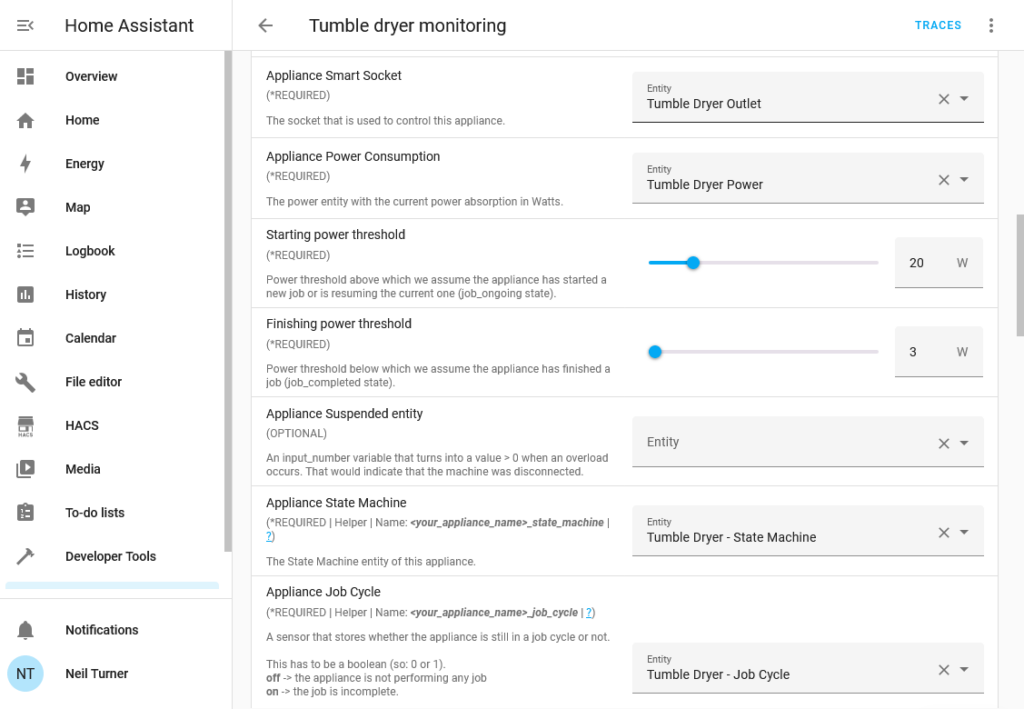
I mentioned that you can get the Sonoff RF Bridge to appear in Home Assistant. There isn’t an official integration, but there are several ways you can achieve this:
- Flash it with custom firmware from ESPHome or Tasmota
- A custom integration available in HACS
- An addon which uses Home Assistant’s API
My initial searches only led me to option 1, and I didn’t fancy taking apart my brand new device to install custom firmware on it. Thankfully, there’s a Sonoff integration in HACS which allows you to log into your eWeLink account, and seems to work well. The addon is something I only found whilst writing this blog post, and it looks like this is actually the official way of integrating eWeLink with Home Assistant as it’s in the same GitHub account. You can use a Docker image instead if you’re running Home Assistant Container.
The alternatives
It’s possible that I have a dud unit, and so I have ordered a different model from AliExpress which uses Tuya. At the time of writing, this cost less than £1, which is clearly some kind of introductory offer as it’s normally £17. This Tuya model also supports infrared, and the 315 MHz RF band. I’ll let you know how I get on with it, when it arrives in a few days.
There’s also the option of building your own. The main components inside the bridge are a standard ESP8285 chip for Wifi and Bluetooth, and a EFM8BB1 chip for RF. You can therefore buy these yourself, solder them onto a board, and use the ESPHome or Tasmota firmware to achieve the same thing. I’m not yet that far down the home automation rabbit hole to build my own devices, but you could consider it.