Sonoff Wi-Fi RF Bridge review

A photo of a Sonoff Wifi RF bridge

I’ve been thinking about my doorbell, and knowing when someone rings it. Obviously it chimes when I’m at home, but I was hoping that with this Sonoff Wi-Fi RF Bridge, I can get notifications on my phone and a log of when people call when I’m out.

We don’t have a smart doorbell, like Ring for example. Ours is a Koopower Wireless Doorbell that I was sent to review six years ago. The Koopower doorbell doesn’t need a battery – the act of pressing the button generates sufficient power to send a RF signal to the receivers.

What I was hoping with this Sonoff RF bridge is that it could also listen out for doorbell pushes, and send me a notification. I could also integrate it into Home Assistant, which could handle logging. As you can probably tell from how I have written this blog post so far, I haven’t been able to achieve this.

Setting up

The Sonoff RF bridge is pretty small – about 2 inches (5 cm) square. In the box is the bridge, a quick start guide and, erm, well, that’s it. You need to provide your own micro-USB cable and a power source capable of 5 volts and 1 amp – so most phone chargers, or even many batteries. The bridge just has two LEDs – a blue one indicating the Wi-Fi status, and a red one the RF status. The only other thing of note on the bridge is a hole for poking a paper-clip in to reset it – there’s no other buttons.

Once you have hooked it up to a suitable power source, you can use the eWeLink app to set it up. This allows you to connect the bridge to your home Wi-Fi network, and pair RF devices.

Pairing devices

In the eWeLink app, you put the RF bridge into pairing mode, and then have 60 seconds to perform an action on your RF device. When it detects a signal, it’ll save the codes transmitted using RF, and will give you a button in the app. By pressing that button in the app, the RF bridge will mimic the action on your remote. So, you can ‘teach’ your bridge to turn an air conditioning unit on and off, rather than using its remote.

The fun comes when you link your RF bridge to a smart home ecosystem, like Google Assistant, Amazon Alexa or Home Assistant. Your bridge will appear as a device, and so you can use your voice to control appliances that are not ‘smart’ and are not on your home network.

That’s the theory anyway

As I write this, I haven’t been able to get my RF bridge to detect my doorbell, even though they both use the same 433.9 MHz frequency band. Even with the doorbell receivers switched off, and me holding the RF bridge next to the doorbell (did I mention you could run it from a battery?), it doesn’t detect a signal.

Now, to be fair, there’s no mention of compatibility with wireless doorbells in Sonoff’s marketing. Indeed, pairing RF devices can be hit-and-miss; you won’t, for example, be able to use an RF bridge to unlock your car, as the codes are changed each time you lock and unlock your car. Trust me, this is a good thing; otherwise, devices like these could be used to break into people’s cars.

If you have RF remotes, then this should work; it should also work with RF window opening detectors, alarms and curtain controls. Note, however, most remote controls use infrared, rather than RF – if your remote requires you to point it directly at the device, then it’s probably infrared, not RF.

RF bridge Home Assistant integration

I mentioned that you can get the Sonoff RF Bridge to appear in Home Assistant. There isn’t an official integration, but there are several ways you can achieve this:

  1. Flash it with custom firmware from ESPHome or Tasmota
  2. A custom integration available in HACS
  3. An addon which uses Home Assistant’s API

My initial searches only led me to option 1, and I didn’t fancy taking apart my brand new device to install custom firmware on it. Thankfully, there’s a Sonoff integration in HACS which allows you to log into your eWeLink account, and seems to work well. The addon is something I only found whilst writing this blog post, and it looks like this is actually the official way of integrating eWeLink with Home Assistant as it’s in the same GitHub account. You can use a Docker image instead if you’re running Home Assistant Container.

The alternatives

It’s possible that I have a dud unit, and so I have ordered a different model from AliExpress which uses Tuya. At the time of writing, this cost less than £1, which is clearly some kind of introductory offer as it’s normally £17. This Tuya model also supports infrared, and the 315 MHz RF band. I’ll let you know how I get on with it, when it arrives in a few days.

There’s also the option of building your own. The main components inside the bridge are a standard ESP8285 chip for Wifi and Bluetooth, and a EFM8BB1 chip for RF. You can therefore buy these yourself, solder them onto a board, and use the ESPHome or Tasmota firmware to achieve the same thing. I’m not yet that far down the home automation rabbit hole to build my own devices, but you could consider it.

ThermoPro TP357 Bluetooth thermometer review

A photo of a ThermoPro TP357 thermometer showing the current temperature of 17.5℃ and humidity of 59% on a LCD display.

I have an upcoming project for Home Assistant which means that I need to be able to measure the temperature in our bedroom. As part of this, I’ve bought a couple of ThermoPro TP357 Bluetooth thermometers from Amazon (sponsored link). One is for our bedroom, and the other is for our eight-year-old’s bedroom which tends to get a bit cold in winter.

I specifically went for these thermometers because they’re:

  • Cheap – I paid £19 for the pair last week, but they’re £16 for the pair as I write this.
  • Supported by Home Assistantthere’s an official integration.
  • No extra hardware required – because they’re Bluetooth, and I run Home Assistant on a Raspberry Pi with a supported Bluetooth chip, there’s no additional hardware required to get the two to talk to each other.
  • Probably good battery life – Bluetooth is quite energy efficient when compared with, say, Wifi, and so the batteries should last longer.
  • No need to use the cloud – all the data can be stored locally on Home Assistant.

ThermoPro TP357 look and feel

The ThermoPro units are smaller than I expected. They’re about as tall as a credit card but roughly square, so they’re narrower than a credit card. Each one runs on one AAA battery which is provided. On the back is a flip out kick-stand, a magnet and a hook, so you can wall-mount it, stick it to your fridge or have it free-standing on a shelf like I do. There’s also a button on the back that switches it between Fahrenheit and Celsius.

On the front, there’s an LCD screen which shows the current temperature and humidity level. There’s also a face pictogram – it’ll smile when the humidity is between 30-60%, frown when it’s less than 30% or show a neutral expression if it’s over 60%.

Home Assistant integration

If you have Bluetooth enabled on your Home Assistant device, then a few minutes after you put the battery in, Home Assistant should pop up a notification to say it’s discovered a new ThermoPro device. You’ll just need to confirm that you want to set it up and allocate it to an area, and you’re done.

As you would expect, the ThemoPro integration reveals entities for temperature and humidity, but also the battery level. I’m not sure how accurate this is, as both provided AAA batteries just show 50%. I’ve added these to my Home Assistant dashboard, and have set up some additional functionality that I’ll blog about later. Mainly because, despite allegedly being ‘summer’ in the UK right now, it’s not been warm enough for me to test.

The range seems quite good on these. ThermoPro claim that there’s an 80 metre range in direct line of sight. There’s a few thick walls between my Home Assistant device and the thermostats, and one that is around 5 metres away doesn’t have great signal strength but it’s enough.

ThermoPro app

Of course, ThermoPro expect you to use their app for iOS and Android. This includes logging of up to a year’s data, and you can set notifications based on events related to the humidity and temperature. Well, that’s what it says – I haven’t actually installed the app. I’m not yet sure if it’s possible to have the app and Home Assistant communicate with the thermostat at the same time. But theoretically, anything the app can do, Home Assistant can do too.

Alternatives

I’ve had various Facebook adverts for alternatives to these. Some have e-ink displays, which are more readable at a distance, or use different protocols to Bluetooth. But they’re all more expensive. These two seem to do the job well and are small and cheap. Plus, it should be quite a while until I need to replace the batteries.

Home Assistant and Google Home broadcasts

Screenshot of Home Assistant showing a script to broadcast a message via Google Home when my washing machine finishes

We have six Google Home Mini devices around our home, and now I can get Home Assistant to automatically deliver broadcast messages. Here’s how I did it.

Broadcast messages

When you have more than one Google Home device, you can say ‘Okay Google, broadcast [message]’, and it will relay that message to all of the other Google Home devices in your home. It’s useful for announcing that dinner’s ready, for example. Our house is long, rather than square, and I’m hard of hearing, so we use this quite a lot.

What I wanted to achieve was automation of these broadcasts, so that a broadcast was triggered by an event. This is possible thanks to the Google Assistant SDK integration. It’s a bit of a faff to set up – I recommend following this guide or watching the video embedded below:

Call the service

Once it’s set up, you can test it by opening Home Assistant’s Developer Tools. Click the ‘Service’ tab, and choose the ‘Google Assistant SDK: Send text command’ service. In the command, type something like ‘broadcast "This is a test"‘ and click ‘Call Service’. If you’ve set everything up correctly, your Google Home devices should all say something like “Incoming broadcast; it says: This is a test”.

Create a script

As I write this, the latest version of Home Assistant (2024.4.x) doesn’t allow automations to call services directly. So, to be able to trigger the broadcast, we’ll first need to create a Script in Home Assistant. In my example, I have a script called ‘Washing machine finished broadcast’. The ‘mode’ is left at the default setting of ‘Single’, and then I’ve created an Action which is to Call a Service. As above, I have selected ‘Google Assistant SDK: Send text command’ as the service to call, and then entered ‘broadcast "The washing machine has finished"‘ as the command, which I have ticked. I’ve left the rest blank.

Whilst here, I’ve also added a time condition. As this will be triggered when the washing machine finishes, I don’t want it to run when we might be asleep. We have Google Home devices in each of the bedrooms, and we sometimes run the washing machine overnight.

Home Assistant runs script actions in order. So, if you also want to add a time condition, you’ll need to add this before the Google Assistant SDK service call, or re-order the actions. In this example, I have created a Test action, where the current time is between 8am and 8pm. Outside of those times, the script will fail and not process the next command, so the broadcast action won’t be executed.

Link it to an automation

Now that we have a script, we can integrate this with an automation. I’m using my existing automation that sends a phone notification when my washing machine finishes. In my case, this is triggered using Meross energy monitoring smart plugs (sponsored link).

So now, as well as sending a notification, it also triggers a broadcast (within the time constraints).

Other things you can do with Google Home

Once you have the Google Asssistant SDK integration installed in Home Assistant, you can use scripts to run any other command that you would say to Google Home. You could, for example, create a button on your Home Assistant dashboard, which triggers the text command ‘play Never Going To Give You Up by Rick Astley on Spotify‘ if you want to automatically rickroll the other occupants of your house. It can also control smart home devices which work with Google Assistant, but do not yet have a Home Assistant integration.

The advantages of a smart home

An AI generated image of a house, with a giant light bulb floating above it that has a depiction of Albert Einstein

Okay, so it’s fair to say that I write a lot about Home Assistant and the smart home – I have a whole category of blog posts about it. Whilst it’s probably a sign of a mid-life crisis project, I thought I would set out the advantages of having smart devices at home, as a justification of why I spend so much time setting and configuring devices.

Delayed start

Many devices, like washing machines, dishwashers and the like, offer a delayed start facility. If you need to wash clothes, but are out at work all day, you probably want your washing machine to finish just before you get home. Otherwise, you’ll have wet clothes sat there for several hours. Similarly, we have a bread maker that we set to finish at around 4am, so that the bread is still fresh but not too hot when we need it.

I also use a delayed start on our dishwasher, so that, in winter, it runs during the middle of the day when there’s more sunlight. That allows us to make the best use of the cheap energy from our solar panels. This may also be useful for people whose electricity tariffs vary at different times, such as the Octopus Agile tariff.

Not all devices offer a delayed start feature as standard, so smart plugs can fill this role. I also use a smart plug to turn off a device that lacks a timer.

Remote control

The first smart device that we got in our house was a Nest thermostat, and this allows us to control our heating whilst outside the home. That means that we can ensure the heating is off when we’re away, saving money, but also ensure that it comes back on before we get back home.

Even when we’re at home, we have a couple of standing lamps in hard-to-reach places – smart plugs allow us to use voice control to turn these on and off.

Dashboard overview

As Home Assistant supports more devices than most other platforms, I can have a very powerful dashboard that brings in data from every smart device in the home (and some outside data too). That way, I can see at a glance whether the TV, dishwasher, washing machine and tumble dryer are on, as well as control several lights and the various Google Home speakers around the house. This is also possible in other apps like the Google Home app, but with a more limited range of devices.

Notifications

Through Home Assistant’s automations, I can create notifications for things happening in my home. For example, although our washing machine beeps loudly when done, it’s in the cellar. Combined with my hearing loss, I might not hear it when in another part of the house. So having a message pop on my phone to say that the washing is done is very helpful.

Logging

Home Assistant in particular has a useful logging feature, so it can automatically log when devices are turned on/off or change state. So if you can’t remember when a device was last used, Home Assistant can tell you.

Quick access to information

We have Google Home smart speakers in almost every room (not the bathrooms). They’re great for asking quick questions about things like the weather, without needing to look it up on a phone or computer. We also use them extensively for setting timers and alarms, and for playing music. And having them across the house means that we can use broadcast messages – again, better than shouting for someone like me who sometimes struggles to hear.

There are other advantages that I don’t have personal experience of; a colleague has a smart doorbell and smart lock, so that if someone tries to deliver a package and no-one’s home, it’s possible to remotely open a door into the porch to allow the delivery driver to leave it securely. We don’t have a smart doorbell or smart lock – or a porch for that matter. We also don’t have a garage, but having a smart garage door opener would be good if we did have one.

Meross energy monitoring smart plugs

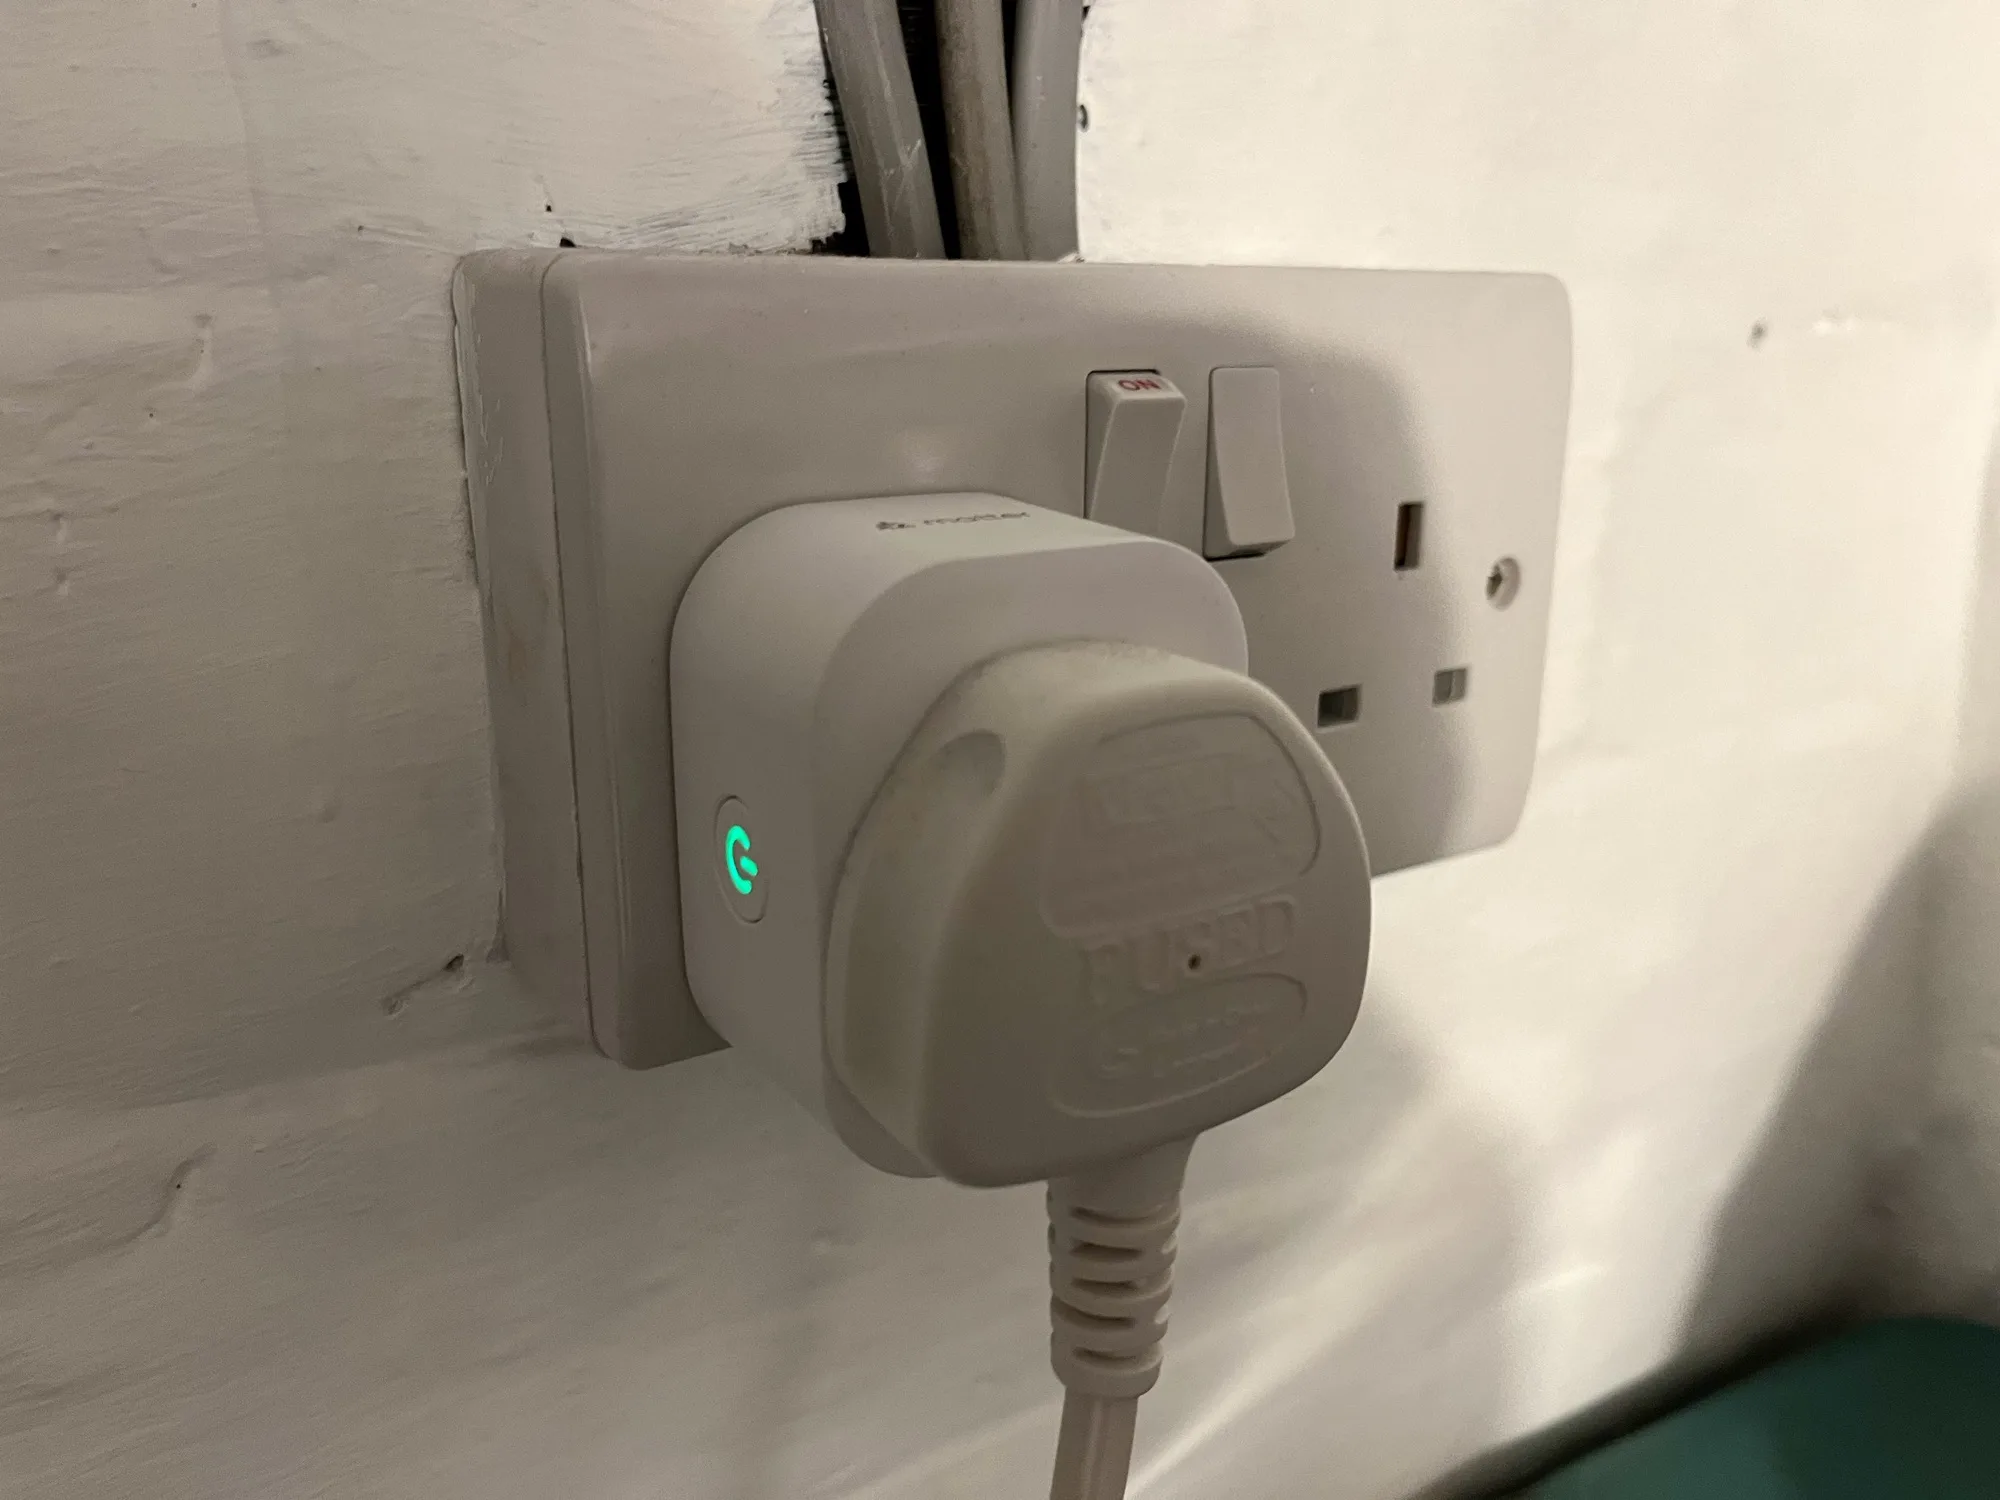
A photo of a Meross energy monitoring smart plug in a UK plug socket

I’ve recently bought a pair of Meross energy monitoring smart plugs (sponsored link), and by integrating these with Home Assistant, I now get notifications when the washing machine and tumble dryer have finished.

Previously, I’ve used Tuya smart plugs. Which are fine, but these ones don’t do energy monitoring, don’t work with Apple HomeKit and I have some privacy concerns. The Meross plugs, on the other hand, do offer energy monitoring, can be used with 13 Amp devices, and also work with Matter. They’re also smaller, and feel more solidly built than the older Tuya plugs.

Matter support

These smart plugs also support Matter, the open smart home standard. This should mean that you can use them with any smart home ecosystem, whether that’s Amazon, Google, Apple HomeKit, Samsung SmartThings or Home Assistant. I was able to get them to pair with Home Assistant, but not with HomeKit. It turns out I need a device that can act as a HomeKit hub, which can be a permanently plugged-in iPad, Apple TV or Apple HomePod. It won’t just use any other Matter server on my home network. This is ironic as the Home Assistant app uses the same Matter provisioning process on iOS devices.

It’s also worth noting that Matter support is limited to turning the smart plugs on and off. I’m guessing the Matter specification doesn’t include energy monitoring as yet. Also, these smart plugs connect over 2.4 Ghz Wifi, which is worth noting if you’ve configured your Wifi network to only use 5 GHz. They don’t use Thread.

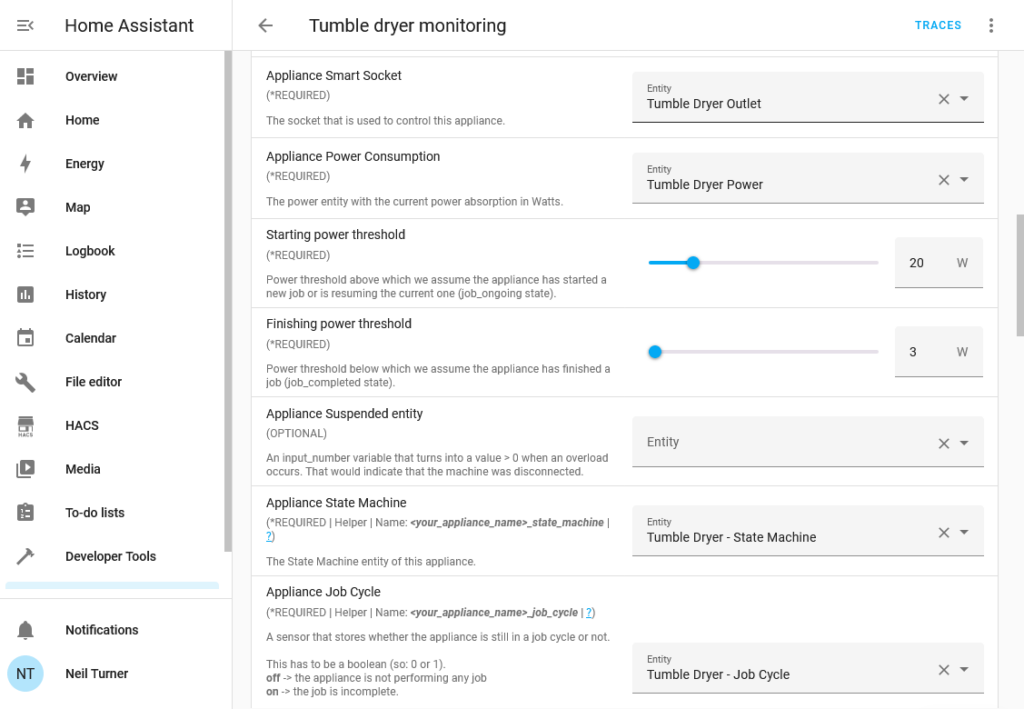
Screenshot of the hassio_appliance-status-monitor Blueprint being configured as an automation in Home Assistant

Making use of energy monitoring

If you want to take advantage of the energy monitoring capabilities of the smart plugs, you’ll either need the official Meross app (for iOS and Android), or use Home Assistant. Whilst I have installed the Meross app, I’ve set up the automations in Home Assistant. There isn’t an official Home Assistant integration for Meross, so you’ll need to install the Meross LAN custom integration which is available through HACS.

Once you’ve set it up and added your devices, you’ll need to set up the energy monitoring automation. By far the easiest way is to use this BlueprintBlueprints are essentially templates for automations that you can download and configure. Make sure you follow the instructions, as you’ll need to create four Helpers for each smart plug, and give them specific names.

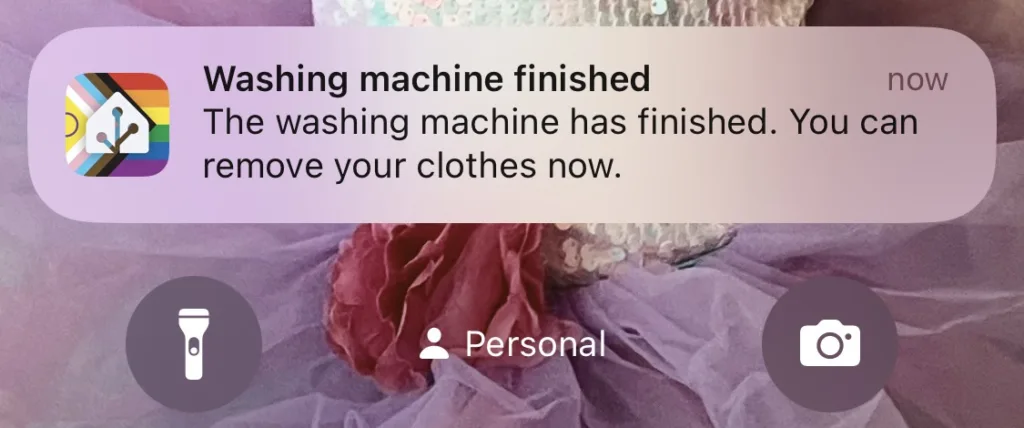
You can then define actions to take when the energy monitoring detects the appliance has started and ended. In my case, I’ve told it to send a notification to my phone when the device has finished. In the case of my tumble dryer, this includes a 15 minute delay as it uses less power towards the end (and otherwise results in notification spam). You may need to tweak the power thresholds as well. If all goes well, then you’ll get a notification like the one in the screenshot below.

A screenshot of a notification from Home Assistant stating that the washing machine has finished, triggered by the energy monitoring smart plugs

Doing this means that you can get one of the key features of a smart device, without paying a significant premium. I paid £25 for the two plugs from Amazon, whereas it would have cost at least another £100 to buy a smart tumble dryer. Our washing machine is 9 years old and I’m not even sure that smart washing machines were on the market at the time.

Converting Tuya devices to Tasmota

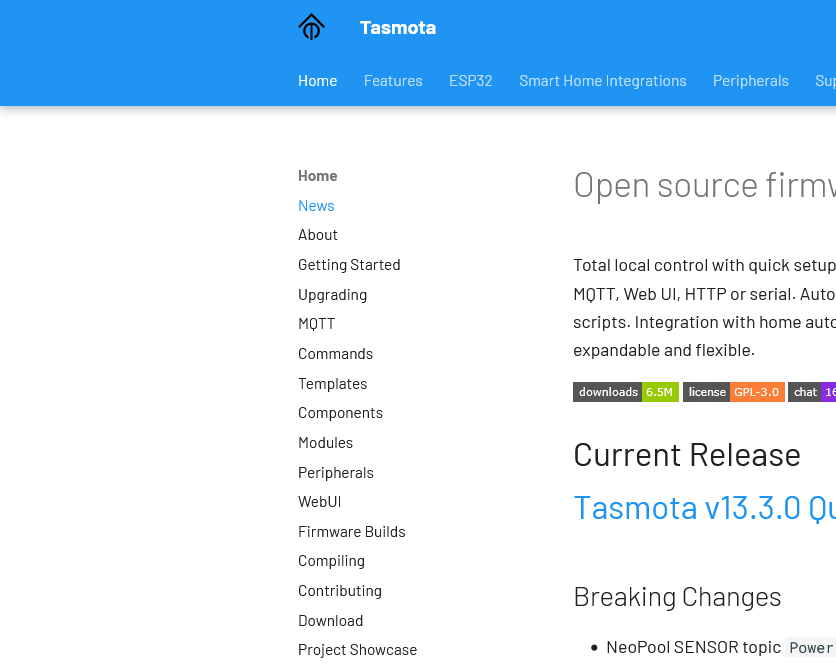
Screenshot of the Tasmota web site

I’ve mentioned that I have a few Tuya smart plug sockets around the home. It’s possible to convert these to run on open source firmware called Tasmota, to gain some additional features, and it’s something I’ve been considering.

The logic boards for many Tuya devices are from the Espressif ESP family, which can easily be flashed with different firmware. Tasmota is one such provider, as is ESPHome which is a sister project to Home Assistant.

What’s wrong with Tuya?

Tuya mostly manufacture ‘white label’ devices that are then sold under a variety of brands. Mine are branded ‘Coosa’ but I’ve seen others called ‘Hey!’ being advertised. Often, they come with their own branded app, but you can use them with Tuya’s own app as well.

I bought them a few years ago because they work well with Google Assistant and IFTTT (which I no longer use). They also work well with Home Assistant (especially since last month). They don’t work with Apple HomeKit natively but can be bridged in using Home Assistant or Homebridge. The other advantage was that you didn’t need a separate hub for them to work – they connect directly to your home Wifi network.

However, Tuya is a Chinese company. Though they claim to have servers in the EU, it could be that every time I use their switches, my request goes via China. In Home Assistant, there are a couple of custom integrations in HACS called LocalTuya and TuyaLocal that can issue commands locally on your home network. But if you use Google Assistant, the commands get sent across the web.

Local control with Tasmota

The Tasmota project offers a tool called Tuya Convert, which replaces Tuya’s official firmware and allows for local control. It mainly uses the MQTT protocol, which is openly documented and used by a variety of different Internet of Things devices. Once flashed onto your devices, they can be controlled locally and don’t need to communicate with external servers. Home Assistant has extensive MQTT support and an official Tasmota integration.

They also work well with Alexa devices, by emulating a Belkin WeMo or Philips Hue device.

This all sounds good to me, but I haven’t gone ahead and done it. Unfortunately, whilst Amazon Alexa is supported, Tasmota doesn’t easily interact with Google Assistant. And once I’ve flashed a device with Tasmota, it may be difficult or impossible to go back to the official Tuya firmware.

Of course, I can configure Home Assistant to work with Google Assistant. I haven’t yet, even though there are two ways to do it:

  1. Sign up for Home Assistant Cloud from Nabu Casa, which costs £6.50 per month
  2. Set up Google Assistant manually with Home Assistant, which is lengthy and may need to be reconfigured every 30 days.

I suppose if we used Amazon Echo devices instead of Google Home, this would be a no-brainer.

In the long run, replacing these smart plugs with ones that use Matter would be better and cheaper. My Home Assistant install is pretty-much Matter ready, with no need for an additional hub. Matter, like Zigbee, mostly works locally, and therefore doesn’t have the privacy implications of my current web-based Tuya plugs.

OpenBenches

Screenshot of the OpenBenches web site

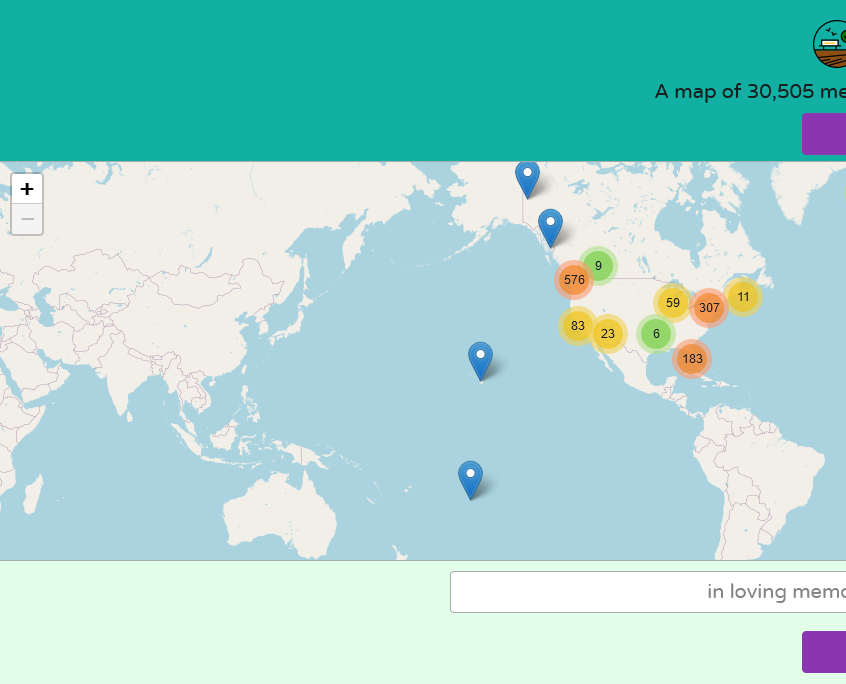
Have you ever wondered if there was a list of benches with public dedications on them? Well, I haven’t, but there is one and it’s called OpenBenches.

It’s similar to Open Plaques, which is crowd-sourced list of plaques on the sides of buildings commemorating notable people or events that happened. OpenBenches, meanwhile, is for people who may not have been notable, but were loved and missed by their friends and relatives after their passing.

Anyone can submit a bench, as long as you can upload a photo of it that is geotagged. With most photos being taken with phones these days, this isn’t much of an issue. Of course, the bench should have a dedication on it, and you’ll need to type out what the dedication says. Submissions can be made anonymously, or by logging in using an account on Twitter/X, Facebook, GitHub or WordPress.

There’s now over 30,000 benches on OpenBenches, all with a location, a photo and a copy of the text of the dedication. However, over 28,000 of them are in the UK, with few elsewhere. That may be because dedicating a bench to someone is more of a British thing, or because its developers (Terence Eden and Elizabeth Eden) are British.

There aren’t any benches listed on there in my town of Sowerby Bridge yet. I think there are some eligible benches nearby, so maybe I should take the time to go and take photos of them to add them.

CarPlay with Home Assistant

A screenshot of the CarPlay home screen showing the Home Assistant icon

There’s now a CarPlay app for the Home Assistant Companion app on iOS. This means that it’s possible to control (some) of your devices connected to Home Assistant whilst driving.

I like CarPlay, and have a standalone unit in my car. Most CarPlay apps are designed for either navigation or for listening to audio content whilst driving, but Apple has allowed some other apps more recently. For example, the RingGo parking app is now available in CarPlay; I wish the same could be said for the four other parking apps I have installed.

The Home Assistant app has four tabs: Actions, Areas, Control and Servers. Areas gives you the list of rooms that you have defined, and from there you can access some of your devices. Control gives you a big list of all of the devices that have a function that can be controlled whilst using CarPlay – mainly buttons and switches. Meanwhile the Servers tab is there in case you’re able to log in to more than one Home Assistant instance.

Actions are unique to the Home Assistant Companion app. They link to automations, but have a specific trigger. At the moment, I’m only really using actions to control my Nest thermostat as this is usually the only thing I want to control outside the home. Actions are also used by widgets on iOS, and by the Apple Watch integration. They’re a bit of a faff to set up at present; this video seems to be the best guide to setting them up.

It should be noted that Home Assistant also supports Android Auto, and indeed has done for longer. CarPlay support was new in January but it’s taken me until now to get it set up and remember to take some screenshots.

I’m really happy about this new feature, as being able to safely control my heating whilst driving isn’t something I’ve been able to do before. It makes the time that I’ve spent setting up and tweaking my Home Assistant server worthwhile.

Disney Minus

A screenshot of our Disney + account setting showing it cancelled.

Last week, we cancelled Disney+. Our annual subscription was due to renew, and at over £100 for the year, we could no longer justify it.

We’ve had a subscription ever since Disney+ launched in the UK, in the early days of lockdown in 2020. In fact, before then we had a subscription to DisneyLife, which was Disney’s UK-only streaming service for video and music, and used to cost £5 per month. Over time, Disney+ has got better, especially now that content from 20th Century Fox is on there.

But we just don’t watch enough of it. When we signed up to Disney+, there was only one price tier at £7.99 per month or £79 per year. Whilst that was more expensive than DisneyLife, there was more content available so it was worth it. Now there are three price tiers, and the most expensive is £10.99 per month, or £109 per year. That’s more than double what we were paying just five years ago. Whilst there is once again a £5 per month tier, it’s with adverts, and we don’t want those.

Like many kids, our eight-year-old seems to just want to watch YouTube Kids now. It’s something we’ve tried to resist for years, but apparently watching home-made videos and Minecraft walk-throughs is far more interesting than the professionally-produced content that we were paying for. We’ll keep paying for Netflix, as you can download content onto an iPad to watch offline. We tend to clip our eight-year-old’s iPad into a stand fixed to the back of the front passenger seat for long car journeys.

We’ve had Amazon Prime in the past, shared using Amazon Household with another family member, but we don’t have this now. Again, it’s getting more expensive, and we’d rather avoid the adverts. And whilst we’ve had free trials of Apple TV+ and Now TV, we’ve never paid for these beyond the trial period. We also don’t pay for a TV package, and just have Freeview and Freesat for live television.

I guess we’ll just re-subscribe to these from time-to-time when there’s something we actually want to watch.

I do find it odd comparing streaming video with streaming music. There’s a handful of music streaming services – Spotify, YouTube Music, Amazon Music, Deezer and so forth – and for the most part, they all have the same music. Yet with streaming video services, most shows are on one or two at best, and many or exclusive to one service.

AdGuard Home

A screenshot of the AdGuard Home web interface running as a Home Assistant addon

I’ve recently started using AdGuard Home as a way of blocking advertising and tracking on my iPhone and iPad, when on wifi at home. It works as a replacement DNS server, and re-routes requests to domains known for advertising and traffic to a DNS Sinkhole.

Unlike a browser-based ad blocking extension, such as uBlock Origin or Firefox Focus, by intercepting DNS requests AdGuard Home can stop tracking in all apps. That includes built-in browsers in apps, such as the Facebook app, as well as any app analytics tools. As I have an almost 6 year old 6th generation iPad that is getting rather slow, not having to load additional advertising and tracking scripts has boosted its performance and battery life.

Installing AdGuard

To run AdGuard Home, you’ll need a spare computer that can run all the time. A Raspberry Pi is ideal for this, as it’s small, low energy and can be run without a keyboard and mouse. You can also use Docker, Snap, or do as I do and run it as a Home Assistant addon. Indeed, once it’s set up, Home Assistant will detect it and offer to install an integration.

You can then adjust your router’s DNS settings, so that every device in your home uses your new AdGuard DNS server. This will block adverts and tracking across all of your devices if you want it to. I’ve chosen not to do this; whilst many tracking sites are a privacy nightmare, I also use sites like Quidco to get cashback. I use Google Chrome with no privacy features turned on when making purchases that could be eligible for cashback; this earned me over £80 when we switched our broadband supplier to Vodafone recently.

For me, just having it running on my mobile devices when at home on wifi is enough.

Whilst AdGuard offers other tools that are paid-for, AdGuard Home is free and open source.

Pi-hole

Pi-hole is similar to AdGuard, in that it is also a DNS-based ad blocker. As the name suggests, it was intended for use on Raspberry Pi computers, but can be installed on other devices. I had investigated installing this, but came across AdGuard as an easier alternative. Pi-hole is also open source, but development seems less active.

Advanced features

For the most part, once you’ve installed AdGuard Home and set it as your DNS server, you don’t need to do much else. However, you can enable DNS Encryption if you want – especially if you want to access your AdGuard server from outside the home. You can also use AdGuard Home to block adult content, or access to certain web sites, and configure this for individual devices. So, I could enable parental controls on our eight-year-old’s tablet using AdGuard without restricting my devices.

Creative Commons License
Except where otherwise noted, the content on this site is licensed under a Creative Commons Attribution-ShareAlike 4.0 International License.