A recent project of mine has been to set up Home Assistant, as a way of controlling the various smart devices in our home.
From bridge to assistant
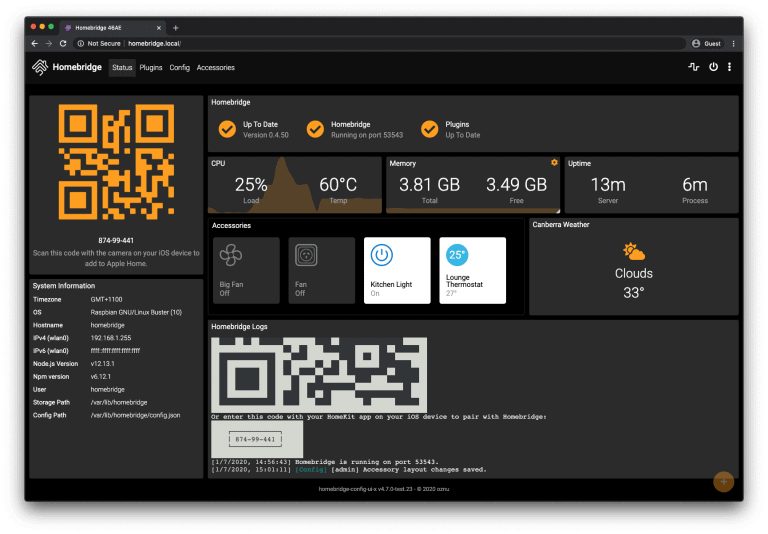
You may remember, back in February, that I had dabbled with Homebridge, a more basic tool which was designed to bridge devices into Apple’s HomeKit universe which aren’t otherwise supported.
I’ve ditched Homebridge, as it didn’t really do what I wanted it to do. If you want to primarily use Apple’s Home ecosystem, but have a few devices which don’t support it, then it’s great. But that doesn’t really apply to our home – although I’m an iPhone and iPad user, I no longer have a working Mac and so I use a Windows desktop, and my wife uses Android devices. Consequently, the only device that we own which natively supports HomeKit is our LG smart TV.
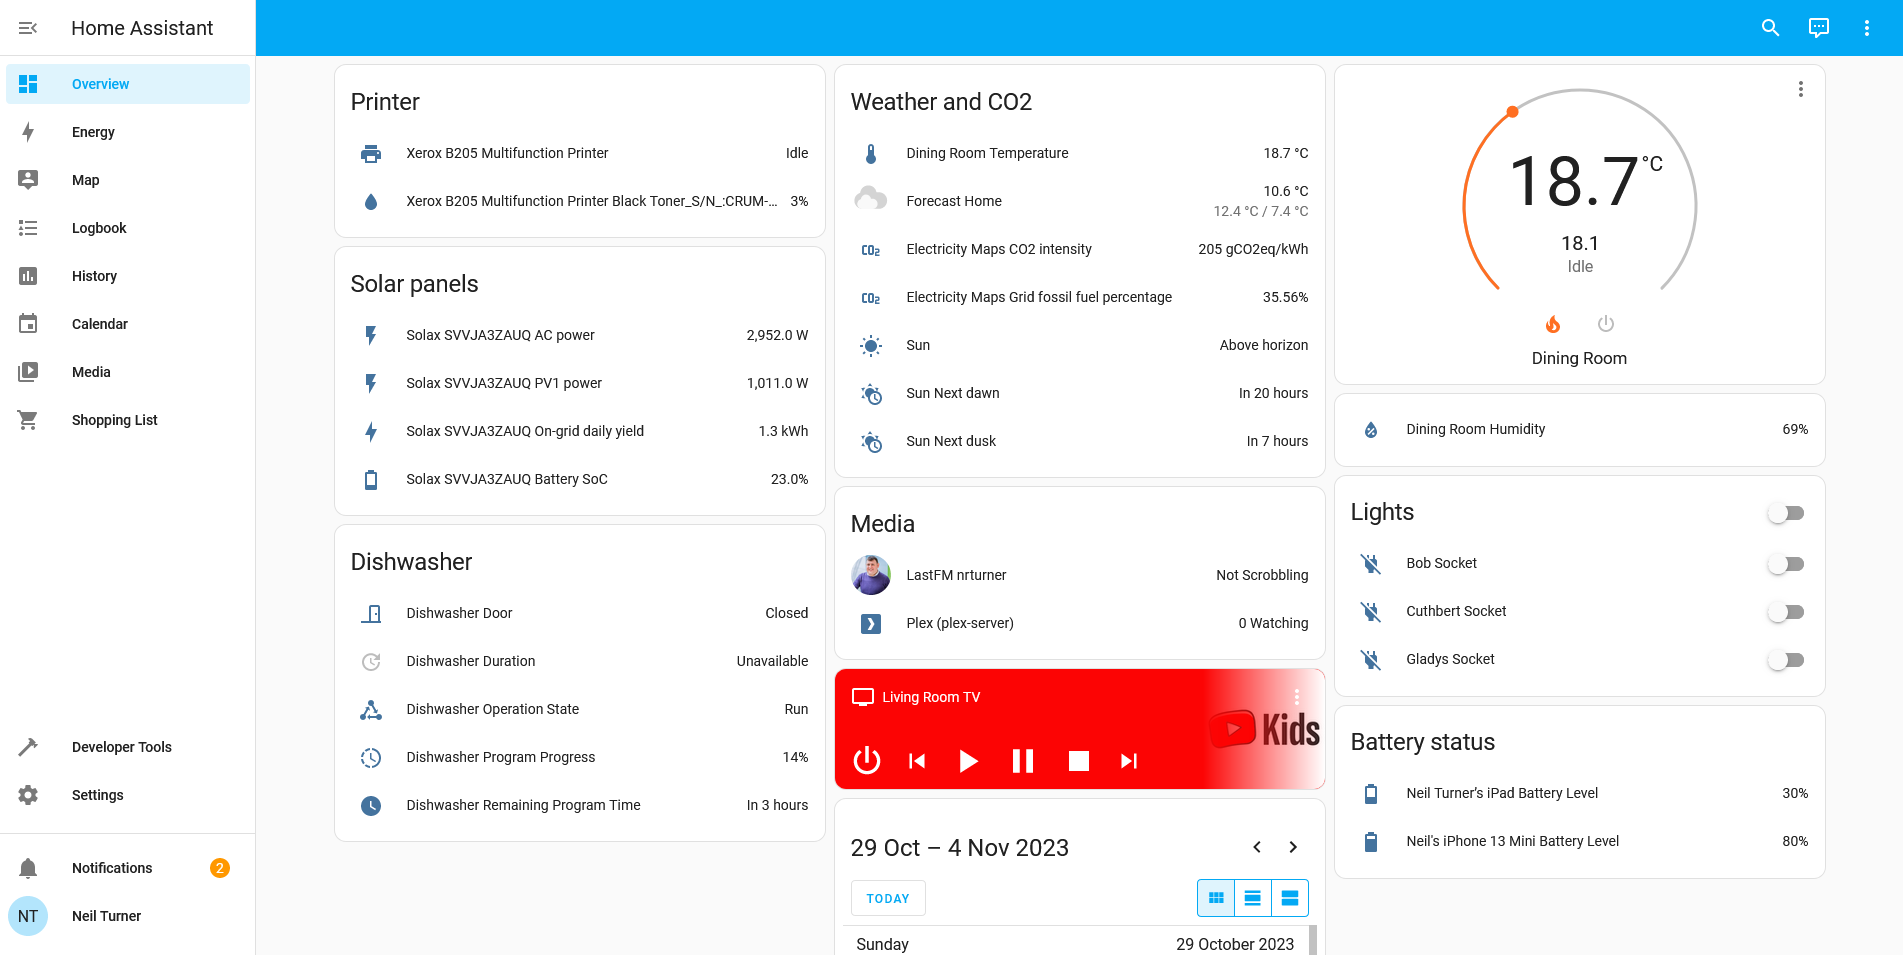
Home Assistant is essentially a replacement for Apple Home, Google Home, Samsung SmartThings and whatever Amazon’s Alexa provides. That means that it provides its own dashboard, and lots of possibilities for automations. But instead of your dashboard being hosted on a cloud server somewhere, it’s on a device in your own home.
Setting it up
Like with Homebridge and HOOBS, you can buy a Home Assistant hub with the software pre-installed. If you already have a device, such as a spare Raspberry Pi, then you can either install HAOS (a complete operating system based around Home Assistant) or just install Home Assistant on an existing system. I chose the latter, and now I have Home Assistant sat on the same device as my Plex Server, using Ubuntu Core and the relevant Snap package.
Once set up, Home Assistant will auto-discover some devices; it immediately found both my ADSL router and my Google Wifi hub using UPnP. You can then add devices yourself. Home Assistant supports way, way more devices than its competitors, due to its hobbyist nature. For example, there’s an IPP integration which means that you can view your printer’s status, including how much ink is left. Despite it being a ‘smart device’ of sorts, Google Home won’t show this in its app. You can also bring in web services like Google Calendar and last.fm.
Some integrations are easier to set up than others though. In most cases, one of the first instructions for setting up an integration is ‘sign up for a developer account with your device manufacturer’. Whilst the instructions are usually quite clear, you’ll find yourself spending lots of time copying and pasting OAuth keys and client secrets to be able to connect your devices. In the case of my Nest Thermostat, this included paying a non-refundable $5 USD charge to access the relevant APIs.
It should also be noted that, whilst Home Assistant does offer integration with Apple HomeKit, I’ve yet to get this to work. Which is ironic as this was the reason why I previously used HomeBridge.
Remote access
Another thing which took some trial and error to get right was enabling remote access. If you want to be able to view and control your devices when you’re out of the home, then there’s a few additional steps you’ll need to complete. These include:
- Configuring port forwarding on your router
- Setting up a DNS server
Home Assistant recommends DuckDNS, which is pretty simple and seems to work okay, but again it’s something that requires some technical know-how.
One limitation of using Home Assistant as a Snap on Ubuntu Core is that you can’t use addons, so setting up DuckDNS meant manually editing Home Assistant’s configuration.yaml file. Indeed, some integrations require this, and so it’s worth backing up this file regularly. You can, however, install a separate snap which enables the Home Assistant Community Store (HACS), and this allows you to install additional (but less-well tested) integrations. I initially couldn’t get this to work, but managed to install it literally whilst writing this paragraph.
If you’re willing to pay, then for £6.50 per month, you can get Home Assistant Cloud. As well as providing an income for Home Assistant’s developers, it offers an easier and secure remote access solution, and integrates Google Assistant and Alexa.
Privacy matters
It should also be noted that Home Assistant has a greater focus on privacy. By hosting an IoT hub yourself, you can limit how much data your devices send to cloud servers, which may be in places like China with markedly different attitudes to privacy. Indeed, the integration with my Solax inverter (for our solar panels) connects directly to the inverter, rather than the Solax Cloud service. It’s therefore not surprising that many of the Home Assistant developer team are based in Europe.
Looking to the future, I’m hoping more of my devices will support Matter – indeed, this week, Matter 1.2 was released, adding support for devices like dishwashers. Theoretically, our existing Google Home devices can all be Matter hubs, but none of my other devices yet support it, and may never will. Home Assistant can work with Matter devices, if you buy their SkyConnect dongle, and again, it will mean that more of your device communications can be done within in your home and not using the cloud. That should be faster, and better for privacy.
Overall, I’m quite happy Home Assistant, even though it’s taken a long time to get every device added and some trial and error. I appreciate being able to see (almost) all of my devices on one dashboard, and it feels like I have more oversight and control over the smart devices in our home. I hope that, with greater Matter support, it’ll become easier for less-experienced users to use in future.