diyHue – Philips Hue Bridge Emulator

Screenshot of the diyHue interface

Almost exactly a year ago, I reviewed Bifrost, which emulates a Philips Hue Bridge in software. I’ve recently replaced Bifrost with diyHue, which does the same thing, but with support for more devices.

Note: I was part-way through writing this when I had my fall, so consider it to be moderately cursed.

Comparing Bifrost with diyHue

There’s a useful comparison table between Bifrost and diyHue here, from Bifrost’s developer. Indeed, Bifrost was developed because of the developer’s shortcomings with diyHue, but the two work differently. Bifrost only works with Zigbee2MQTT, and so can only support Zigbee devices. By contrast, diyHue can work with a much wider range of devices, including any that connect via MQTT and Home Assistant. That opens up support for Govee, WLED and Matter/Thread based lights as well.

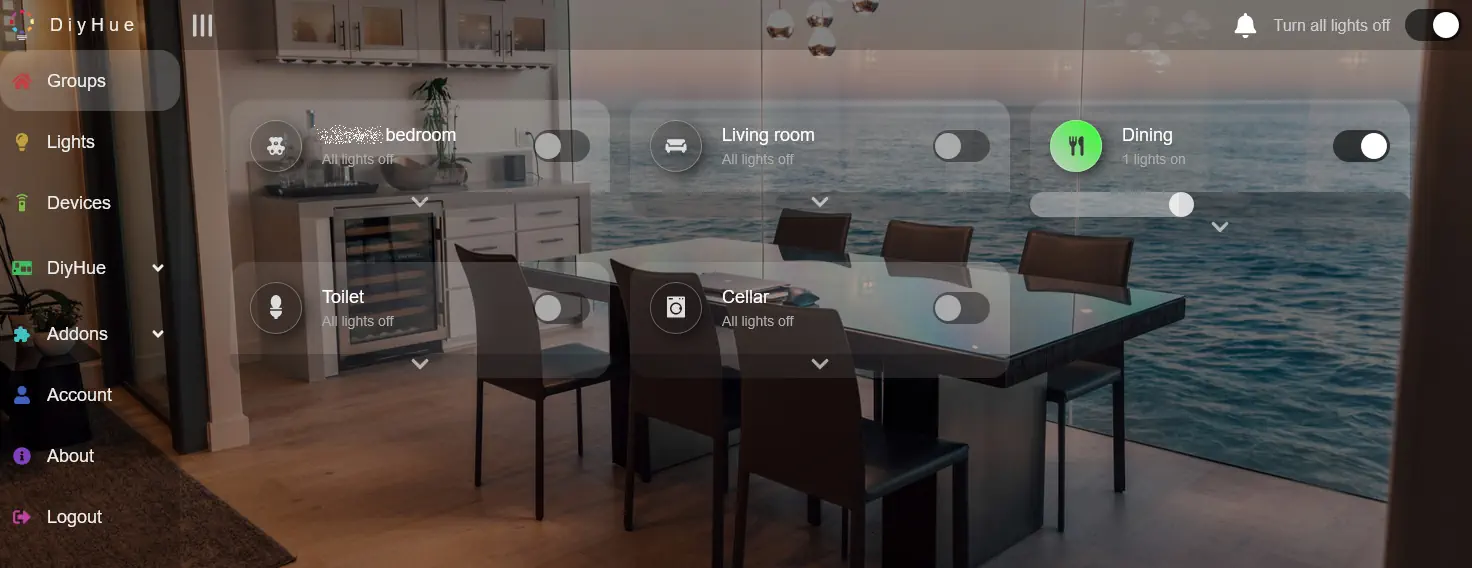
diyHue is also easier to set up – there’s no YAML file to configure. Instead, it can run as Home Assistant app, and offers its own web-based interface. This allows you to control which lights are exposed to the Hue app, should you not wish all of them to show up. This is especially useful if you have set up both its Home Assistant and MQTT links, as otherwise you’ll end up with duplicates.

You can also easily configure how each light appears to the Hue app, by selecting a model number to emulate. In my experience, diyHue gets this right most of the time, so that light controls in the Hue app match the features of the bulb, but you can tweak it if needed.

Benefits of using the Hue app

I touched on the main benefits of the Philips Hue app in my review of Bifrost, in that you can use its scene gallery to set multiple lights in the same room to complementary colours. At the moment, I only have one room with more than one colour changing light in it, so this isn’t so useful to me, but I’m planning to fit colour changing lightbulbs when we refurbish our bathroom later this year.

The other key benefit of having diyHue is that I can use the Hue app on my Fitbit Versa 3 smartwatch to control the lights. There are some situations where I want to turn lights on and off without using my voice, or having to reach for my phone in the dark. There isn’t really a good Home Assistant app for Fitbit devices (and Google is phasing out the Versa range anyway), so the Hue app is the next best thing.

Ditching proprietary Zigbee bridges

A photo of two dongles, both Sonoff ZBDongle E devices, labelled 'Zigbee' and 'Thread'.

For my Zigbee devices, I use Zigbee2MQTT and a Sonoff USB Zigbee dongle as my co-ordinator. As I came quite late to the Zigbee party, I didn’t pick up a proprietary Zigbee bridge, but if I had, I wouldn’t use one. Today, I’m going to go through a few reasons why.

Examples of proprietary Zigbee bridges include the Philips Hue Bridge, the Ikea Dirigera Hub and the Tuya Zigbee gateway, but there are others. Here are my reasons why it’s best to go with a more open system, like Zigbee2MQTT or Home Assistant’s Zigbee integration. I’ve previously compared the two.

A map of my Zigbee network, showing the mesh connections between devices

Having all your devices on one Zigbee network

Zigbee is a mesh network. That means that, as more devices are added, the network actually gets stronger, as each device can communicate with each other. This is especially true with mains powered Zigbee devices like smart plugs and light bulbs. Therefore, if all of your Zigbee devices are on the same network, the connection between each device should be stronger. I’ve included a diagram of my network above, and you can see the multiple mesh connections between devices.

If you have multiple Zigbee bridges – say one for your Hue lights and another for your Ikea smart plugs – you risk causing interference between networks. Furthermore, Zigbee runs on the same 2.4 GHz frequency band as Wi-Fi, Bluetooth and your microwave oven. Having everyone on one network should reduce interference.

Better device support

Some Zigbee bridges are better than others, when it comes to supporting third-party devices. For example, you might be able to add an Ikea Tradfri bulb to a Philips Hue bridge, but possibly not another kind of device. Zigbee2MQTT has, arguably, the best device support and will work with just about any Zigbee device, regardless of manufacturer. You can check the Zigbee Device Compatibility Repository to see which devices work with which platform.

My Zigbee devices are a mixture of Tuya and Ikea, and they co-exist well within Zigbee2MQTT.

Cheaper

Most proprietary Zigbee bridges cost around ÂŁ60. Meanwhile you can plug a USB Zigbee dongle into a spare PC, or a low-powered Raspberry Pi device that you may already have. The USB dongles typically cost ÂŁ20-30 each (my Sonoff ZBDongle-E costs ÂŁ27 at Amazon at present [sponsored link]), and you’ll only need one dongle and one computer rather than multiple bridges.

Easier to troubleshoot

With both Home Assistant’s ZHA and Zigbee2MQTT, you can look at the logs to see what’s going on inside your Zigbee network. Hopefully, that’ll help with troubleshooting any devices that aren’t working the way they should. As shown above, you can also get a diagrammatic representation of your network. This lets you see how your devices connect to each other and whether there are any weak spots on your mesh.

Not reliant on cloud services

There’s a risk that your proprietary Zigbee bridges could become expensive paperweights, if their manufacturers decide they’re no longer going to support them and turn off the cloud servers. They may continue to work locally, but if their cloud servers go dark, you may find that you can’t control your devices remotely any-more. By hosting your own Zigbee bridge, you can still have remote access but on your own terms. I use Homeway for remote access to Home Assistant, but you can also set up your own reverse proxy, for example.

Proprietary bridges may offer some convenience and a nice app, But, if you’re willing to put a bit of effort in to manage your Zigbee devices yourself on one single network, I think there are more advantages of going down the route of using Zigbee2MQTT or ZHA.

Bifrost – a Hue smart light emulator

A screenshot of the Bifrost logo

Today I’m writing about Bifrost, which is software that emulates a Philips Hue bridge for controlling smart light bulbs. It works with Zigbee2MQTT, and is designed to replicate the core Philips hardware using open source software.

Bifrost allows you to control any Zigbee smart lights (bulbs, strips etc) using the Philips Hue app, without needing to buy the Hue Bridge. The Hue bridge normally costs around ÂŁ50 on Amazon (sponsored link). Instead, Bifrost can run on the same hardware as, say, Home Assistant, or an old an PC.

Setting up Bifrost

I’ve recently installed Bifrost on the same Raspberry Pi that hosts my Home Assistant instance (there’s an addon to make it easier). As it stands, it’s relatively new software, and so it has to be configured manually using a YAML file. You also need to be using Zigbee2MQTT, and have Zigbee smart bulbs – non-Zigbee devices aren’t supported, and nor is Home Assistant’s built in Zigbee controller. Also, Bifrost only works with lights – for example, I have a Zigbee smart plug which controls a light, and Bifrost ignores this.

The other thing to be aware of is that Hue uses ports 80 and 443, so if you want to use Bifrost, there can’t be any other software acting as a web server on the same machine. I had to pause my use of Nginx Proxy Manager to get it to work; thankfully, I’m now using Homeway for remote access to Home Assistant so this wasn’t an issue. Whilst you can tell Bifrost to open other ports instead, most Hue apps won’t work if you do this.

Once Bifrost is running and has found your Zigbee devices, you should be able to use the official Hue app to set up your lights. You’ll need to tell the app that your bridge doesn’t have a QR code; if all goes well, it’ll detect the Hue mDNS packets that Bifrost broadcasts, and it’ll then work just as if you had a genuine Hue bridge.

Benefits of the Hue app

The official Hue app has some features that other smart home apps don’t have – mainly the ‘Scene Gallery’. If you have multiple multi-colour lights in a particular room, Hue can offer to set them to different, but complementary colours.

It should be noted that, with Bifrost, you can use the Hue app to control (theoretically) any smart lights, regardless of whether they were manufactured by Philips or not. The multi-colour lights I have were a couple of cheap Tuya Zigbee strips from AliExpress, and they work fine in the Hue app through Bifrost.

Other Hue emulators

Bifrost isn’t the only emulator in town. There’s also DIY Hue, which, like Bifrost, can be installed using Docker or as a Home Assistant addon. There’s a comparison between Bifrost and DIY Hue here.

Home Assistant itself includes a Hue emulator. It’s an older integration that has to be configured using YAML, and it’s more limited. It probably won’t work with the official Hue app – I haven’t tried it myself. It’s mainly there as an easier way to bridge devices in Home Assistant into Amazon Alexa.

Creative Commons License
Except where otherwise noted, the content on this site is licensed under a Creative Commons Attribution-ShareAlike 4.0 International License.