ESP Firmware alternatives

Building on last week’s post about flashing smart plugs Tasmota, today I’m going to talk about other custom firmware that you can install on devices with an Espressif ESP chip. Tasmota is the most well-known, but whilst researching how to do the flashing, I’ve come across some others.

Tasmota

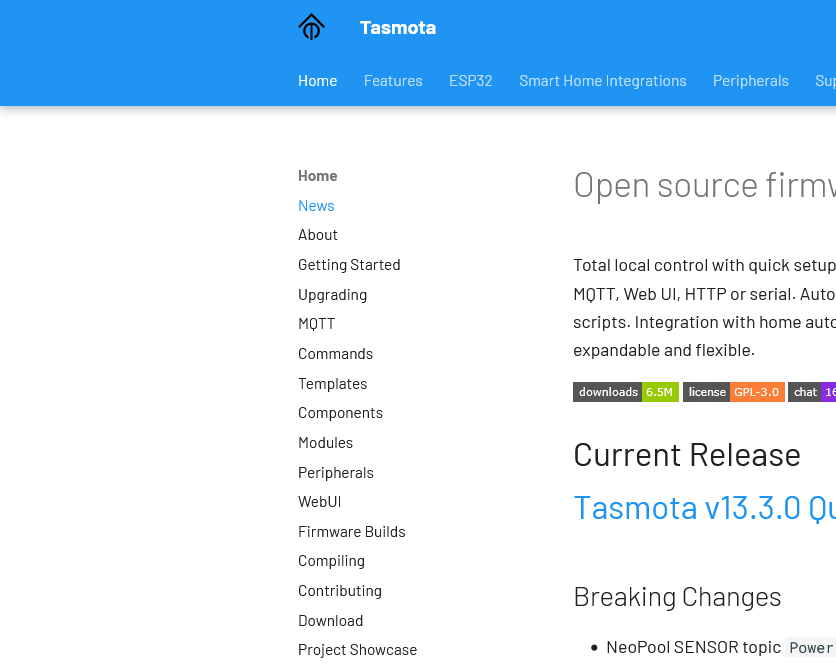
Obviously the first one I should mention is Tasmota. It seems to be the most well-used, with active development and lots of features. It’s designed to be used only on ESP32 and ESP8266 boards. Tasmota incidentally is an acronym which stands for Theo-Arends-Sonoff-MQTT-OTA and to this day Theo Arends remains the primary developer.

Recent Tasmota releases have included Matter support, albeit only on ESP32 chips which have more storage than ESP8266.

ESPurna and ESPEasy

I’ve grouped these together, as I found out about them from this blog post by HomeOps which compares them to Tasmota. ESPEasy is actually the oldest, having been around for almost 10 years, but Tasmota and ESPurna both started up around a year later. There’s an update to the blog post which also includes ESPHome, and compares them in a more quantitative way.

Notably, ESPurna only works on ESP8265 and ESP8266 chips, whereas Tasmota and ESPEasy also work on ESP32 chips, such as the one in the m5stack Atom Lite that I turned into a Bluetooth Proxy. Both ESPurna and ESPEasy use MQTT to communicate with other devices.

ESPHome

ESPHome is part of the Open Home Foundation, along with Home Assistant, and as such integrates well with Home Assistant. Unlike the other firmware tools here, ESPHome doesn’t use MQTT by default, although if you build your own firmware with ESPHome then you can add it as an optional extra. Instead, it communicates via Home Assistant’s API. This offers some advantages – it allows Home Assistant to install firmware updates for ESPHome devices. But if you were to switch from Home Assistant to another smart home platform, then you would either need to recompile the ESPHome firmware to add MQTT, or switch to one of the other firmware platforms listed here.

Another thing I’m less keen on about ESPHome is that you use a YAML configuration file to configure devices. I found Tasmota’s web-based interface much more user-friendly.

It’s worth noting that, as well as Espressif chips, ESPHome also works on RealTek RTL8710 and Beken BK7231 series chips too.

OpenMQTTGateway

OpenMQTTGateway is a more specialised firmware designed to make existing non-smart products work over MQTT. It’s best used with BLE (Bluetooth Low Energy), RD, Infrared and old fashioned Serial (RS232) devices. You can buy devices from Theengs which have the OpenMQTTGateway firmware already flashed.

As far as I can tell, OpenMQTTGateway just works on ESP32 chips.

OpenBeken

OpenBeken started out as a way of implementing a Tasmota-like experience on Beken BK7231 chips, but now supports a huge range of chips including ESP32 (but not some other Espressif chips like ESP8826) and RealTek RTL8710. It apparently works in a similar way to Tasmota, but I’ve yet to try it. I have one Tuya device with a BK7231 chip, but I haven’t yet been brave enough to try to flash it. Again, it uses MQTT to communicate with other devices.

Comparing Zigbee2MQTT with ZHA

A screenshot of the Zigbee2MQTT home page

If you’re a Home Assistant user who is getting started with Zigbee devices, then you may be tempted to just use Zigbee Home Automation (ZHA), Home Assistant’s built-in Zigbee implementation. But you may also want to consider Zigbee2MQTT as an alternative, and this blog post will explain the differences.

I’ve recently started looking into Zigbee devices. Back in July, I wrote about the different smart home protocols, and Zigbee offers some useful features:

  • Low power, so battery-powered Zigbee devices shouldn’t need their batteries replacing too often.
  • It’s a mesh protocol, so every mains-powered Zigbee device forms a mesh with each other, allowing a network to span a house without necessarily needing multiple access points like Wi-Fi.
  • It works locally, so it’s more secure and private than Wi-Fi.

If you have Philips Hue bulbs, Ikea Tradfri devices or any Hive products from British Gas, then you’re probably already using Zigbee devices. You also have a private Zigbee network if you have a smart meter, although you won’t be able to use this with your own devices. I’m using a Sonoff USB Zigbee dongle (sponsored link), which is plugged into the Raspberry Pi which runs Home Assistant. Previously, I had flashed it with custom firmware to enable support for Thread and Zigbee, but I’ve reverted that now as multiprotocol support is experimental, and I have Google Wi-Fi devices which support Thread if needed.

Zigbee Home Automation (ZHA)

If you’re new to Zigbee and/or Home Assistant, my recommendation is to use ZHA, which is Home Assistant’s built-in implementation. If you plug your Zigbee dongle in, Home Assistant should detect it, and offer to configure the ZHA integration for you. Then, you just add devices using the ‘Add Integrations’ button on the Integrations Settings page, where a new ‘Add Zigbee device’ option will appear at the top.

Home Assistant should be able to recognise and offer to add any Zigbee device, but what you may find is that some devices won’t have any entities. This means that it’s not supported by ZHA. There’s a database of Zigbee devices which you can use to check whether they’re supported by ZHA or Zigbee2MQTT, and what you may notice is that there are quite a few which ZHA doesn’t support.

Zigbee2MQTT

One of the devices that I’ve recently bought seemingly fell into this latter category. To be fair, I never checked it with ZHA, but reading reviews online suggested that it would only work with Zigbee2MQTT and not ZHA. Zigbee2MQTT also maintains its own list of supported devices, which currently number nearly 4000.

Getting Zigbee2MQTT set up with Home Assistant is a much more involved process, however. You’ll need to install two addons and an integration:

  1. Firstly, you’ll need to install the Mosquitto addon, which is an MQTT broker – essentially a server which handles the MQTT messages. This is available from the standard Home Assistant add-on store. There are other brokers available, but this one is most recommended for use with Home Assistant.
  2. Next, you’ll need to install the MQTT integration. Once Mosquitto is running, Home Assistant may automatically detect it, and offer to install this for you, but if not you’ll need to install it manually.
  3. Finally, there’s the Zigbee2MQTT addon to install. This isn’t available from the standard Home Assistant add-on store until you add a custom repository.

Once all of these are installed, you’ll need to disable the ZHA integration if it’s enabled, and then open the Zigbee2MQTT web interface. Go into the settings, and ensure that it’s pointing at the Mosquitto MQTT server that you set up in step one above – you may need to enter its IP address.

You’ll then need to add devices using the Zigbee2MQTT web interface – there’s a button at the top right where you can enable pairing. Any devices you add will then show up automatically under the MQTT integration in Home Assistant.

Once set up, Zigbee2MQTT seems to work well, and I’ve seen others state that they’ve found it more stable than ZHA. But it’s a lot more difficult to set up, and ZHA will probably work for most users. If you’re new to all this, my advice would be to try ZHA first, and then re-pair your devices with Zigbee2MQTT if it doesn’t work out.

Converting Tuya devices to Tasmota

Screenshot of the Tasmota web site

I’ve mentioned that I have a few Tuya smart plug sockets around the home. It’s possible to convert these to run on open source firmware called Tasmota, to gain some additional features, and it’s something I’ve been considering.

The logic boards for many Tuya devices are from the Espressif ESP family, which can easily be flashed with different firmware. Tasmota is one such provider, as is ESPHome which is a sister project to Home Assistant.

What’s wrong with Tuya?

Tuya mostly manufacture ‘white label’ devices that are then sold under a variety of brands. Mine are branded ‘Coosa’ but I’ve seen others called ‘Hey!’ being advertised. Often, they come with their own branded app, but you can use them with Tuya’s own app as well.

I bought them a few years ago because they work well with Google Assistant and IFTTT (which I no longer use). They also work well with Home Assistant (especially since last month). They don’t work with Apple HomeKit natively but can be bridged in using Home Assistant or Homebridge. The other advantage was that you didn’t need a separate hub for them to work – they connect directly to your home Wifi network.

However, Tuya is a Chinese company. Though they claim to have servers in the EU, it could be that every time I use their switches, my request goes via China. In Home Assistant, there are a couple of custom integrations in HACS called LocalTuya and TuyaLocal that can issue commands locally on your home network. But if you use Google Assistant, the commands get sent across the web.

Local control with Tasmota

The Tasmota project offers a tool called Tuya Convert, which replaces Tuya’s official firmware and allows for local control. It mainly uses the MQTT protocol, which is openly documented and used by a variety of different Internet of Things devices. Once flashed onto your devices, they can be controlled locally and don’t need to communicate with external servers. Home Assistant has extensive MQTT support and an official Tasmota integration.

They also work well with Alexa devices, by emulating a Belkin WeMo or Philips Hue device.

This all sounds good to me, but I haven’t gone ahead and done it. Unfortunately, whilst Amazon Alexa is supported, Tasmota doesn’t easily interact with Google Assistant. And once I’ve flashed a device with Tasmota, it may be difficult or impossible to go back to the official Tuya firmware.

Of course, I can configure Home Assistant to work with Google Assistant. I haven’t yet, even though there are two ways to do it:

  1. Sign up for Home Assistant Cloud from Nabu Casa, which costs £6.50 per month
  2. Set up Google Assistant manually with Home Assistant, which is lengthy and may need to be reconfigured every 30 days.

I suppose if we used Amazon Echo devices instead of Google Home, this would be a no-brainer.

In the long run, replacing these smart plugs with ones that use Matter would be better and cheaper. My Home Assistant install is pretty-much Matter ready, with no need for an additional hub. Matter, like Zigbee, mostly works locally, and therefore doesn’t have the privacy implications of my current web-based Tuya plugs.