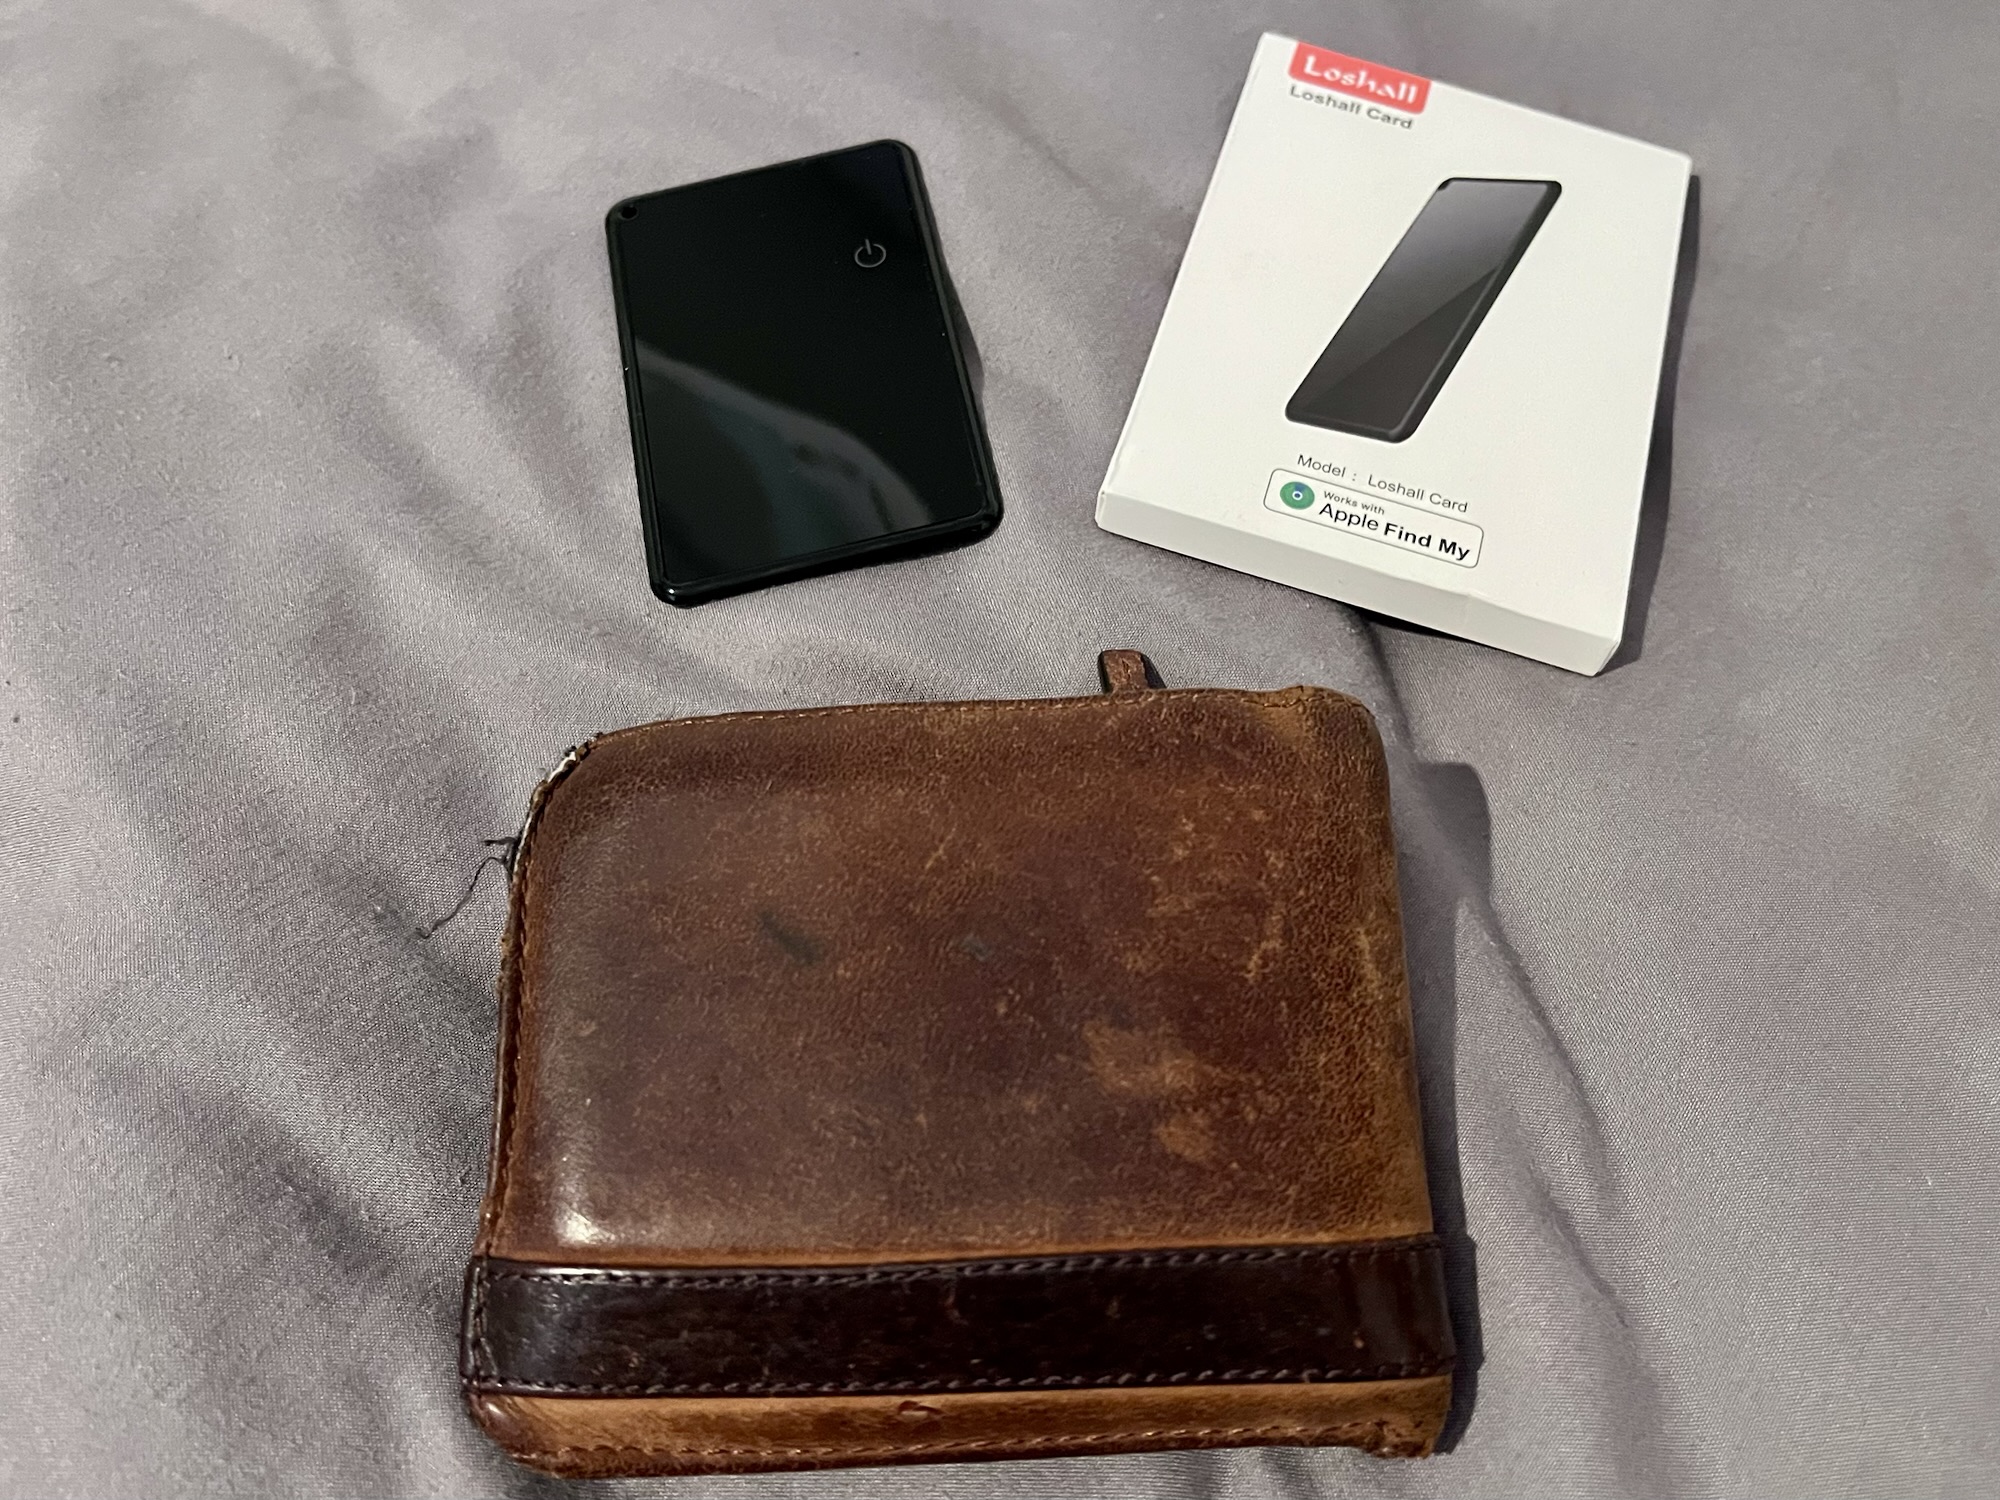
Although I’ve never lost my wallet before, I now have a wallet tracker in it, in the hope that, should I lose it in future, I can use Apple’s Find My network to find it again.
The specific wallet tracker card I’ve bought is the Loshall Card. It’s available for £20 on Amazon(sponsored link), but I bought mine from AliExpress. I paid £6.09 for it, but it’s currently selling for £8.50 – still, that’s half the price of Amazon. And, it’s considerably cheaper than Spotminders, who advertise heavily on social media but charge £37 (plus postage) for basically the same thing.
Pairing and charging
The Loshall Card is shaped like a standard credit card, but is about double the thickness. It should fit snugly in your wallet in a standard card slot. To set it up, you scan a QR code included in a leaflet in the package, which opens Apple’s Find My app and allows you to pair the card to your iCloud account. Your wallet tracker card will then show on an ‘Items’ tab in the Find My app, and as long as it’s in Bluetooth range of another Apple device, you should be able to see where it is at all times.
The battery inside the Loshall Card isn’t removable, but can be recharged wirelessly using any Qi wireless charger. A full charge should last around 4 months, which is less than other wallet tracker cards, but the Apple Find My app should show its charge level. There’s also a tiny LED on the card that shows red whilst charging, and green when fully charged.
If you do need to locate your wallet, you can use the Apple Find My app to play a sound on the Loshall Card. It’ll make a little beeping noise, but it’s quite quiet.
Using the Loshall card wallet tracker
I’ve had my card a couple of months and it’s worked well – up to a point. Several weeks ago, I had an alert that I’d left my wallet behind at work – my first day back in the office post-injury – when I hadn’t. It appeared that the card had crashed and had stopped pinging its location until I charged it, even though it had been fully charged a few days earlier. That seems to have been the only niggle, and it’s worth remembering it was significantly cheaper than many other wallet tracker cards. If it fails again, then I may need to think about buying a better one that I can rely on; I wouldn’t want to lose my wallet at a time when the card fails.
Only for Apple devices
It should be noted that this model of Loshall Card only works with Apple devices. Android devices have their own network called Find Hub, and so if you have an Android phone, you will need a different wallet tracker device.
It’s also worth noting that Tile, the original tracker device company, uses a separate, third network called Life360, and so its wallet tracker card won’t work with Apple Find My or Android Find Hub. Nowadays, I generally wouldn’t recommend Tile devices, as the Apple and Android networks are larger and so you’re more likely to find your lost devices on these. Which is a shame, as I used to use Tile trackers quite a bit before the pandemic. I still have several, but their batteries are long dead, and whilst the batteries can be replaced easily, I think I’d rather buy new trackers with better support.
January started with a trip to the Science and Industry Museum in Manchester, to have a look at their Operation Ouch exhibition about food and, um, poo. They have another exhibition about brains and bogeys in 2025 so I’m sure we’ll be back there soon. We also went to Eureka in Halifax; despite having an excellent children’s museum practically on our doorstep, we don’t go there that often. And there was also a brief trip to the Royal Armouries in Leeds.
I added a newsletter to the blog in May, which is a weekly list of new blog posts. So far, a grand total of four people are fully subscribed, although two were in December so maybe it’s picking up momentum?
In 2023, my dad had some health issues which persisted for some time into 2024, ultimately resulting in him going back into hospital again in June this year. Thankfully, this time the doctors treating him seemed to get on top of the issue, and so he’s now much better than he’s been in a while.
We didn’t have any days out in September (bar a trip to the cinema to see Inside Out 2), but I did write about travel more generally in a blog post about furthest compass points.
Another cinema trip, this time to bawl our eyes out at The Wild Robot which is as good as everyone says it is. Our (now) nine-year-old got one of the follow-on books as a birthday present. We also went to Bolling Hall Museum with friends, and had a return visit to the Askham Bryan Wildlife & Conservation Park (which I wrote about in 2017 when it first opened).
Throughout the year, I mostly stuck with my target of publishing a new blog post every other day, which I’m really pleased about. I don’t have the time to contribute something every day – I’ve tried that in the past and I just end up writing waffle to fill up space. And, as we’re a family of two full-time working parents, our ability to have fun days out is mostly limited to weekends and holidays. But we did have the opportunity to do a few fun things this year, and have some new experiences. Whilst we didn’t go abroad this year, we squeezed a lot into our summer holiday to Northumberland, and seeing thousands of puffins on the Farne Islands will be something I hope to remember for a long time.
KVM switches have been around for many years – KVM standing for Keyboard, Video and Mouse. They allow you to have one keyboard, mouse and screen connected to two or more computers, which you can switch between. Older models had to include all manner of ports – RS232 serial ports, parallel ports, PS/2 ports for keyboards and mice, and VGA or DVI ports for screens. Nowadays, thanks to standardisation on USB, modern KVM switches are much more simple.
This Steetek model is designed to switch between two computers. It comes with two USB-A to USB-B cables to connect to each computer, but you need to provide your own HDMI cables. On the front are four USB 2.0 ports, so it also doubles as a USB hub. Note that the picture on Amazon’s web site suggests that there are two USB 1.1 and two USB 2.0 ports, but they’re all labelled as USB 2.0 on the KVM switch that was delivered to me.
Once set up, there’s a single button at the front, which you press to toggle between the two computers, and two LEDs, which illuminate depending on which computer is in use. It can support 4K Ultra HD screens (3840 × 216 resolution) and audio over HDMI, so you can use it for (for example) games consoles as well as computers. The KVM switch does not need any external power, and there are no drivers to install. That being said, the lack of external power means that the USB ports will only be really useful for connecting keyboards and mice, and not any high-power devices like phones.
It’s also nice and compact, measuring just 11 cm (4 1/2 inches) wide, 6 cm (2 1/2 inches) deep and only an inch (2.5 cm) high, so it doesn’t take up much space on my desk. I’m using it to switch between our home Windows laptop, and the Raspberry Pi which runs Home Assistant. As mentioned, there’s no need to install drivers and so it works fine, even when the two computers are very different. It costs about £20 at the time of writing.
There are lots of other KVM switches available, offering external power and connections to more than two computers. There are also some Thunderbolt KVM switches, such as this one(sponsored link), which are even simpler to set up. Because Thunderbolt uses USB-C connectors for data and video, you only need one USB-C connection to each device rather than separate USB and HDMI connections. However, you’ll pay a premium for these, as they cost several times more than this more basic one. And neither of my computers support Thunderbolt.
Early in July, I needed some new Bluetooth headphones at short notice, and so I bought this cheap pair of Kvidio Bluetooth headphones from Amazon(sponsored link). At the time, they were around £16, but at time of writing they’re selling for £14.20, which is only a little above half their recommend retail price.
Now I’m no audiophile, although I do like headphones that at least make some effort with sound quality. And quality-wise, these sound like headphones in the £30-40 range. Which is pretty good considering their price. They’re nowhere near as good as some much more expensive headphones, but in terms of sound quality, they’re excellent value.
Two devices
One great feature is that they can be paired to two different Bluetooth devices simultaneously. I have my headphones paired to both my iPhone and iPad, and you can switch between the two sources just by starting playback on the other device; your other device will then pause. It supports Bluetooth 5.3, which is currently the second-newest release, and puts it ahead of my iPhone (5.0) and iPad (4.2).
You can, of course, use the headphones for calls, and there’s a microphone included. I haven’t tried recording sound from the microphone but people I’ve called whilst wearing them haven’t commented on any sound issues.
In terms of physical ports, charging is with a USB-C cable, and there’s a 2.5mm audio jack for devices that aren’t paired via Bluetooth. Note that the 2.5mm jack is input only – the microphone only works via Bluetooth. There are three buttons – the centre button pauses playback, and can be held down to turn it on or off. The other two can be used to skip tracks forwards and back.
Another sign of their cheapness is the sounds that the headphones make on startup (a very poorly digitised voice saying ‘power on’ and ‘connected’) and a loud beep when the pause button is pressed. More premium headphones will probably have more pleasing sounds.
Battery life
Battery life is claimed to be 65 hours, and I’ve only needed to charge them once since I bought them nine weeks ago. The long battery life is probably because these are noise-isolating headphones – i.e. they’re a snug fit around your ears to block out noise, but they don’t feature active noise cancellation. That also contributes to the lower price.
They’re quite lightweight – indeed, they don’t feel very solid although I’ve not managed to break them yet. As such, they’re quite comfy to wear, even for long periods.
For what they are, these Kvidio headphones are very good value for money. Sure, there are many better quality options out there, but I think you would struggle to find something else as good as these at this price point.
I have an upcoming project for Home Assistant which means that I need to be able to measure the temperature in our bedroom. As part of this, I’ve bought a couple of ThermoPro TP357 Bluetooth thermometers from Amazon (sponsored link). One is for our bedroom, and the other is for our eight-year-old’s bedroom which tends to get a bit cold in winter.
I specifically went for these thermometers because they’re:
Cheap – I paid £19 for the pair last week, but they’re £16 for the pair as I write this.
No extra hardware required – because they’re Bluetooth, and I run Home Assistant on a Raspberry Pi with a supported Bluetooth chip, there’s no additional hardware required to get the two to talk to each other.
Probably good battery life – Bluetooth is quite energy efficient when compared with, say, Wifi, and so the batteries should last longer.
No need to use the cloud – all the data can be stored locally on Home Assistant.
ThermoPro TP357 look and feel
The ThermoPro units are smaller than I expected. They’re about as tall as a credit card but roughly square, so they’re narrower than a credit card. Each one runs on one AAA battery which is provided. On the back is a flip out kick-stand, a magnet and a hook, so you can wall-mount it, stick it to your fridge or have it free-standing on a shelf like I do. There’s also a button on the back that switches it between Fahrenheit and Celsius.
On the front, there’s an LCD screen which shows the current temperature and humidity level. There’s also a face pictogram – it’ll smile when the humidity is between 30-60%, frown when it’s less than 30% or show a neutral expression if it’s over 60%.
Home Assistant integration
If you have Bluetooth enabled on your Home Assistant device, then a few minutes after you put the battery in, Home Assistant should pop up a notification to say it’s discovered a new ThermoPro device. You’ll just need to confirm that you want to set it up and allocate it to an area, and you’re done.
As you would expect, the ThemoPro integration reveals entities for temperature and humidity, but also the battery level. I’m not sure how accurate this is, as both provided AAA batteries just show 50%. I’ve added these to my Home Assistant dashboard, and have set up some additional functionality that I’ll blog about later. Mainly because, despite allegedly being ‘summer’ in the UK right now, it’s not been warm enough for me to test.
The range seems quite good on these. ThermoPro claim that there’s an 80 metre range in direct line of sight. There’s a few thick walls between my Home Assistant device and the thermostats, and one that is around 5 metres away doesn’t have great signal strength but it’s enough.
ThermoPro app
Of course, ThermoPro expect you to use their app for iOS and Android. This includes logging of up to a year’s data, and you can set notifications based on events related to the humidity and temperature. Well, that’s what it says – I haven’t actually installed the app. I’m not yet sure if it’s possible to have the app and Home Assistant communicate with the thermostat at the same time. But theoretically, anything the app can do, Home Assistant can do too.
Alternatives
I’ve had various Facebook adverts for alternatives to these. Some have e-ink displays, which are more readable at a distance, or use different protocols to Bluetooth. But they’re all more expensive. These two seem to do the job well and are small and cheap. Plus, it should be quite a while until I need to replace the batteries.
There’s only 32 hours of 2023 remaining in my timezone, so it’s time to review the things I’ve consumed this year and pick out my favourite content.
Note: all links below marked with a * are Amazon referral links, and so I receive a small amount of commission from any purchases. But please feel free to buy these from a local, independent tax-paying shop, or borrow them from your local library, as I did with several of these recommendations.
Favourite book of 2023
So far I’ve read 95 books this year, although to be fair, quite a few of these were bedtime stories for our eight-year-old. Those aside, my favourite book was ‘These Impossible Things’ by Salma El-Wardany*. It tells the story of three young British Asian women, who are navigating the divide between family and cultural expectations, and life as a young person in the UK in the 21st century. It’s very well-written, with very relatable characters. This is El-Wardany’s debut novel and so I’m interested to see what comes next.
Honourable mentions: There were a few books that I awarded five stars to on Goodreads this year:
What If? 2* is a sequel to Randall Munroe’s first book about absurd hypothetical questions – you’ll know him as the creator of xkcd. The first book* is good as well.
We haven’t been able to watch many films this year, and those that we have seen at the cinema have tended to be child-friendly films. We’re also behind on Marvel films and haven’t seen any in a couple of years. Of those that we have seen, probably my favourite was the Barbie movie, which was just hilarious all the way through. We saw it a few weeks after it came out and there were several of us laughing out loud in the cinema.
Honourable mentions:Dungeons and Dragons: Honour Amongst Thieves* was fun, and it was good to see Hugh Grant playing an antagonist for once. And it was nice to finally see a sequel to Chicken Run – I had the first film on VHS, which gives you an idea of how long ago since that came out, and meant I’ve had to explain to our eight-year-old what a ‘VHS’ is.
It’s also worth noting that we are planning to see Wonka tomorrow.
Favourite TV show of the year
Again, we’ve not had much time to watch TV this year. When you work full-time in a different city to where you live, and have a child who has school and homework and weekend activities, there’s not a lot of time to keep up with TV. Of the shows that I have seen bits of, The Repair Shop has filled that niche of being interesting, comforting and educational.
Favourite audio series of the year
Okay, so I basically created this category so that I could tell you about Felicia Day’s ‘Third Eye’*. It’s an Audible exclusive, and is more akin to a radio play rather than an audiobook. But, it has a narrator in the form of Neil Gaiman and is split into chapters. Felicia Day wrote the script for TV several years ago, and although no TV channels picked it up, it’s become a very good audio series with Day playing the lead character. London Hughes, Alan Tudyk and Wil Wheaton provide some of the other voices.
So – these are the things that I have watched, read and listened to in 2023. Next year, I’m hoping to catch up with the Marvel films we’ve missed (especially now that the pace of release has slowed down) and continue to read more things. Maybe I’ll manage 100 books across the year this time?
Like with most wireless doorbells, this Koopower kit has a transmitter bell to attach by your door, and a plug-in receiver that plays the chime. What sets the Koopower kit apart is that the transmitter doesn’t require any batteries.
The energy required to transmit the signal is generated by the action of pushing the button. This gets around one of the major problems with traditional wireless doorbells – knowing when the batteries are flat. Short of testing your own doorbell regularly, you run the risk of someone pressing the button and there being no chime, even when you’re in.
The Koopower kit I received contained two receivers, which is useful; I have one downstairs and one upstairs. Our house is quite long with thick walls and in the past I’ve struggled to hear our previous doorbell.
Pairing them with the transmitter was straightforward, and the transmitter includes a double-sided sticky patch for attaching to your wall/door. Compared to my previous wireless doorbell, installation was really easy.
Once installed, a couple of buttons on the receivers let you control the volume, and choose one of 25 polyphonic ringtones to play. I stuck with a simple ‘ding dong’ sound, which is the default. The receivers also flash an LED when they ring.
Whilst more expensive than other wireless doorbell kits, the Koopower system gains points for its incredibly simple installation and offering two receivers. It’s not a smart doorbell system like Ring (Amazon Link), so it won’t link to your phone. But it does well for a basic doorbell system that requires minimal maintenance.
Today I’m reviewing the pair of TP-Link 1000 Mbps Gigabit Powerline Starter Kits that I bought earlier this year to improve our network at home. If you haven’t already, please read yesterday’s post for some context, although I’ll summarise here too.
My aim was to improve the network speeds on some of the devices that I own, thus freeing up Wifi capacity. I went with Powerline (also known as HomePlug) because it would be less disruptive to install than Ethernet cables.
The TP-Link units were well-reviewed on Amazon, averaging 4.5 stars with over 1000 reviews at time of writing. I needed three adaptors; unfortunately I could only find them in packs of two, and so ended up buying four. At the time, this set me back £80, but they’re now down to £36 for a pack (so £72 for two).
Installing the Powerline adaptors
Setup is a doddle. Each starter pack includes two Powerline adaptors, and two standard two metre Ethernet cables. You plug one adaptor into a wall socket near your router and connect it up with an Ethernet cable, and then use the other adaptor and cable to connect to your device in another room. Ensure the adaptors are switched on at the wall, and your device should connect, just like it would if there was a direct Ethernet cable linking it to the router. Repeat this for any additional adaptors – you can use more than two in the same home.
There’s no special software to install, and unlike Wi-Fi routers, there’s no configuration either. It’s literally just ‘plug and play’.
That being said, each adaptor has a ‘Pair’ button, and it’s recommended that you press this on each adaptor in turn. This encrypts the signal between each adaptor, so if there’s any signal leakage with a neighbour, their Powerline adaptors won’t be able to connect to your network and vice versa. It’s a bit like enabling WPA on your Wi-Fi, and it doesn’t seem to have any discernible effect on performance.
Performance
Speaking of performance, the TP-Link adaptors seem to work well. The speeds and latency are certainly better than I was getting over Wifi. Internet-based tests like Ookla’s Speedtest seem to suggest that I’m able to take full advantage of my internet’s connection speed.
As I mentioned yesterday, our household electrical wiring is of variable quality and I was concerned that the older wiring would affect speeds. This doesn’t look to be the case, and the Powerline signal works across our fuse box to serve different electrical rings.
It is worth pointing out that you ‘lose’ an electrical socket when using these adaptors. This isn’t much of a problem for us; when we had the downstairs rewired, we deliberately installed far more sockets than we needed. If you are short of sockets, then you can pay extra for adaptors with a pass-through capability. They work the same but you can still plug another AC device in; however, they cost £50 for a pair, rather than £36.
Compatibility
As I was starting from scratch, I deliberately bought two pairs of adaptors from the same manufacturer. The good news is that HomePlug is an agreed standard (IEEE 1901), and these TP-Link adaptors comply with the HomePlug AV2 specification. This means that if I wanted to expand the network even further, I could theoretically use any HomePlug AV2 compliant hardware to do so – I wouldn’t necessarily need to buy TP-Link equipment again. As it is, I have a spare adaptor since I only needed three.
Conclusion
I’m really impressed with the TP-Link Powerline units. They deliver a good, fast connection, and have worked well in the couple of months that I’ve had them. Whilst it would have been nice to save a bit of money and buy a pack of three adaptors, rather than two pairs, at least I have a spare adaptor for future expansion.
If you have problems with your Wi-Fi speeds or signal strength – especially if your home is around 100 years old and built of stone, like ours – then Powerline adaptors may be a good solution for you.
When my latest set of headphones stopped working in one ear, thanks to a loose connection in the jack, I decided that it was probably about time to get rid of the wires altogether and go wireless. I’d previously tried some cheap no-brand Bluetooth headphones in 2014, which were terrible – a non-standard charger cable, poor sound quality and cheap plastic-y construction. I think I used them once – I’d bought them for the gym but then stopped going and haven’t been back since.
After browsing through Amazon, I came across these mPow Magneto headphones. The reviews were generally good and they ranked as the number best-seller in wireless headphones. I purchased them for £16, but at the time of writing they’re selling for less, making them a bargain.
The headphones aren’t completely wireless – there’s a flat wire between the two earpieces which also has a remote control on the right side. But they’re less prone to tangling than regular wired headphones and you can run the wire behind your neck. The ‘Magneto’ name refers to the magnets in the earpieces – you can attach them together and wear it as a sort of necklace when you’re not listening to them.
The remote control has volume control buttons, and a general purpose button used for turning them on and off, and for pause the current playing track. There’s also a microphone, and when paired with a phone you can use it to make and receive telephone calls. The right earpiece has a micro-USB port for charging – a full charge takes about an hour and gives around 8-10 hours of music playing in my experience.
Pairing with your device is straightforward, and if your device supports the Bluetooth Battery Service, you’ll be able to see how much charge your headphones have left. My iPhone 5S supports this; when connected, the Bluetooth icon in the top right gains an additional battery indicator and a new ‘Battery’ widget appears on the Today pull-down. The mPow Magneto will also play an audible warning every 5 minutes once you get below 30% battery remaining.
Sound quality is pretty good – decent bass and reasonable clarity. Audiophiles will probably want to spend more on something better, but I was pleasantly surprised – I’ve used wired headphones with worse sound quality before. Although sometimes radio interference affects the range – the sound can become choppy if your device is more than a foot away from your headphones, but it depends where you are. Other times it can be a couple of metres away and be fine.
Going wireless does have its downsides. As far as I can tell, you can only pair your headphones with one device at a time, whereas you can plug wired headphones into any device with a 3.5mm audio jack. Although you can use the headphones whilst they’re charging, you may have physical difficulty getting the right earbud to sit in your ear as you do so. Plus, the need to recharge your headphones once or twice a week may put some people off, as will the extra battery drain on your phone or device (especially if you normally have Bluetooth turned off). But not having to unknot wires that then dangle and pull when running is quite liberating.
There are better headsets out there, if you’re prepared to pay more. But the mPow Magneto is fantastic value for money and gets my recommendation. I use them daily and have been really impressed with them.
You may be thinking, ‘wait a minute, you only reviewed a Netgear range extender a few weeks ago!‘. And you would be right. I was sent a Nighthawk EX7000 Wi-Fi range extender to review, but unfortunately I had to send it back to the PR company after I’d written the blog post.
I still needed a Wi-Fi range extender though, as my BT Home Hub 4 can’t reach the whole house. The WN3000RP model had some reasonable user reviews on Amazon, met my needs and was reasonably affordable, and so I put it on my Christmas list. Santa, or rather my Dad, obliged and so I’ve been using it since Christmas Day.
It’s a much smaller than the Nighthawk and simply plugs directly into a plug socket with no further assembly required. As it’s equipped with Wi-Fi Protected Setup (WPS), configuring it is dead simple – turn it on, press the WPS button, press the WPS button on your router, and then wait a minute or two. A new Wi-Fi network will appear with ‘_EXT’ appended to it and it’ll use the same WPA security key (password) as your router.
That’s probably all most people will need to do, but a few configuration options are available using a web-based control panel. There’s also a port for a network cable to connect a device which lacks its own Wi-Fi connection, although you’ll need to provide your own cable.
The Nighthawk I reviewed in November was a premium model with lots of additional features, such as extra network ports, a USB port for a hard driver or printer and faster connections. This is a much simpler model without the bells and whistles, but it does the basic job well. It has certainly alleviated our wifi signal issues and seems to perform as well as we need it to.
If you’re looking for a simple solution to extend your Wi-Fi router’s reach, at £27 from Amazon, you can’t go wrong with the Netgear WN3000RP. It’s a fifth of the cost of the £140 Nighthawk EX7000 (although Amazon had it for £100 before Christmas) which offers extra features and performance, at a price.