Homeway – easy remote access to Home Assistant

Screenshot of the Homeway web site home page

Being able to access your Home Assistant instance outside of your home is useful, and there are many ways to do it – I’ve used several, including SWAG, an nginx proxy and more recently Nginx Proxy Manager. Today, I’m reviewing Homeway, a third-party service.

Setting up Homeway

Of all of the ways that you can enable remote access to Home Assistant, Homeway is one of the easiest. You sign up for an account on the Homeway web site, install an addon on your Home Assistant instance, and then you should be ready to go. Setting up the Home Assistant Companion App for iOS and Android is also supported, albeit with a little more work. If you don’t run Home Assistant OS or Supervised, and can’t install addons, then there’s also a Docker image or CLI client you can install.

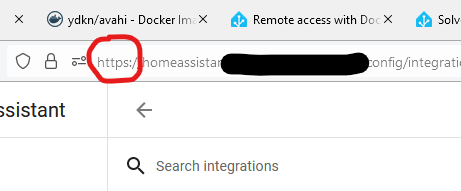
Once up and running, it works well – you log in first to Homeway, and then into your local Home Assistant instance. It’s all done over SSL, without needing to set up DNS, port forwarding or reverse proxies.

Homeway also supports easy integration with Google Assistant and Amazon Alexa. Having done it myself, setting up Google Assistant manually is a chore, and even when it’s up and running, I found it slow and unreliable. Using Google Assistant this way is much easier, as you don’t need to create a developer account. I also found it to be much faster, and I haven’t had any issues with devices showing as offline.

If you want to use Home Assistant’s voice control feature, then Homeway also provides access to an AI large language model for processing commands. Its chatbot is called Sage, and behind the scenes it uses ChatGPT 4 and Anthropic’s Claude services. For speech-to-text, it can also call on Google Gemini and DeepSeek R1, and there’s a choice of 25 voices from the various services it uses. As I use Google Assistant, I haven’t set this up myself.

What about Home Assistant Cloud?

What Homeway offers is very similar to Home Assistant Cloud. Home Assistant Cloud is provided by Nabu Casa, who employ many of Home Assistant’s developers and support the Open Home Foundation. So why should one use Homeway instead of Home Assistant Cloud?

The answer is price. I’ve compared the prices in a table:

Monthly priceAnnual price
Home Assistant Cloud£6.50£65
Homeway£3.49£29.88

As you can see, Homeway is less than half the price of Nabu Casa’s Home Assistant Cloud. And, it should be noted that Homeway offers a free tier, if you just want remote access, albeit with data limits. You only need to pay for heavy usage and Google Assistant/Alexa access. There isn’t a free or lower-priced tier for Home Assistant Cloud.

That being said, as of January, Home Assistant Cloud now includes backup storage as well, which Homeway doesn’t currently offer. It’s also worth reiterating that some of the money from Home Assistant Cloud subscriptions goes to paying staff to work on Home Assistant development. As such, Homeway is a little controversial, and I noted that the Home Assistant Community on Reddit seems to block the word ‘homeway’ from posts.

For me, the best feature about Homeway is the Google Assistant support, which works well. I already have good remote access set up using Nginx Proxy Manager and will continue to use this.

Comparing ZeroSSL and Let’s Encrypt

If you run a hobbyist web site like I do, then nowadays there’s at least two places to get free SSL certificates: ZeroSSL, and Let’s Encrypt. I’ve used both, and so this is a comparison of their relative advantages and disadvantages.

Of the two, Let’s Encrypt is the most well-known, even though it’s only been around almost 10 years. It’ll celebrate its 10th birthday this coming November. Despite this, over 400 million certificates have been issued over those 10 years, and 93% of web sites use Let’s Encrypt certificates. It’s now the world’s most popular Certificate Authority, presumably because it’s free for all to use.

ZeroSSL is a much smaller commercial alternative, but it too offers free SSL certificates. The concept of SSL certificates being free would have probably blown my mind 20 years ago, but now almost all web sites use SSL – probably because Google ranks such web sites higher as a way of encouraging better security.

Anyway, this is a comparison, so here we go:

A still from the Lord of the Rings film where Boromir states 'One does not simply walk into Mordor'. The text has been replaced with 'One does not simply get a Let's Encrypt certificate'.

Ease of issuing certificates

Let’s Encrypt is designed to be an automated service for managing certificates, using tools like Certbot. Which is fine if you have a host that supports Certbot, or another tool that uses the ACME protocol. For example, I run Sympl which manages my Let’s Encrypt certificate for this web site.

But if you want to manually obtain an SSL certificate from Let’s Encrypt, it’s a much more involved process. You’ll need to interact with Certbot on the command line, and probably fiddle with your domain’s DNS settings. SSLFree.io appears to be a web-based front-end for getting Let’s Encrypt certificates, but I’m not sure how much I trust it.

ZeroSSL is the winner here. There’s a web-based tool for obtaining SSL certificates, and you can authenticate using an email link if you wish. There is also an ACME API.

How many certificates you can get

Let’s Encrypt is free for everyone, no matter how many certificates you need. You can also create a ‘wildcard’ SSL certificate, that would cover example.com and all its subdomains, although you’ll need to use a DNS provider that has a plugin available like CloudFlare.

ZeroSSL, being a for-profit company, isn’t so generous. If you want to use their web-based interface, then you’re permitted a maximum of three free SSL certificates that are valid for 90 days. This limit of three certificates includes renewals, so if you have three certificates already, you’ll need to wait for one to expire before you can renew it (or pay for a new one). Thankfully, there isn’t a limit on those created using the ACME service.

How long the certificates last for

Paid-for SSL certificates would typically last for 12 months. The free certificates that Let’s Encrypt can issue are only valid for 90 days, but the idea is that their renewal is automated using tools like Certbot so that, in practice, there’s no interruption in service for users.

ZeroSSL’s free certificates are therefore also only valid for 90 days. You can, of course, pay for a standard certificate that lasts longer, but this will cost. Rather than paying per certificate, ZeroSSL charges a monthly subscription beginning at $10 per month. By contrast, Xilo, who I used before Let’s Encrypt was a thing, charges £20 for a one year SSL certificate.

Other alternatives

I’ve focussed on Let’s Encrypt and ZeroSSL as these are the two that I have the most experience with. CloudFlare also offers free SSL certificates, as does SSL.com. I can’t really compare these as I haven’t tried them.

Manually renewing SSL certificates with Certbot

A screenshot of Putty connecting over ssh to a server running certbot, where the command has been issued to manually renew an SSL certificate. The domain has been pixelated.

Back in February, I started using nginx Proxy Manager to manage external access to the various web services that I host on my Raspberry Pi – namely, Home Assistant, calibre-web and Nextcloud. Nginx Proxy Manager (NgPM) includes Certbot, which is an automated tool for managing SSL certificates from Let’s Encrypt, and it should automatically renew certificates every three months so that there’s always a valid certificate in use.

In practice, this doesn’t work on my NgPM install. I understand it’s a bug in an older version that has been fixed, but as I run NgPM as a Home Assistant addon, that bug fix hasn’t made its way downstream. Attempts to renew the SSL certificates through the NgPM web interface fail with unhelpful errors.

Hopefully, the Home Assistant addon package will get updated soon, and this won’t be a problem anymore. But in the meantime, this is the workaround that I’m using – manually interacting with Certbot on the command line to generate a certificate. This can then be imported into NgPM manually.

Step 0: access Certbot through Docker

If you have access to Certbot directly, you can skip this step.I don’t, and Certbot is no longer supported on Windows, so I’m using the version of Certbot that comes with NgPM.

As this runs in Docker, we need to open a shell session inside the Docker image, using docker exec -it addon_a0d7b954_nginxproxymanager sh. I had to run this as root on my system using sudo.

Step 1: request the certificate

Now we can interact with Certbot itself. Here’s the command to type:

certbot certonly --manual --preferred-challenges dns - d example.com

Let’s break this down:

  • certonly specifies that we just want the certificate – we don’t want Certbot to install this for us.
  • --manual tells Certbot that we want to manually authenticate the domain.
  • --preferred-challenges dns means that we want to authenticate using DNS, rather than HTTP – this is tricky to do when you’re using a reverse proxy
  • -d example.com is the domain that we want the SSL certificate for.

Step 2: add a TXT record to authenticate

If you use something like Google or Cloudflare for DNS, then you may be able to use a plugin to automate this step. I don’t, so here we create a TXT record on our DNS provider’s dashboard to authenticate the certificate. This will be something like _acme-challenge.example.com and will include a text string that Certbot gives you.

Once you’ve created the TXT record, my suggestion is to set a timer for 2-3 minutes, before pressing Enter to continue. DNS records can take anything from a matter of seconds to a few minutes to propagate, and if you try to continue too soon, the authentication will fail and you’ll need to go back to step 1. Trust me on this.

Step 3: download the certificate files

If the authentication is successful, then Certbot will have created two files for you. For me, these were something like:

/etc/letsencrypt/example.com/fullchain.pem
/etc/letsencrypt/example.com/privkey.pem

As I was running Certbot from within Docker, the easiest way I found to save these was to type cat /etc/letsencrypt/example.com/fullchain.pem (and for privkey.pem) and then copy and paste the output into a file locally.

Step 4: add to Nginx Proxy Manager

If you’re using Nginx Proxy Manager and want to be able to use your new SSL certificate, then open the SSL Certificates tab at the top, click ‘Add SSL Certificate’, and then ‘Custom’. Don’t choose the Let’s Encrypt option; although these certificates were issued by Let’s Encrypt, you want to import them manually.

Give it a name – I usually put the name of the service and the month (e.g. Nextcloud Sept 2024). Upload the privkey.pem file as the Certificate Key, and fullchain.pem as the Certificate. Click Save.

Now, go to the Proxy Hosts tab, and choose the host that matches the SSL certificate that you’ve uploaded. Click on the three dots on the right hand side, and choose Edit. On the SSL tab, select the certificate that you’ve uploaded. And that should be it – try navigating to your domain to see if it’s working and check that the new certificate is in use.

No auto-renewals

It’s worth baring in mind that manually-issued Let’s Encrypt certificates won’t normally auto-renew. You apparently can use validation hooks to enable auto-renew, but this goes beyond my expertise.

I’m hoping that the package maintainer for the Nginx Proxy Manager addon for Home Assistant will issue a new release soon, which will enable me to auto-renew my certificates in future. If not, then I have my own guide to follow to manually renew.

Home Assistant with HTTPS and HomeKit

A screenshot of Home Assistant running in a web browser with HTTPS enabled and no certificate errors

Welcome to the latest chapter of getting Home Assistant working on a Raspberry Pi using Docker. Last time, I’d managed to get it working in Docker, but only over a regular HTTP connection and without HomeKit. The good news is that I’ve solved both of these problems.

Using SWAG to enable HTTPS

Firstly, I recommend reading this paragraph whilst listening to ‘Swagger Jagger’ by Cher Lloyd.

I’ve tried lots of different ways to get Home Assistant working over SSL/TLS. There’s a good reason why this is one of the key selling points of Home Assistant Cloud, as it can be difficult. Thankfully, there’s a Docker image called SWAG (Secure Web Application Gateway) that handles much of the legwork. Once you’ve installed SWAG, follow this guide, and you should find that you can access your Home Assistant setup at https://homeassistant.[yourusername].duckdns.org/ . No need to specify a port, or accept any certificate warnings.

Inside SWAG, there’s a DNS client, which will automatically renew the SSL certificates every 90 days for you, using ZeroSSL or Let’s Encrypt. There’s also nginx, which is used to set up a reverse proxy, and support for dynamic DNS services like DuckDNS.

SWAG has sample configurations for lots of different services, including calibre-web, so I have SSL access to my calibre-web image too. My only issues with it so far were last week when DuckDNS went down on Sunday morning. Most services, like Home Assistant, need to be mounted as subdomains (as above), but others (like calibre-web) can be mounted as subfolders, e.g. https://[yourusername].duckdns.org/calibre-web. This reduces the number of subdomains that you need SSL certificates for; ZeroSSL only offers 3 subdomains for a free account so it’s worth considering subfolders if you want to add more services.

If you have your own domain, then you can also add a CNAME to it to point it at your DuckDNS account, should you wish to use that rather than a [something].duckdns.org address.

Getting Apple HomeKit working

Carrying on the musical theme, here’s ‘Carry Me Home’ by Gloworm, a 90s dance classic which has only recently become available on digital platforms again.

After getting my swagger jagger on and getting HTTPS working, the final issue I’ve been having with Home Assistant is the HomeKit bridge. Adding Home Assistant devices to Apple’s Home app is something that normally works out of the box if you install Home Assistant OS, but takes more work if you use Docker.

The instructions which helped me where these on the Home Assistant forums. You’re going to need to install another Docker image containing avahi; there are several but this one worked for me. It’s bang up to date, unlike the most common Docker image which is, um, 8 years out of date and also only works on x86 machines. Which isn’t much help for my arm64-based Raspberry Pi 4.

Once you’ve installed avahi, added the relevant lines to configuration.yaml in Home Assistant and restarted it, HomeKit should work. To get started, add the HomeKit integration to Home Assistant – you may want to specify which devices will show if you don’t want all of them. Then, use your iPhone or iPad to scan the QR code in your Home Assistant notification panel, and add the bridge. If all goes well, it should immediately tell you that it’s an unsigned device, but will then let you set up each device in turn.

If it just sits there for several minutes and then gives up, you’ll need to do some more digging. Don’t worry, this happened to me too. I suggest downloading the Discovery app, which shows all of the mDNS devices broadcasting on your network. If you can’t see ‘_hap._tcp’ in the list, then there’s a problem. In my case, this turned out to be because my Raspberry Pi wasn’t connected to the same wifi network. It’s plugged in to my ADSL router with a network cable, but we use Google Wifi which results in a ‘double NAT’ situation. Connecting the Raspberry Pi to both wired and wireless connections seemed to fix the issue.

Indeed, as a side effect Home Assistant managed to autodiscover some additional devices on my network, which was nice.

Home Assistant Core in Docker? Done it, mate

All in all, I’ve successfully managed to get Home Assistant to where I want it to be – self-updating in Docker, secure remote access, and a HomeKit bridge so that I can ask Siri to manage my devices. I’m looking forward to being able to turn my heating on whilst driving, for example.

It’s been a challenge, requiring a lot of skimming through the Home Assistant forums and various StackExchange discussions. Ideally, I would have a spare computer to run Home Assistant OS, which would have taken some of the leg work out of this, but I’m happy with the setup. Finding SWAG and getting it to work was a moment of joy, after all the setbacks I’d had before.

SSL-secured

A screenshot of Firefox showing that the connection to neilturner.me.uk is secured with a certificate.

One of my first projects after moving to the new server was to sort out a SSL certificate. Until now, any secure connections to this site have been using a ‘self-signed’ certificate which brings up big red warnings in most web browsers. Which is fine for me as I know I can ignore the warnings, but not ideal.

However, Google is (rightly) making HTTPS sites rank slightly higher in its results pages. So having a proper SSL certificate verified by a third-party is now more important, and not just because it offers better security to your users.

Two things were holding me back from getting a certificate in the past: the need to have an extra IP address, and the cost.

Extra IP address

Traditionally, if you want a SSL certificate for a particular domain, that domain would need to have its own, unique IP address. This was something that my host offered, but only by raising a support ticket and having it added manually. On the new BigV platform, I can easily add up to four IP addresses, allocate each to a domain name and set the reverse DNS. More IP addresses are available if needed, but on a request basis – after all, there aren’t many spare IPv4 addresses left.

Cost

I also had it in my head that SSL certificates were expensive – I was expecting at least £10 per month. As I’m saving £6 per month on my new hosting package, I decided to spend some of that saved money on an SSL certificate. Richy recommended Xilo to me via Twitter, and they offer SSL certificates for £16 per year – which is much cheaper than I expected. Xilo are a Comodo re-seller.

Setting up the certificate was really simple – it took me around 10 minutes, following Bytemark’s user manual. It’s been in place for a week now and works fine. I can’t get an Extended Validation (EV) certificate which shows the green bar in web browsers, as I’m not a company – individuals have to go for the more bog standard certificates.

Right now SSL is there as an option if you want to use it, but it isn’t the default. I may change my mind and make the site HTTPS-only, but this would require me to fix every link to every embedded image over 13 years of blog posts, and I’m not sure of the effect on my server’s load. That’s a project for another time.

Stem my bleeding heart

Screenshot of the Heartbleed web site

If you read tech news on the internet, then you will have almost certainly come across the Heartbleed bug. As well as being probably the first programming bug to have a logo and brand name, it’s also very serious. It affects, or affected, a significant number of web sites and web services – pretty much anything that used SSL or TLS and the OpenSSL library. This will include many sites using the open source Apache and nginx web servers, which between them account for a majority of web sites.

The Heartbleed bug was in the ‘heartbeat’ component of OpenSSL, and first appeared in a code commit made at around 11pm on New Years Eve 2011 – make of that what you will. The first stable release of OpenSSL with the bug came in March 2012, and it was only fixed relatively recently. It’s therefore estimated that 17% of the world’s web sites may be affected.

If you administer a server that uses OpenSSL, then you’ll need to make sure that you update to the latest version which fixes the bug. But you may also need to revoke your SSL certificates and acquire new ones, and, if you suspect any foul play, do a full security audit. You can check your server using this tool – I’ve verified that this site was never affected.

If you’re just a regular user of the internet, then you may notice that some web sites will have forcibly logged you out. Some may also require you to change your password, and possibly re-connect any third party apps linked to your account. IFTTT emailed me to suggest changing my password, and Pocket has advised its users to do the same. Ironically, so has the web site Should I Change My Password which notifies of data breaches. If you are not already, I would suggest using a password manager such as 1Password, RoboForm, Keypass or LastPass. LastPass users can also find out if any sites they use have been affected by Heartbleed.

Some security experts have suggested that users change all of their passwords, although only once the web sites have implemented their fixes. This may not be necessary and PayPal has said they were not affected by Heartbleed. However, if you’re not using strong, unique passwords for every web site then now may be a good time to do so, regardless of whether sites have been affected or not, and the aforementioned password managers will help you in that regard. A lot of sites will now accept passwords that are more than 20 characters long, with special characters, which should be very, very difficult to crack.