Melody

Just recently announced is Melody, a new open source content management system based around the blog concept that is derived from Movable Type, the software that has powered this site for nearly 7 years. It has been developed with Six Apart’s blessing, and by several former 6A employees; its development is guided by the Open Melody Software Group which counts Anil Dash from 6A as one of its directors.

The system will stay API-compatible with MT, so that plugins will still work, but may drop support for lesser used features like Trackback and PostgreSQL databases (Update: These may be spun off into plugins, not dropped altogether – see comments). Focus will be on improving development and support of weblog themes (which has always been a little clunky in MT), but ultimately the aim is to generate a community around Melody which guides the development process. MT will stay on as a product of 6A, and while there will be some code-swapping between the two Melody is essentially a fork.

It all sounds like good news and I wish the team every success with the development of Melody – once a more stable release is available I may well switch to it. WordPress has, rightly or wrongly, stolen the limelight from MT in recent years so a proper, community-driven open source alternative could pull users back to the MT/Melody platform.

(Incidentally the default user name for a new MT installation is ‘Melody’ – not sure whether that was used as an inspiration or not)

Solid Gold Chartbusters

I’m afraid I am about to post a music video which ranks as one of the most annoying songs of all time:

Once you have watched it, and presumably received relevant counselling, I’ll explain myself.

The song is called “I want a 1-2-1 with You”, unsurprisingly, by a band calling themselves the Solid Gold Chartbusters, but who are actually better known as The KLF. It wasn’t a very big hit, being released in the run-up to Christmas in 1999 along with other novelty songs.

But it’s notable for being one of the first songs to use a ringtone as part of the main melody, in this case the default tone used by Nokia phones. Of course, in 1999 we didn’t even have polyphonic ringtones, never mind MP3s, so it was a series of beeps. And the “1-2-1 with you” idea was almost certainly inspired by the UK mobile network One2One, originally part of Cable & Wireless and since bought out by Deutsche Telekom and re-branded T-Mobile.

Why am I mentioning this? In 2005, some marketer who probably deserves a rather painful death came up with the idea of combining the Crazy Frog ringtone with the song Axel F, in this instance covered by the Bass Bumpers. This song, rather unfortunately, went on to be UK number 1 and spawned a whole album of songs which were mercilessly destroyed by El Frog. At the time, it was claimed that this particular cover of Axel F was the first time that a ringtone had been made into a single, as opposed to the other way around which is what normally happens. While it was the first ringtone-based song ever to be number 1, it certainly wasn’t the first song to be released.

It also happened to one of those random songs that I vaguely remember seeing on MTV 10 years ago that for some reason surfaced in my mind, and so I decided to share it. You’re probably wishing I hadn’t, though.

How to migrate a Parallels virtual machine to VirtualBox

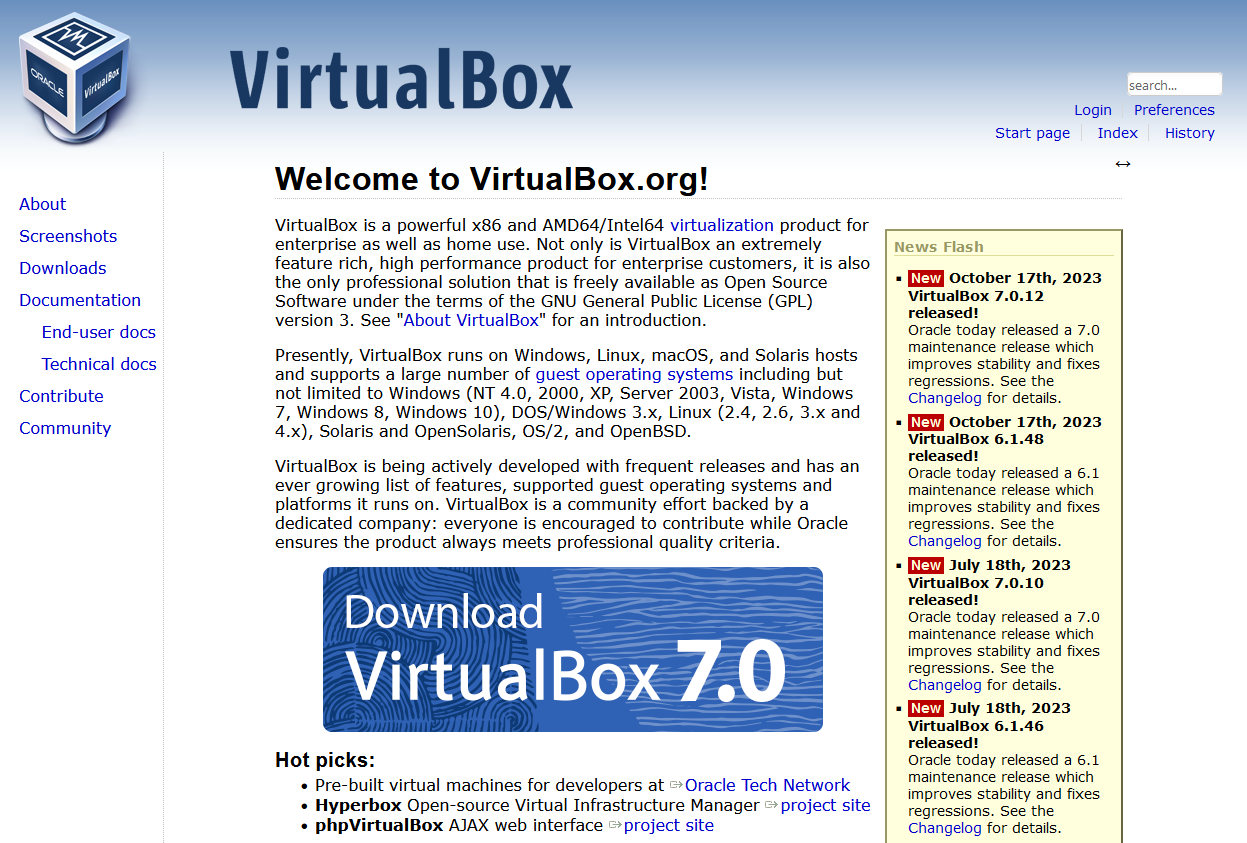
A screenshot of the web site for VirtualBox

Despite Parallels and VirtualBox both being programs which run virtual machines on Mac OS X, they both use different file formats for storing the virtual machines on disk. Though I believe Parallels will open a VirtualBox disk, VirtualBox cannot automatically import Parallels disks. But it’s not impossible…

If the guest operating system, i.e. the system that is running inside Parallels, is Windows 2000/XP/Vista, then it is possible to use a free tool from VMWare to do the conversion. Here’s a step-by-step:

1. Back up your virtual machine

Seriously. We’ll need to modify it a bit before it’s converted, so you’ll want a backup copy just in case things go wrong, or if you may use Parallels again in future.

2. Uninstall Parallels Tools

This is the modifying bit. Load your Windows virtual machine in Parallels, and uninstall Parallels Tools (the helper program that adds drivers and clipboard sharing, and other stuff). This is important as otherwise your virtual machine won’t boot in VirtualBox – and I know this from experience. You also can’t uninstall Parallels Tools unless you are running Parallels at the time.

3. Close all programs

Close as many running programs in your virtual machine as possible. We’re about to take a snapshot image of it while it is running, so any unsaved data may be lost when you boot the image in VirtualBox. That includes programs with icons in your notification area, such as virus scanners, instant messaging programs etc.

4. Install VMWare Converter

Once Parallels Tools has been uninstalled (you may need to reboot the virtual machine for this), we can begin the conversion process using a tool ironically made by VMWare. Go to the download page for the VMWare Converter in whatever web browser you use in your virtual machine (it’s a Windows program) Download it, and then install it.

Run the Converter tool, and click ‘Convert Machine’ – this should pop up a wizard which walks you through the process of setting up a new virtual machine image. You want to tell it to use a ‘Physical Computer’, and then on the next screen choose ‘This Local Machine’. Select the hard disk of the virtual machine and leave ‘Ignore page file and hibernation file’ ticked as this will just bloat the new virtual disk with unnecessary rubbish.

For the type of virtual machine, select ‘Other virtual machine’, and on the next screen, give it a name (e.g. ‘Windows Vista’). Next, you will also need to save it somewhere, and this should not be the existing hard disk of the virtual machine. You can either use your Mac’s main hard disk, mapped to drive ‘Z:’ under Parallels, a network drive or an external drive if you have it forwarded through to the virtual machine. You should be able to use the top option for the type (i.e. ‘Workstation 6.x’) but if it doesn’t work try another option. Keep ‘Allow disk to expand’ checked on the next screen. Click through until you’re ready to complete, and start the conversion.

5. Go and grab a cup of coffee

Or go out shopping. Or read a few chapters of War and Peace. Either way, the machine will take a significant amount of time to convert – mine took around 45 minutes and was only around 15 GB. Bigger disks may well take longer. It helps if you don’t have lots of other programs running on your Mac at the same time as then more of your CPU juice can be used for the conversion.

6. Shut down the machine in Parallels

Now that you’ve exported the machine, shut down Windows and close Parallels. This is mostly so that you can stay within the terms of the license agreement for Windows which won’t allow multiple instances.

7. Import the disk into VirtualBox

Open VirtualBox, choose ‘File’ and then ‘Virtual Disk Manager’. Add the disk file that you created, and click OK. Then click ‘New’ to create a new virtual machine, and select the correct operating system from the list. Try to ensure that you give the virtual machine the same settings (such as RAM size) as you did in Parallels. When asked for a hard disk, click the ‘Existing’ button and choose the disk file that you created from the list. Then click Finish.

8. Boot up in VirtualBox

Hopefully all will have gone to plan, and you will be able to boot into Windows as before. All of your files and programs should be there waiting for you.

If, however, you encounter a blue screen mentioning ‘prlfs.sys’ like I did, boot the machine but press F8 during the boot to enter Safe Mode with Command Prompt. Type in cd c:\windows\system32\drivers and then rename prlfs.sys prlfs.sys.old and then reboot – that should get you up and running.

For the inquisitive, prlfs.sys is part of Parallels Tools and this should have been removed as part of step 2, however muggins here forgot to this when he tried it himself and therefore encountered this error.

9. Install VirtualBox Guest Additions

Guest Additions are to VirtualBox what Parallels Tools are to Parallels – in other words, they make Windows sit better in the virtual machine and improve integration with the host operating system. On the main VirtualBox menu, select Devices and then ‘Install Guest Additions’ and follow the on-screen instructions. Though this is optional, it will improve the experience of using Windows in VirtualBox.

Hopefully now you’ll be up and running in VirtualBox. Feel free to post comments below and I’ll try to do what I can to answer them but I’m not the world’s greatest expert in this. I also don’t know how to do this in other versions of Windows or other operating systems.

Knock-off Nigel

When you watch a British DVD, usually before the film starts, you’ll have to watch this:

But now on TV, we have this:

The message it’s trying to spread is that people who download films or buy counterfeit DVDs are sad, corner-cutting lowlifers – no ‘cool’ person would want to be like Nigel. While I like the less confrontational stance, I somehow doubt the effectiveness of the new ads.

Of course, the best one is the parody by the IT crowd:

Leaping to the Coast

I’m making sure I post something here today, since I can only do it once every 4 years. No marriage proposals yet, though.

I’m off to spend a weekend at the seaside in the vicinity of Scarborough, which will be nice provided that the weather is better than the wind and rain we have in Bradford right now.

Create a Safely Remove Hardware shortcut

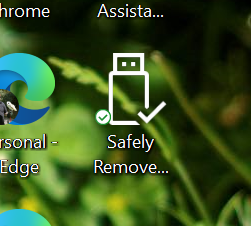
A screenshot of a Safely Remove Hardware shortcut on Windows desktop.

Here’s a tip I gleamed from today’s Windows Secrets newsletter. You may well be familiar with the ‘Safely Remove Hardware’ icon which appears in your notification area (or ‘system tray’ if you must) when you plug in a removable hard drive or camera (or whatever). You may also notice that the icon sometimes isn’t there – and this is a problem which my parents’ computer randomly suffers from – which means it’s difficult to safely disconnect removable devices. The answer: a desktop shortcut.

Right-click on the desktop, select ‘New’ and then ‘Shortcut’. For the item location, copy and paste the following:

RunDll32.exe shell32.dll,Control_RunDLL HotPlug.dll

Then click ‘Next’. Call the shortcut ‘Safely Remove Hardware’, and you should be done. If you want to make it look snazzier, right-click the icon, choose ‘Properties’ and then the ‘Shortcut’ tab, click on ‘Change Icon’ and in the ‘Look for icons’ box type:

%windir%\system32\HotPlug.dll

The first icon in this file matches the ‘Safely Remove Hardware’ icon so you’ll be able to recognise it more easily.

Now, if the normal notification icon doesn’t appear, all you need do is double-click your new desktop icon to safely remove any disks before unplugging them.

Update (November 2023): This was written back in April 2007, but it still seems to work in Windows 10.

Things

Thanks for all of the birthday wishes over the past couple of days – I had quite a good birthday but most of my presents aren’t coming until tomorrow. Not entirely sure what I’m getting but I think they will mostly be vouchers for driving lessons.

I’m having a brief experiment with Trackback. A while ago I removed the block of code that allows other weblogs to discover the trackback URL and post to it, in an effort to reduce trackback spam. This turned out to be very successful, making the trackback problem almost non-existent, however since then I’ve been getting almost no trackbacks at all which makes the feature almost useless. So I’ve re-added it, but now I’ll only be opening trackback on a handful of entries (with it off by default). I’ll see if I start getting more pings this way, or if the spam problem becomes intolerable again.

I’m looking at alternatives to trackback, such as getting data from Technorati and displaying a list of blogs that link to that entry, but I’d like to give trackback another chance before I give up on it.

Screenshots on a PocketPC

Since it took me a while to find out how to do this myself, I’m going to use this opportunity to tell you how to take screenshots on a PocketPC or Windows Mobile device – in my case, Windows Mobile 2003.

First of all, you need to know that, as far as I can tell, your device does not have a screenshot capability built in. It’s not like a Windows machine where you can hit Print Screen or a Mac where you can hit Cmd+Shift+3 – you will have to install some software first. I’m sure there’s some fancy-pants shareware jobby that will do the job painlessly but in this instance we’re going to use Pocket SnapIt (link no longer available), which is available for both normal Windows Mobile/PocketPC devices and Windows Smartphone handsets. There’s also a Windows version for your PC. It’s free and open source.

Choose the relevant package – for my Dell Axim x50v, I chose the PocketPC package – and download it to your device. This may mean downloading it to the Mobile Device folder in My Computer and then using ActiveSync to send it across. Then, click on the cabinet file on your device to have it install. If you’re using Windows Mobile 2003 (and probably 5.0 also) you’ll probably get a warning saying that the application was designed for an older operating system – you can ignore this. Now, go to Programs and run the newly-added Pocket SnapIt icon.

You’ll now need to define a hotkey to trigger the taking of screenshots. I chose the ‘/’ character – to set this, click on Menu and select Options. Then click Menu again, expand Options and choose Capture Options. Now click Menu a third time and click Select Capture Button. Click OK and then select a key on the keyboard. Click OK to go back to the main screen, and then click Start.

Now, open up the program you want to take a screenshot of and press the trigger key – you should hear a noise when you do. You should then find a bitmap file in your My Documents folder call Snap001.bmp – this is your screenshot.

You can see my effort further up the page – this was a shot from Skype for PocketPC. As you can see, the capturing mostly works but it chokes on the font smoothing, so you may want to consider turning this off first. You’ll also need to change the image format to something other than bitmap if you want to post your screenshot on the internet (since bitmaps are not compressed) – PNG is probably the best format to go for. The image I posted is less than 13KB.

Post-birthday notes

  • It’s the morning afternoon after the night before, and I’m actually feeling okay. I did drink a lot (by my standards) last night – mostly Southern Comfort, which, had I drank neat, would have seen me consume half a bottle of the stuff. I am somewhat hungover but I’ve been much, much worse than this before having consumed less, so, yay.
  • I went into town today to put a birthday money cheque into my account at the bank. This is the first time I’ve had to put any cheque in for about 2 months now; normally I have my Google AdSense cheque and rent from my parents to pay in, however thanks to Google introducing EFT and my parents embracing the joys of online banking the money now comes through electronically.
  • On the subject of money, now that I’m 21, I get access to a savings account that my grandmother has been keeping for me. I’m not quite sure how much is in there but it’s not an insignificant amount of money. I don’t need it desperately so I’m probably going to bung it into an ISA for a year or so to amass some interest.
  • There’s a surprisingly high number of Liverpool supporters in Bradford, as I found out last night. Trust me to have a birthday that coincides with one of the most gripping cup finals ever. Well done to Liverpool by the way.
  • I haven’t yet got all of my presents yet, but so far I’ve had a box of Celebrations from work, a blue drinking t-shirt from my parents and some birthday money. And money to buy the TFT screen which I’ll be ordering next week.
  • And now I’m off to the pub for a much-needed cool, caffeinated, non-alcoholic beverage.

To be 21

I’ve just got back from my 21st birthday celebrations, which, as you can probably tell by me being able to post here, means that I haven’t managed to totally inebriate myself. I am pretty well-plastered, but on the other hand I have been much worse before. I’ll blame it on the fact that we got kicked out of a club due to one of my friends reproducing the contents of her stomach, after which we decided to go home.

Thanks for all the ‘happy birthday’ comments and the TFT screen recommendations; I think I’ve decided on one now so I’ll be ordering it in a few days time. But right now, I really, really need to go to bed.

Oh, on a totally unrelated note, congratulations to Lucio Buffone on getting a Sony Award and a contract with XFM. Lucio is a former University of Bradford student and was Communications Officer of the student union for a year as well as being a DJ on our radio station, Ramair.